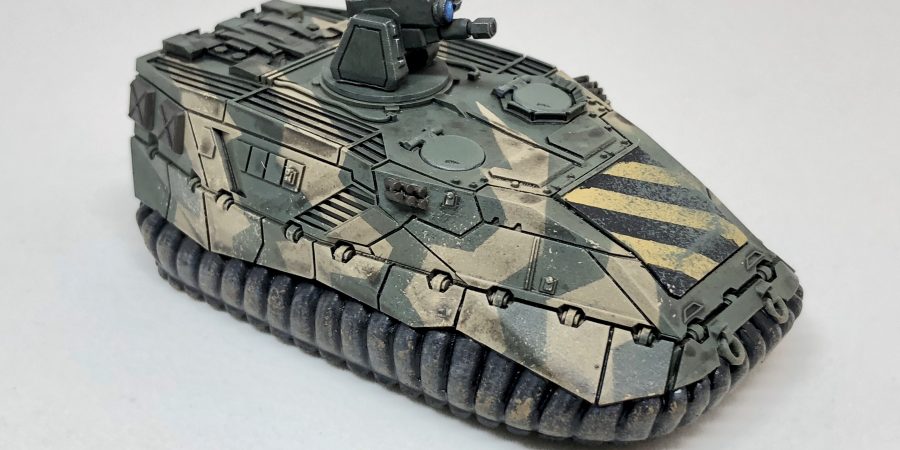
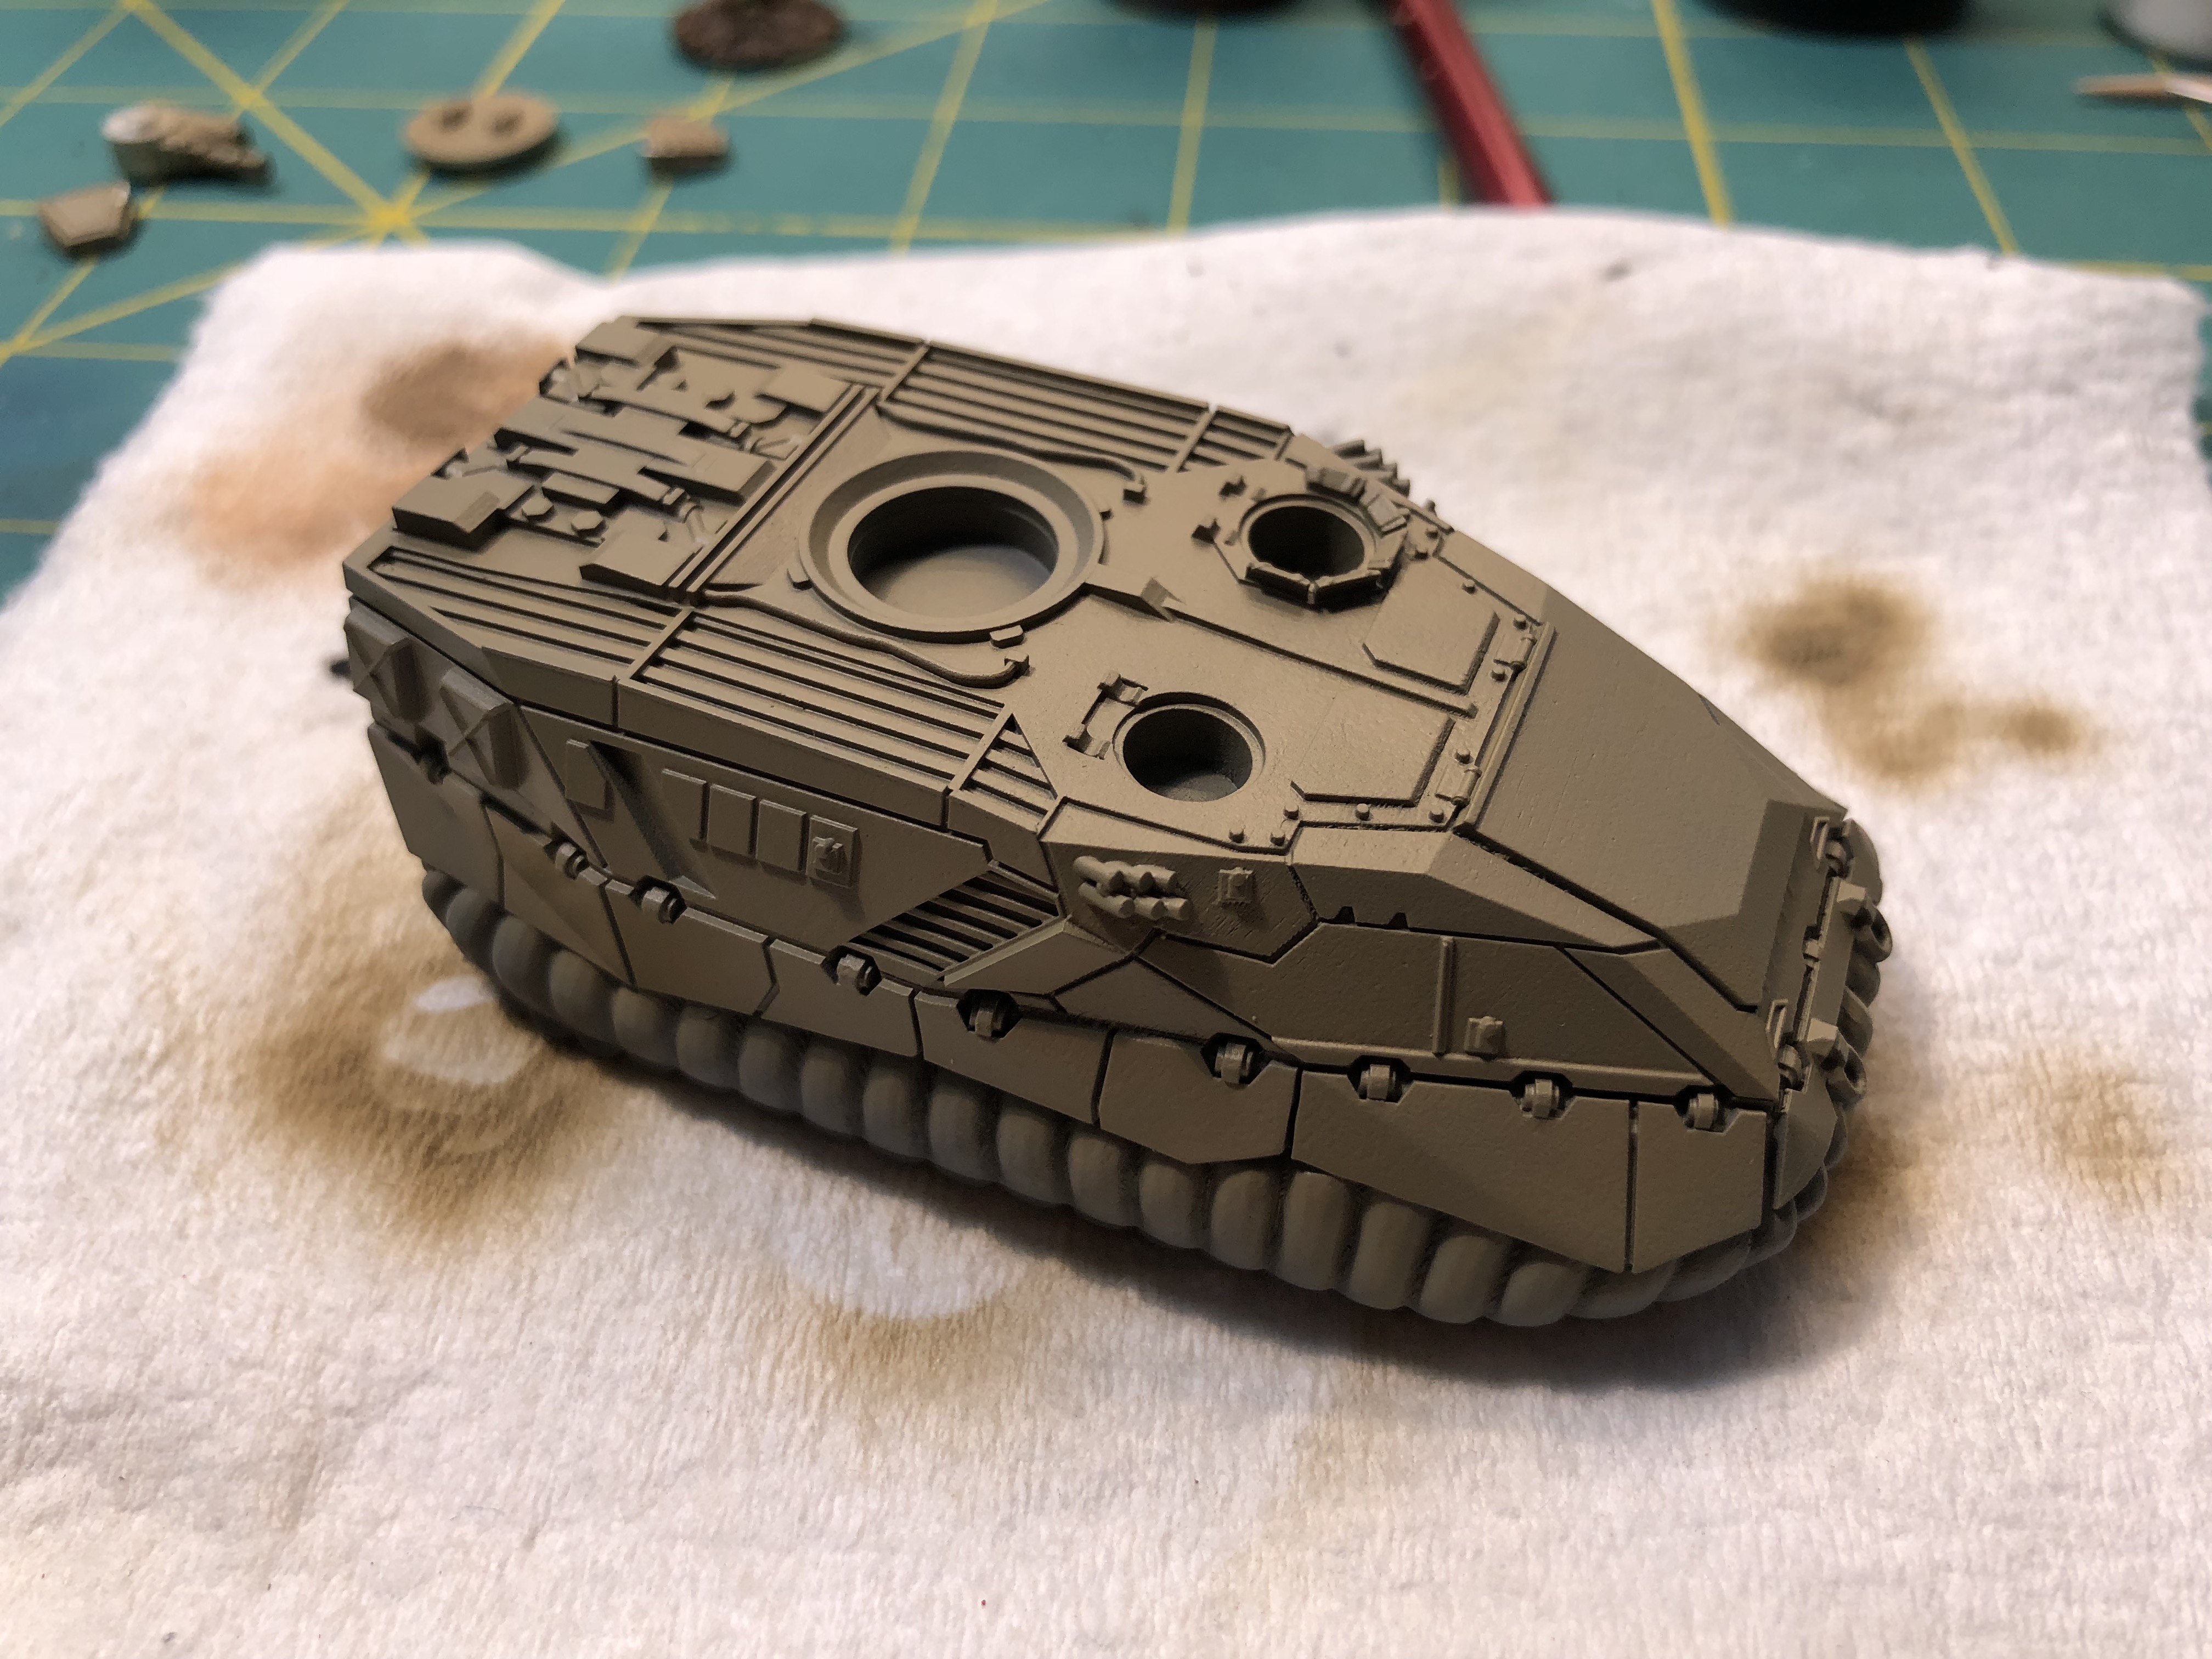
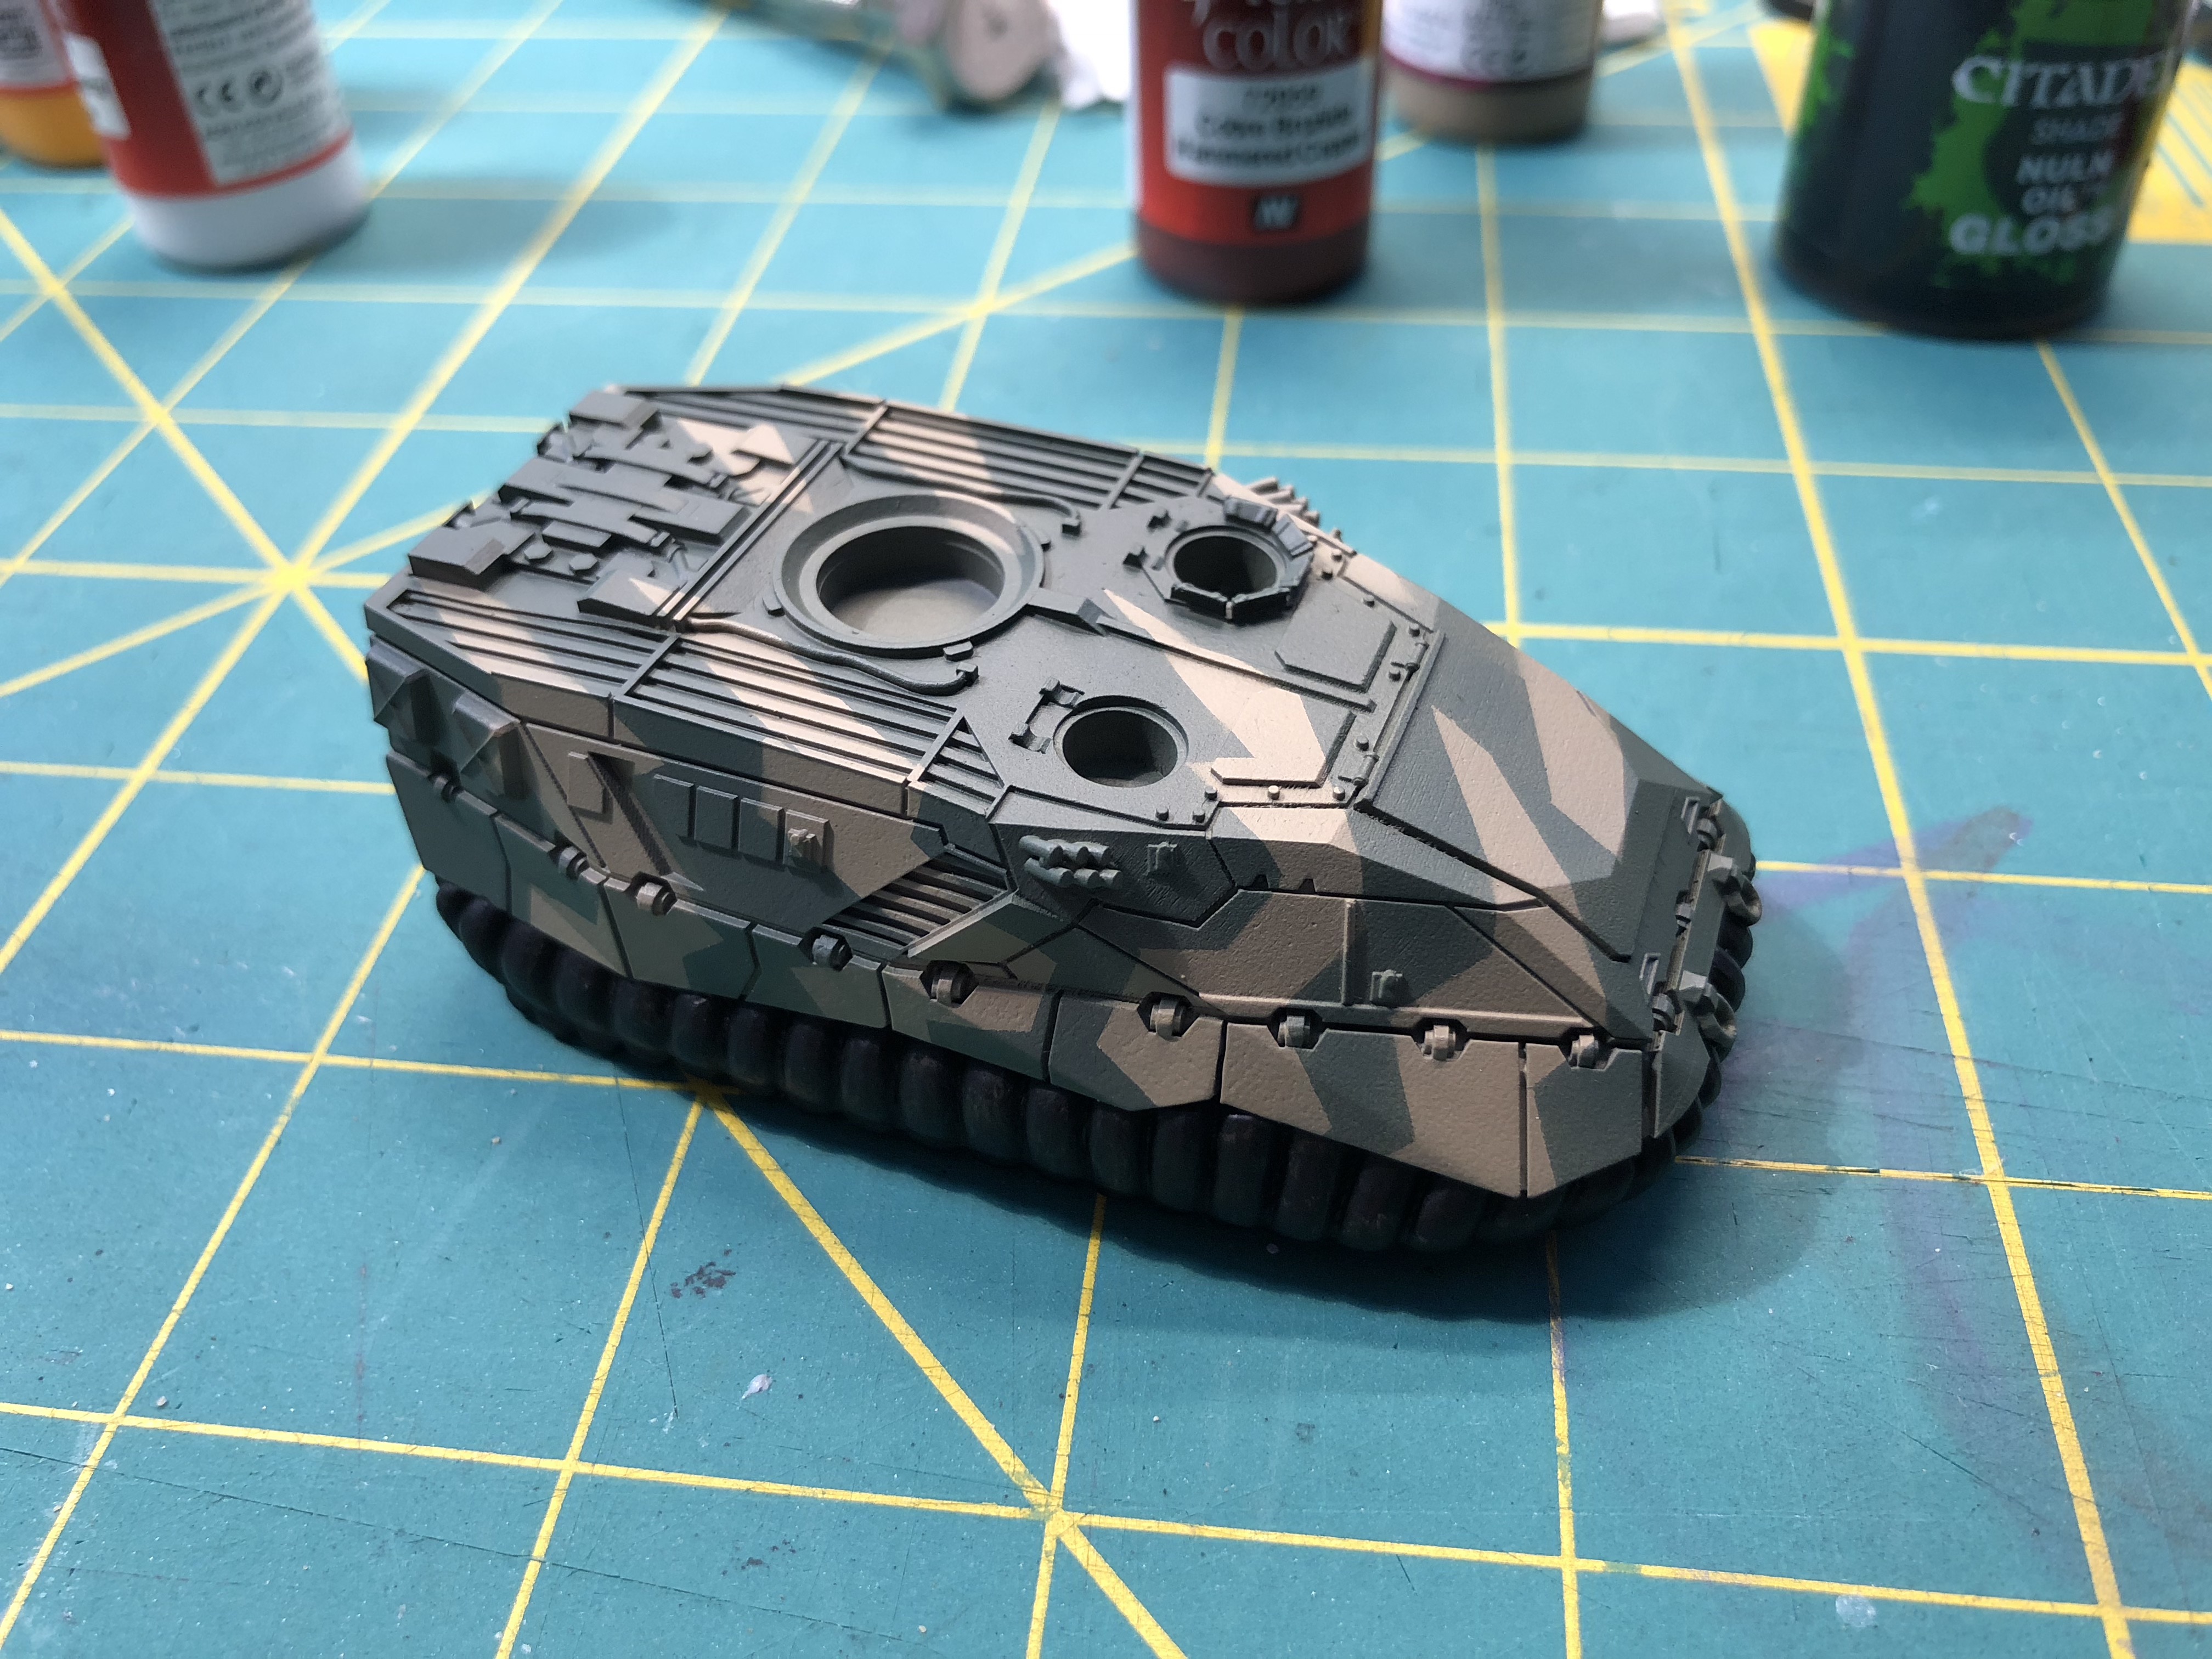
This is one of my first vehicle purchases from Khurasan Miniatures, a Challenger Hover APC. The model is cast from resin and was remarkably clean and required very little patching or trimming of flash. I really like the bulky, utilitarian design of this model and the details such as hull panels, smoke launchers, tow rings and hinges for the armor above the hover skirts are great.

The two hatches are not fully weathered since I’ll be replacing them with vehicle crew miniatures from Khurasan soon.
The weapon turret is actually four separate pieces that allows the gun to be angled at different pitches as well as having 360° rotation. I hollowed out an area below the main turret hole for a neodymium magnet and glued a small metal disc to the bottom of the turret. This keeps the turret in place while allowing for full rotation.

Excellent mini, I ordered a few of these a couple months back. Was extremely impressed with them! Your paint job makes it look even better, is that some sort of text you put on the rear hatch?
I’ll be ordering more Challengers and Swords from Khurasan soon….
Ryan.
I’ve got another Challenger and a Sword on the way as well! I applied a decal to the rear hatch, but it didn’t turn out as well as I would have liked. The decal has a different sheen from certain angles than the rest of the model even though it’s coated with Testors Dull-Cote matte finish spray. My mistake may have been applying the decal after the model was coated with the matte spray, then applying another coat of the matte over the decal. I’m going to try to apply the decal over “bare paint” next time without multiple layers of matte spray.
Couple things you could try. Seal it with a gloss, then hit it with a matte sealer again. This may help, may not. If you’ve already coated it, I doubt decal softener will work, but can try.
In terms of not getting any glossiness, a couple of tricks. Seal with gloss sealer, then apply decal, then decal softener, finally matte sealer. Let things dry between each stage. Always has worked for me. You can also paint/spray Future floor wax on the area (basically just creates a glossy surface). Then apply decal, decal softener, then your matte spray, again waiting for everything to dry between stages.
Either way, the key is really apply decals over gloss coat surfaces, not matte surfaces. Hope it helps! Looking forward to seeing your Sword!
Ryan.
Thanks for the tips, Ryan! I’m starting another Proteus Frontline Battle Mech soon that should give me a chance to try out the “gloss -> decal -> softener -> matte” process.
I’ve had good success with the MicoSol decal solution (the red bottle stuff is what I use, I have the blue bottle stuff as well, but never really needed it).
https://www.amazon.com/Micro-Setting-Solution-Microscale-Industries/dp/B0006O9K5Q
Best of luck, looking forward to seeing more work!