Last autumn, I began work on a revision to the Scout model to bring it closer in line to some of Bryan Gibson’s later works depicting the Scout. Bryan had taken some elements from the 3D model I created and blended them back into an updated design, one of my favorite examples being shown below.
If you’re interested in the original Scout model, I have another blog post that covers the entire process from concept art through 3D modeling and painting.
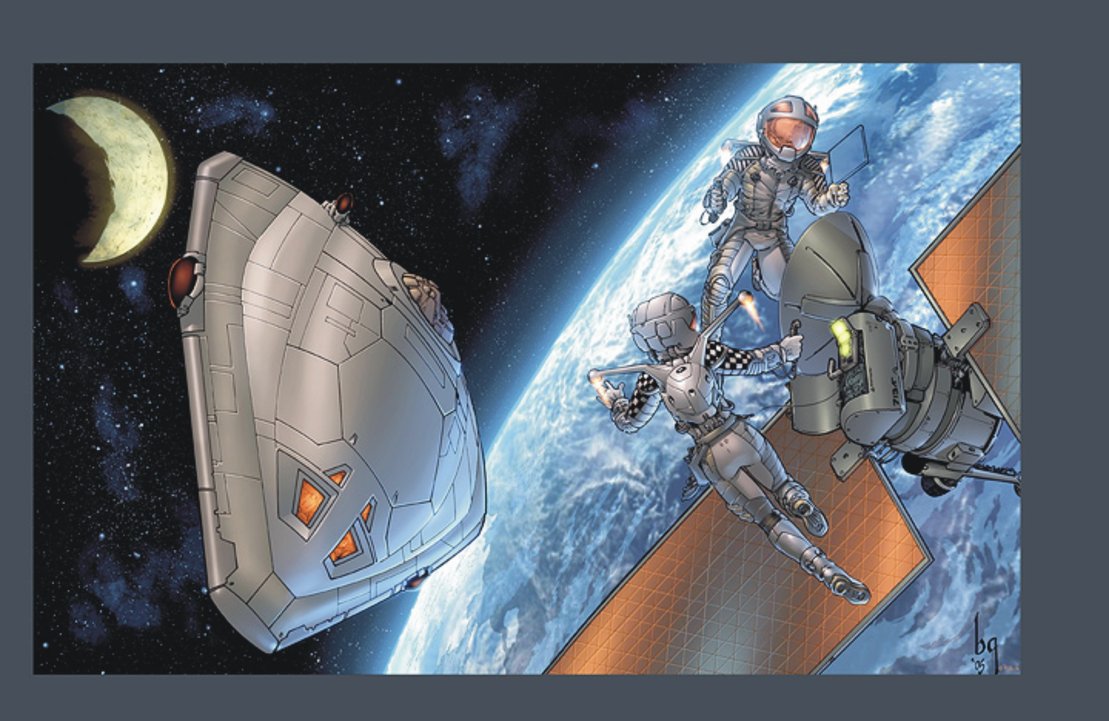
Bryan replaced many of the original rectangular hull lines with the hexagonal central panels from my 3D design, then added even more panels and hull lines. I loved the new design, but never had a chance to interpret this new variant back into 3D since I was busy with a new career direction.
Revision B Objectives
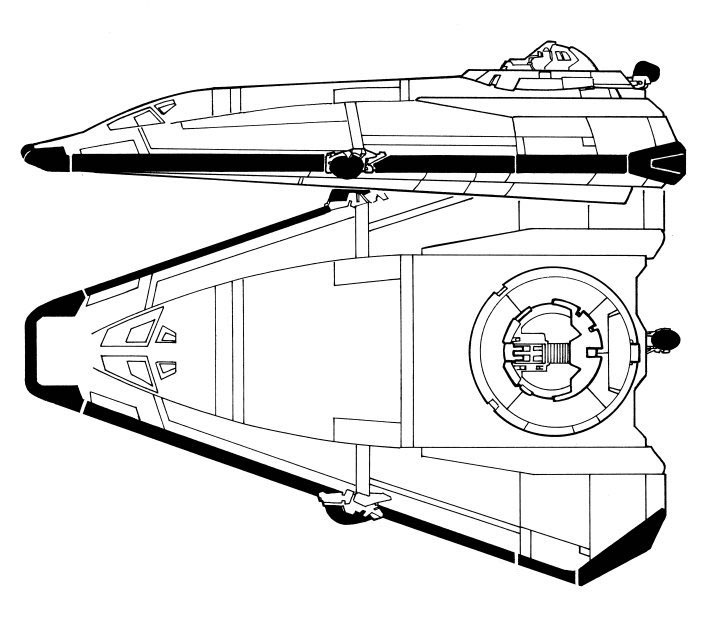
One of the faults of my original 3D model (which I’ll refer to as Scout Revision A) was that I didn’t properly account for the lower portion of the hull below the midline. I had gone with a simple, very shallow bottom whereas the original design showed a convex portion of the hull protruding slightly. Since I never saw any other depictions of the bottom of the Scout, I didn’t have a lot to go on and so I left it flat, although I always intended to return to the design and extend the bottom hull.
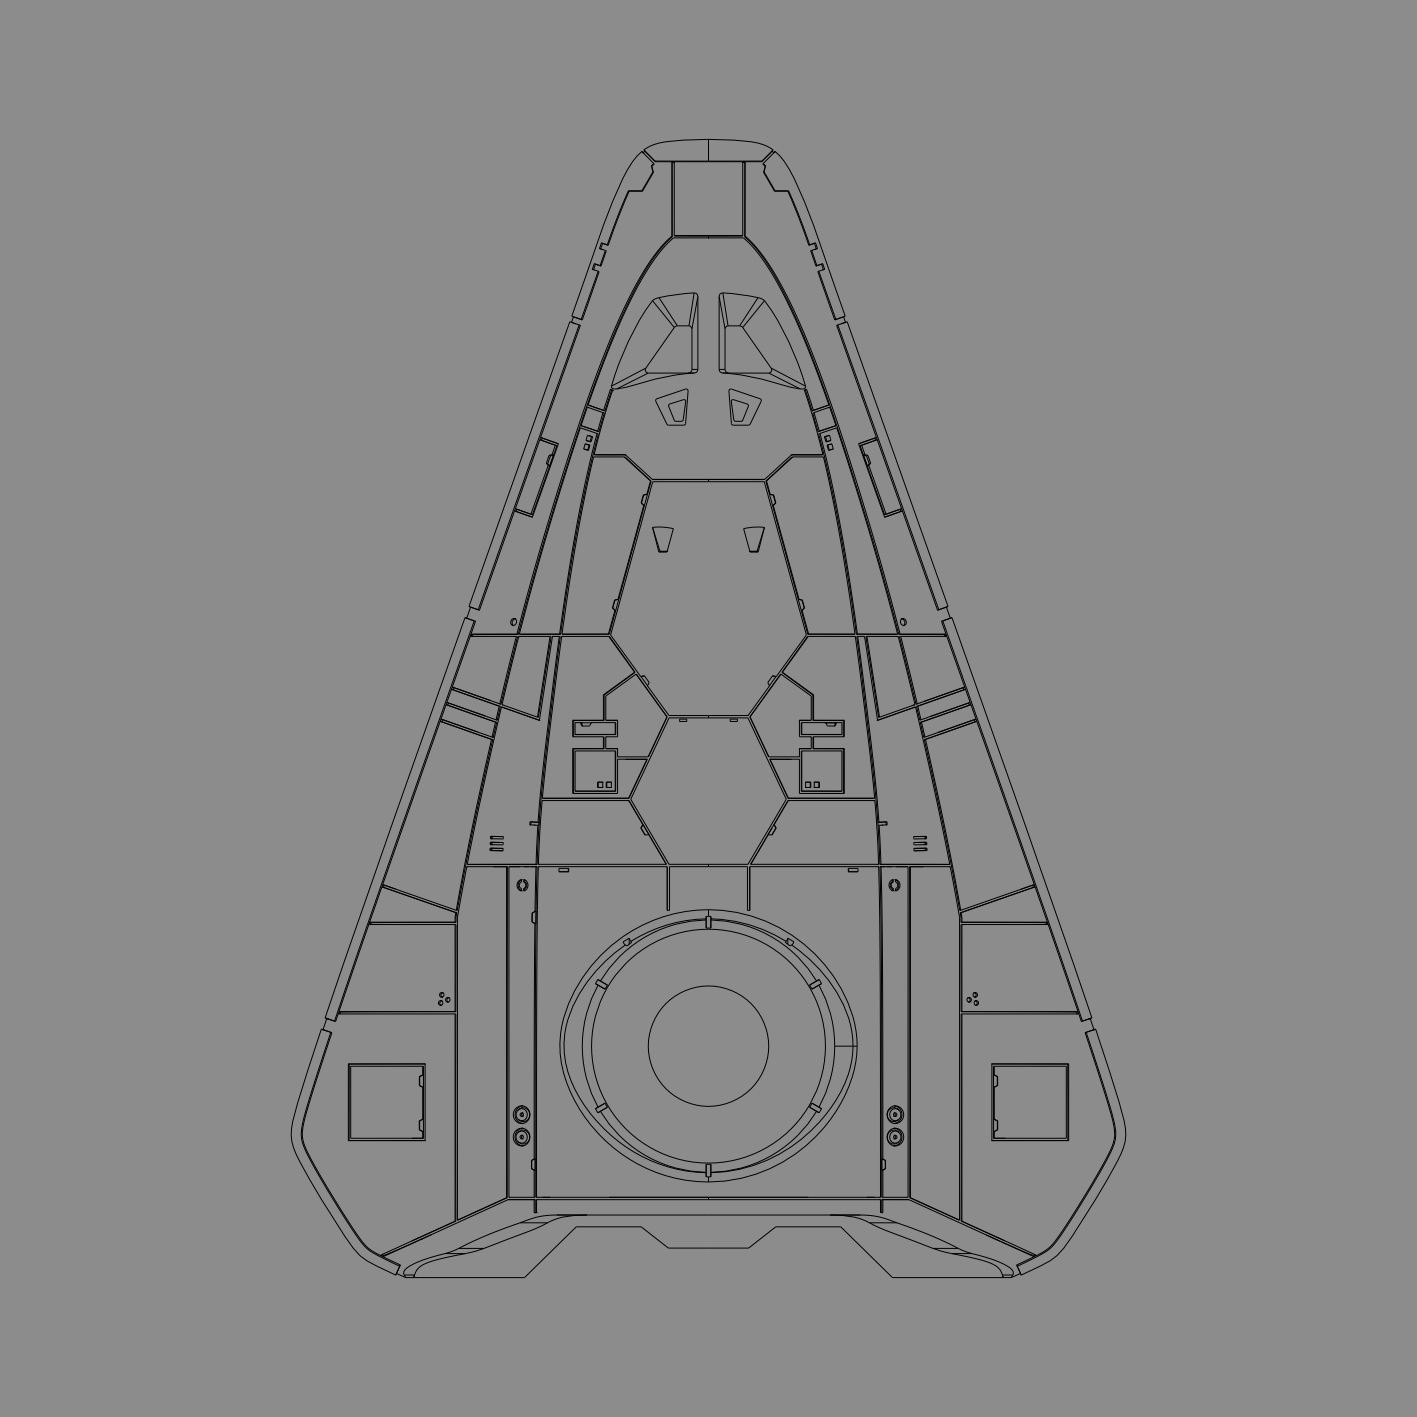
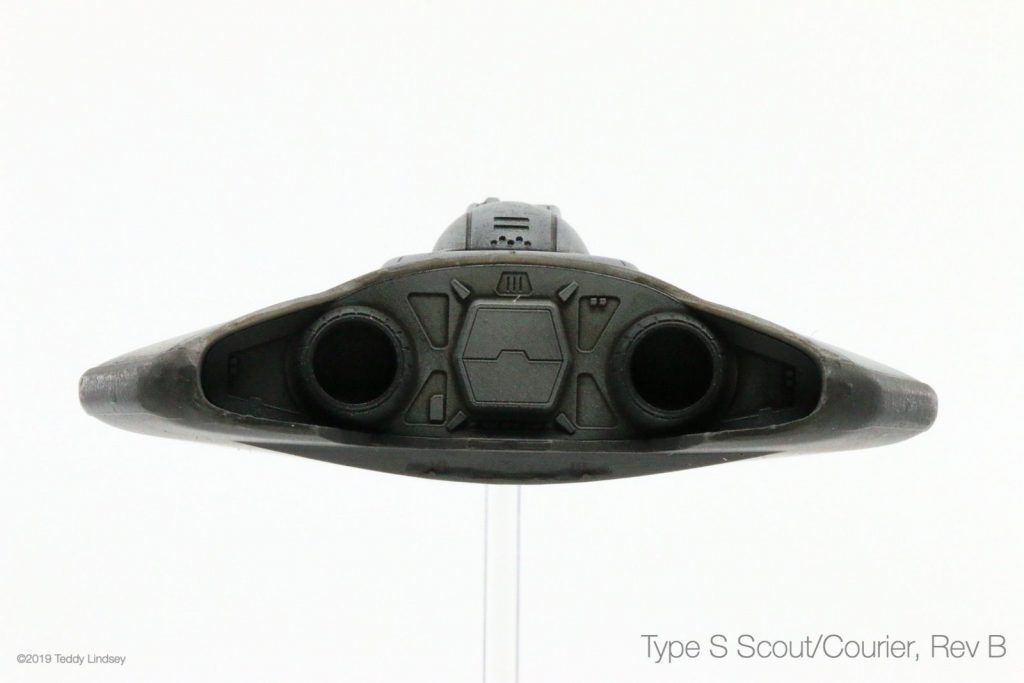
One of the challenges on translating 2D art into a working 3D model is that sometimes the 2D source materials don’t actually line up properly in 3D space. This was a problem in that the original sketches showed the aft upper and lower hull around the drives to be symmetrical when viewed from above. However, the side view seemed to indicate that the upper hull didn’t extend as far back. For Revision B, I wanted to have the aft upper hull to be cut back to show off the drive units and airlock.
I also wanted to capture the more gently sloped cockpit bulge, larger windows and the additional panel lines of the Scout in the Orbital Repairs illustration. These changes required the main hull geometry to be completely rebuilt into a shape with a broader upper deck and more internal volume.
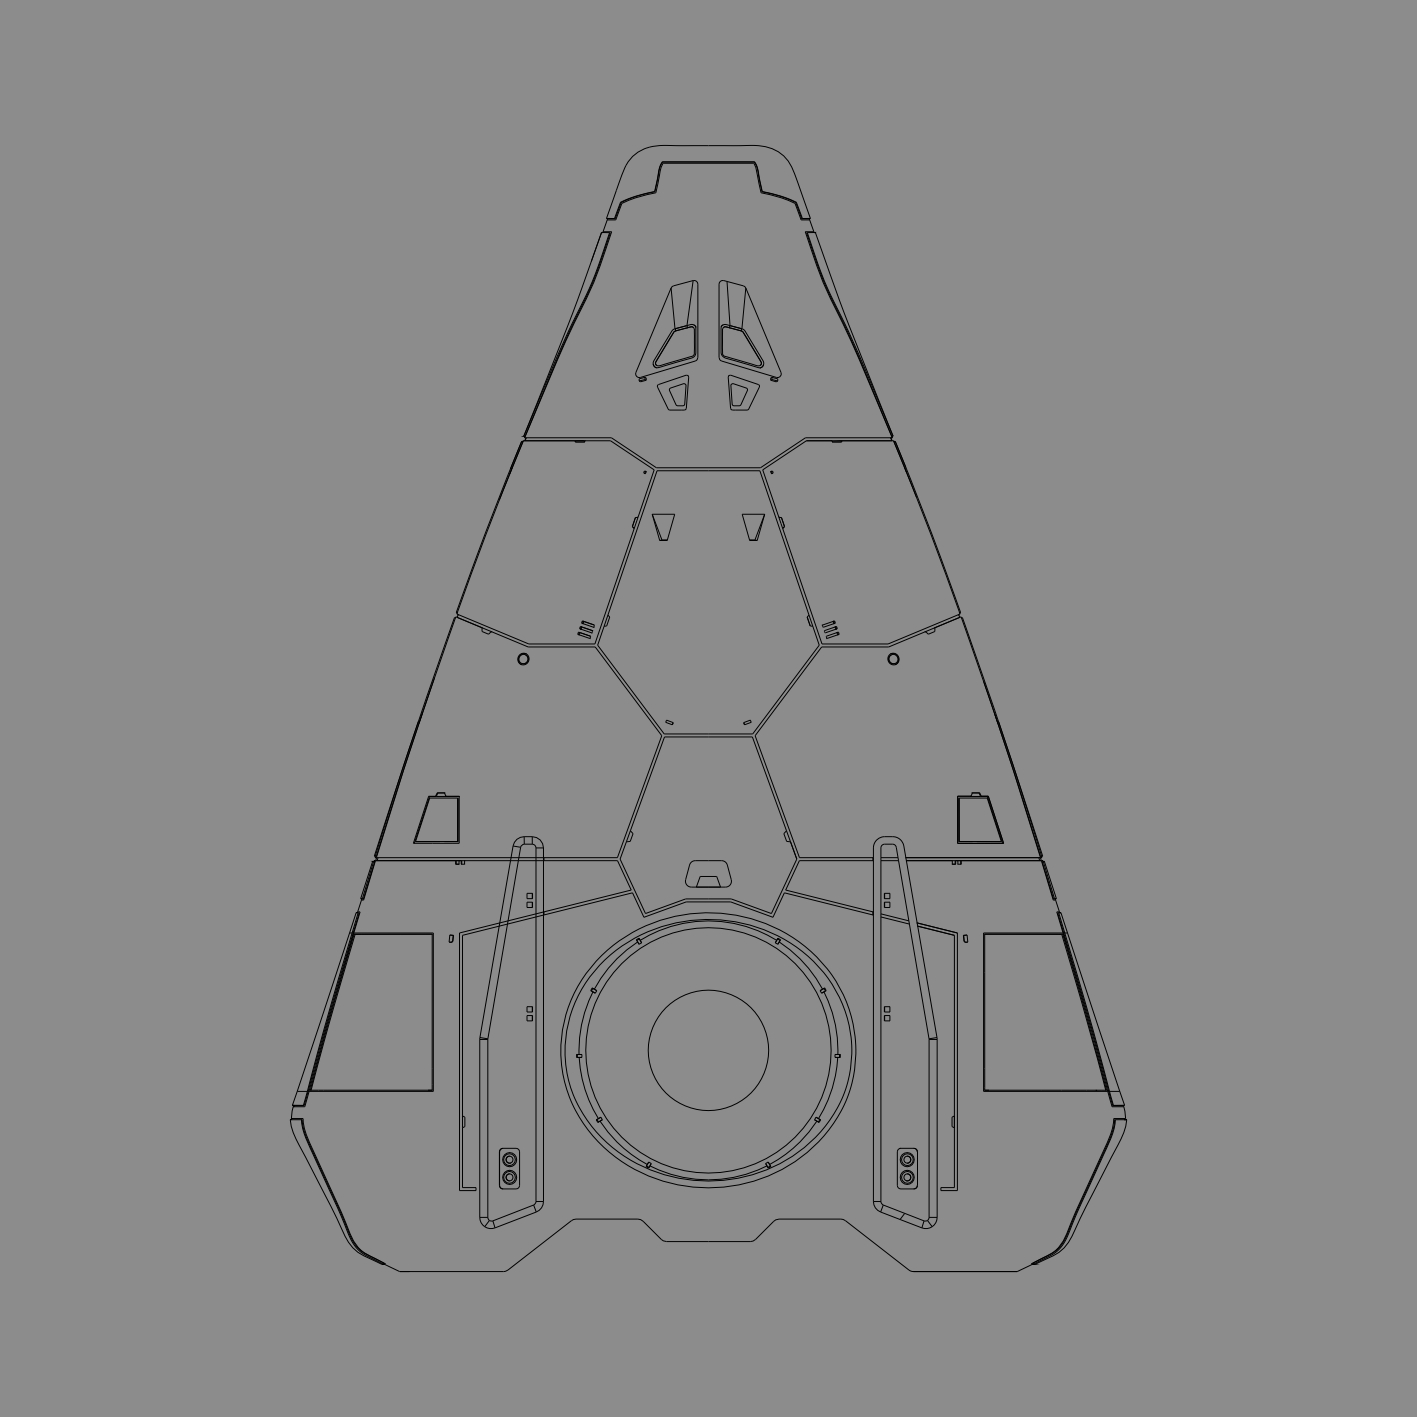
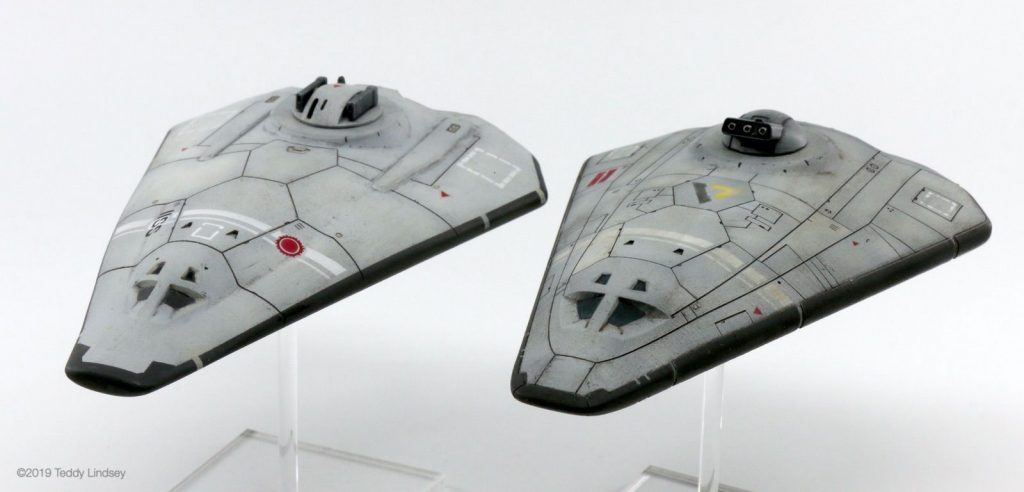
In the illustrations below, you can see how much wider the bridge is based on the size of the windows. While the overall silhouette is the same, Revision B has a slightly bulkier feel.
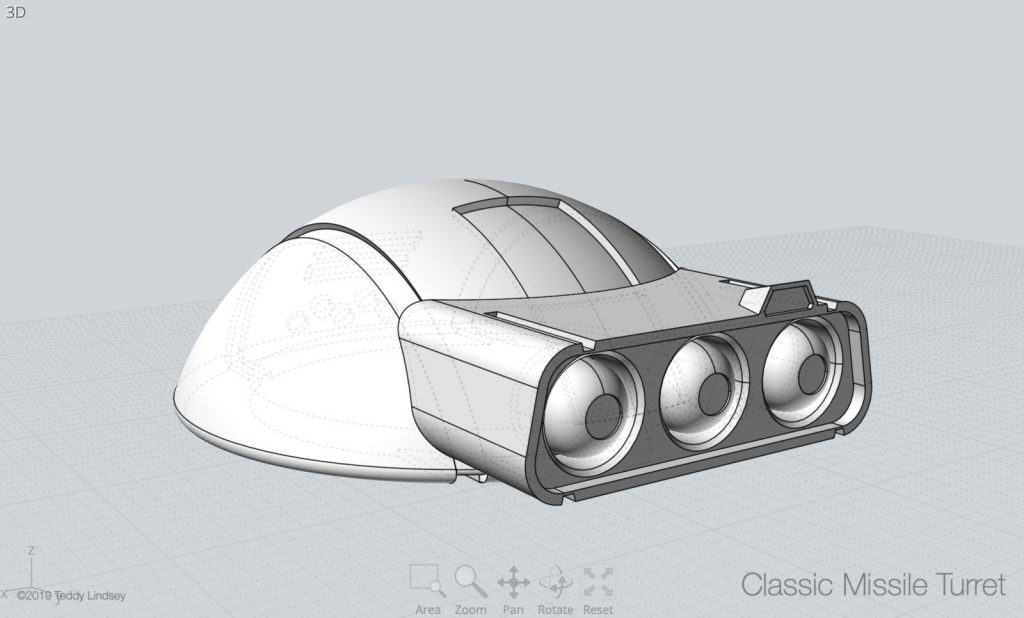
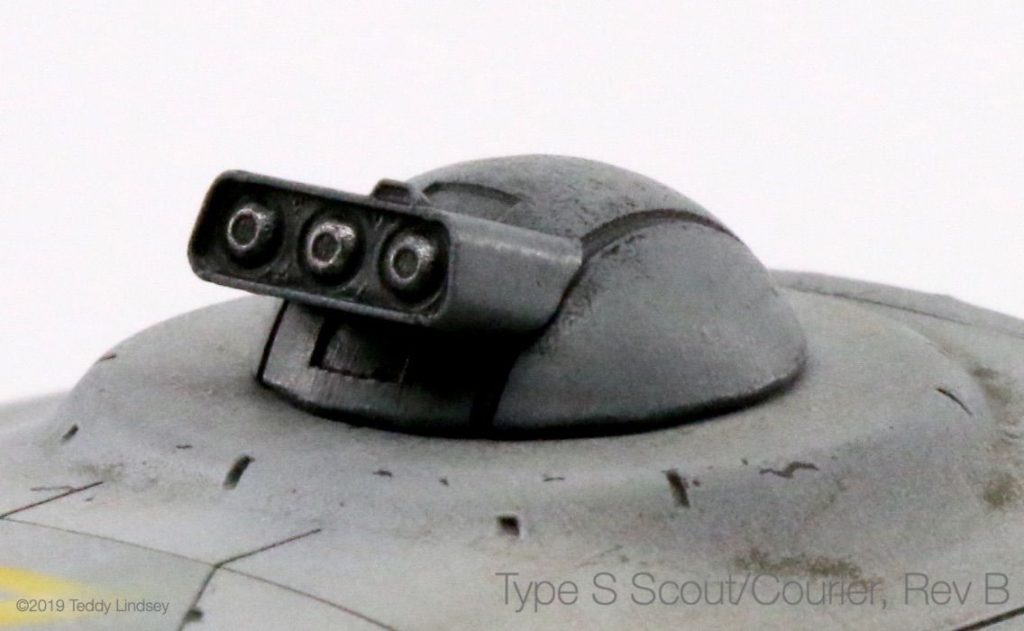
New Turret
I also finally got around to creating a “classic” Traveller turret as shown in many illustrations over the years. I modeled a triple missile turret and built it so that the missile launcher assembly can be positioned within a 75° arc. I plan to build some additional ordnance modules that will attach to this base turret.
If you have suggestions of specific combinations of weaponry for the ordnance modules, let me know in the comments below.
Painting the Revision B
I primed the model with Badger Stynylrez Black followed by mottled layers of Vallejo Light Gull Gray and Vallejo White Gray to give some variation to the hull tones. I then picked out some panels with various lighter or darker grays.
I then masked out the hull stripes, warning triangles, red bars and the central delta symbol, then airbrushed them in. I also used a slightly moist paper towel to gently rub away some of the markings to make them look more weathered and chipped.
Next was a coat of Tamiya Clear to seal in the base colors followed by application of the white dashed-line square decals on each wing. I then dry brushed some gray over the decals to weather them a bit.
Finally, I put down a mix of Flory Wash Black and Dark Dirt over the entire model and let that dry for a bit before gently wiping it away with a moistened paper towel.
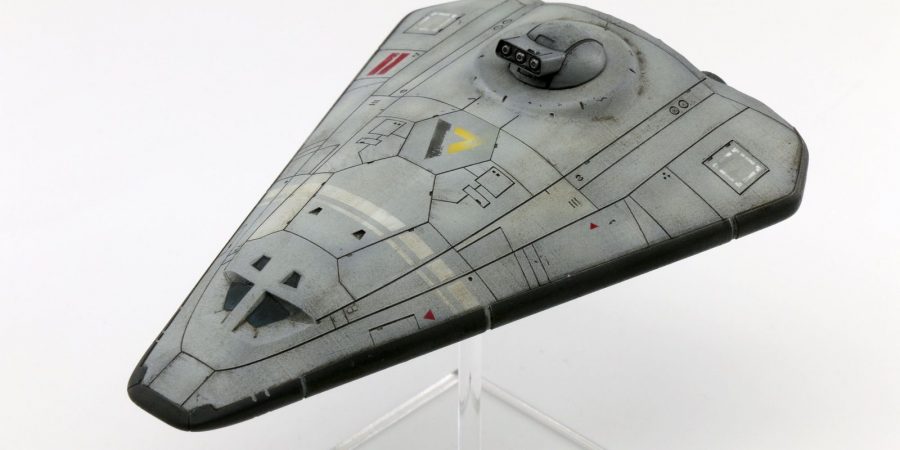
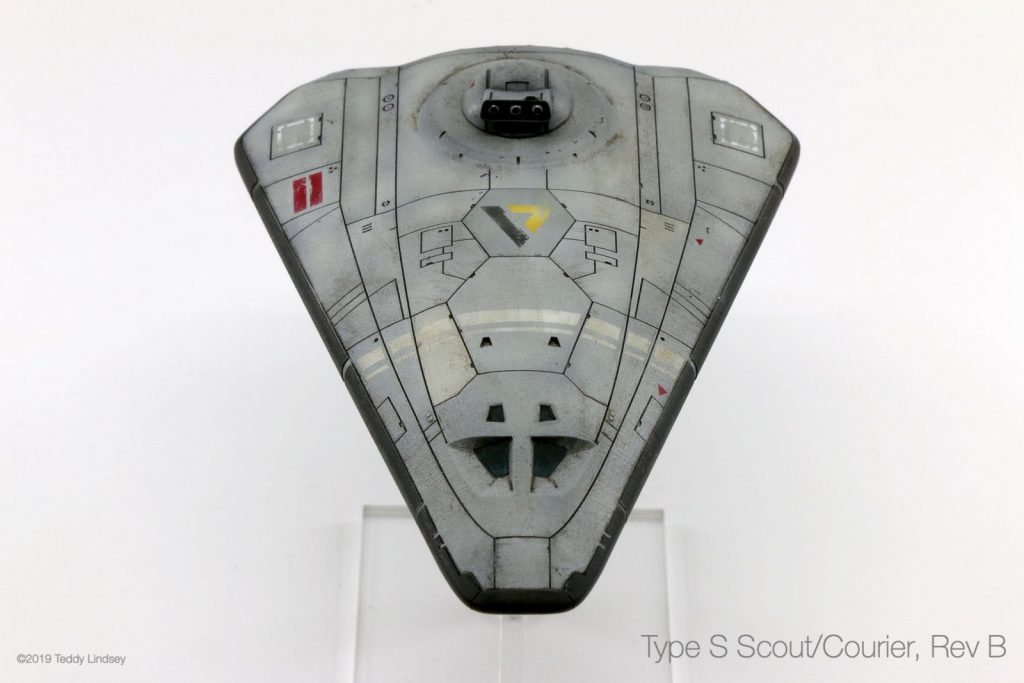
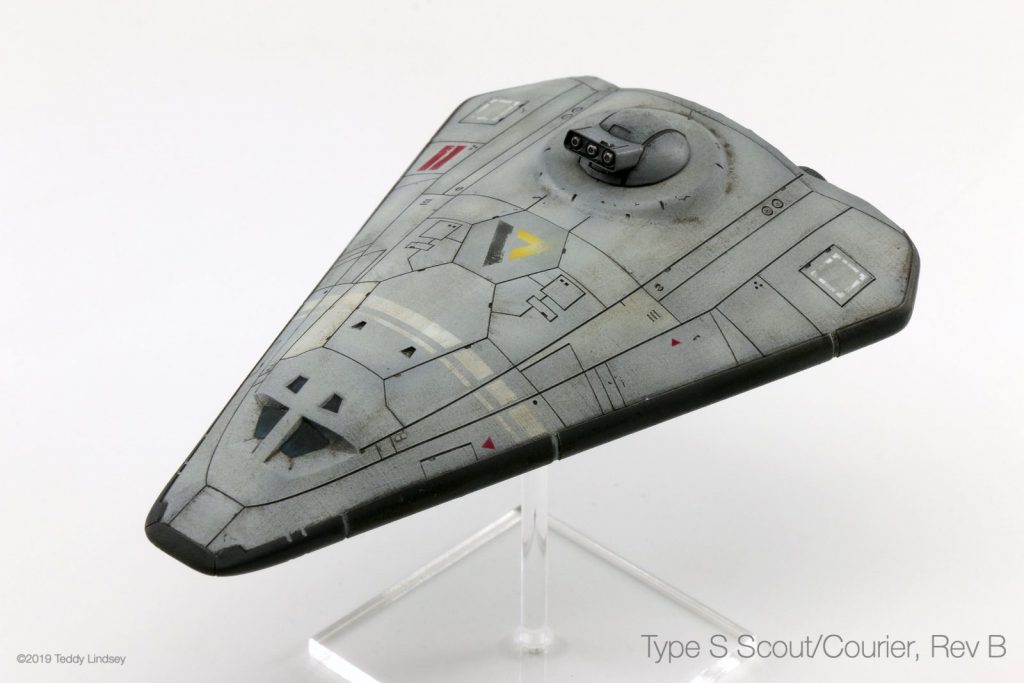
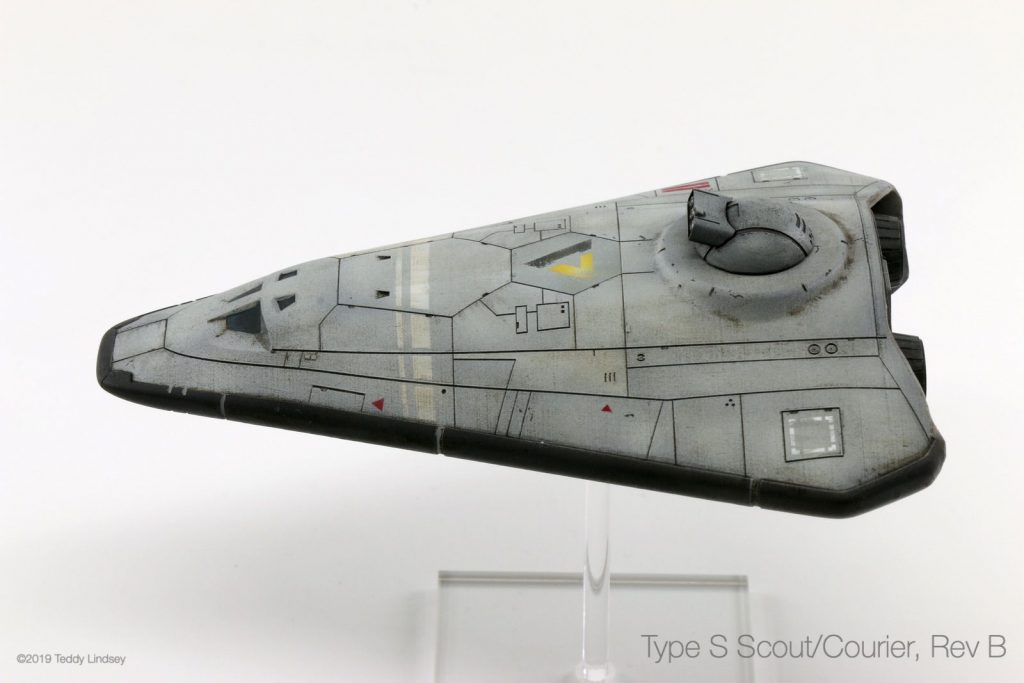
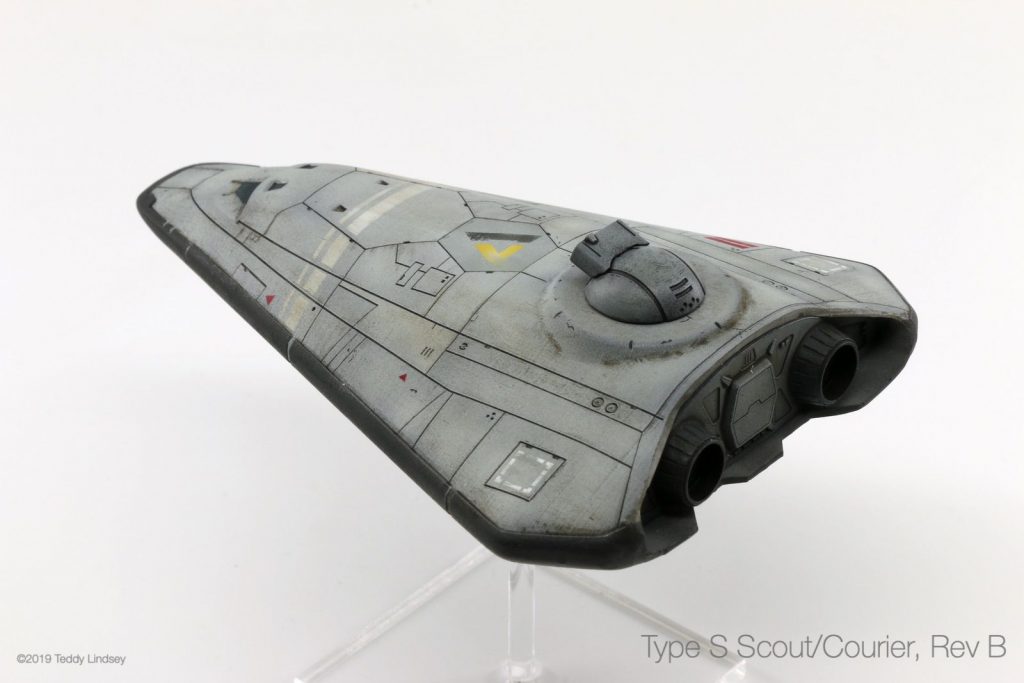
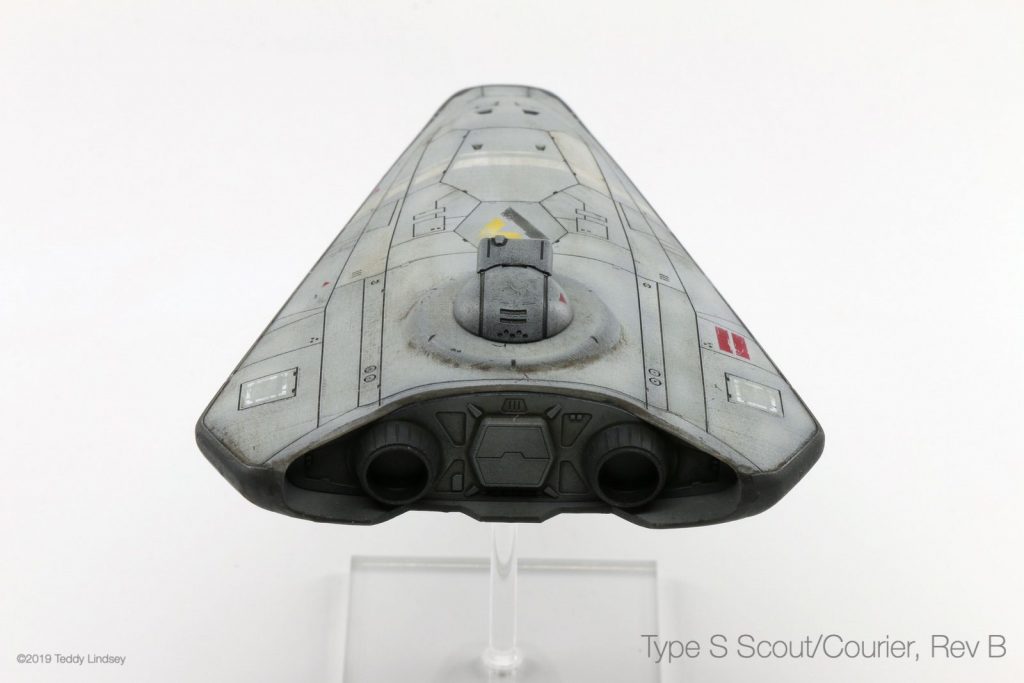
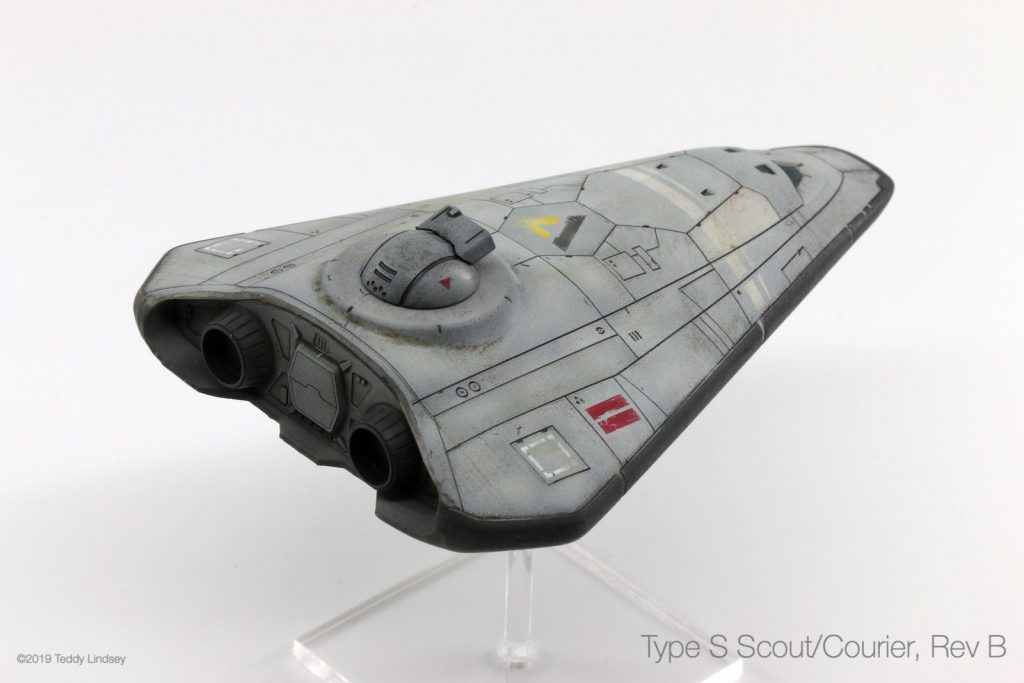
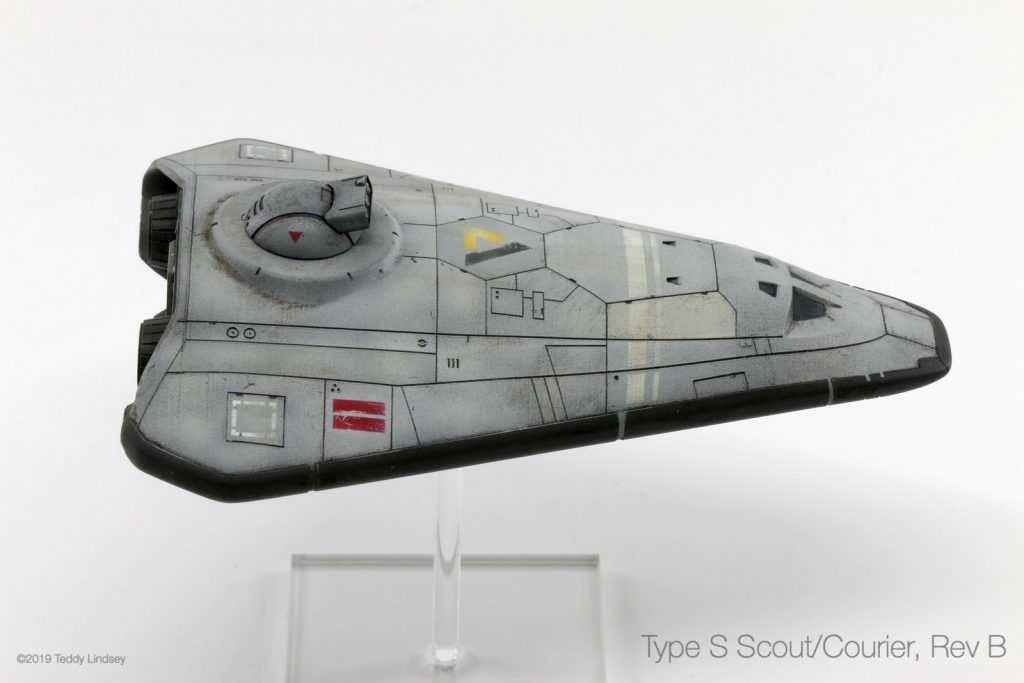
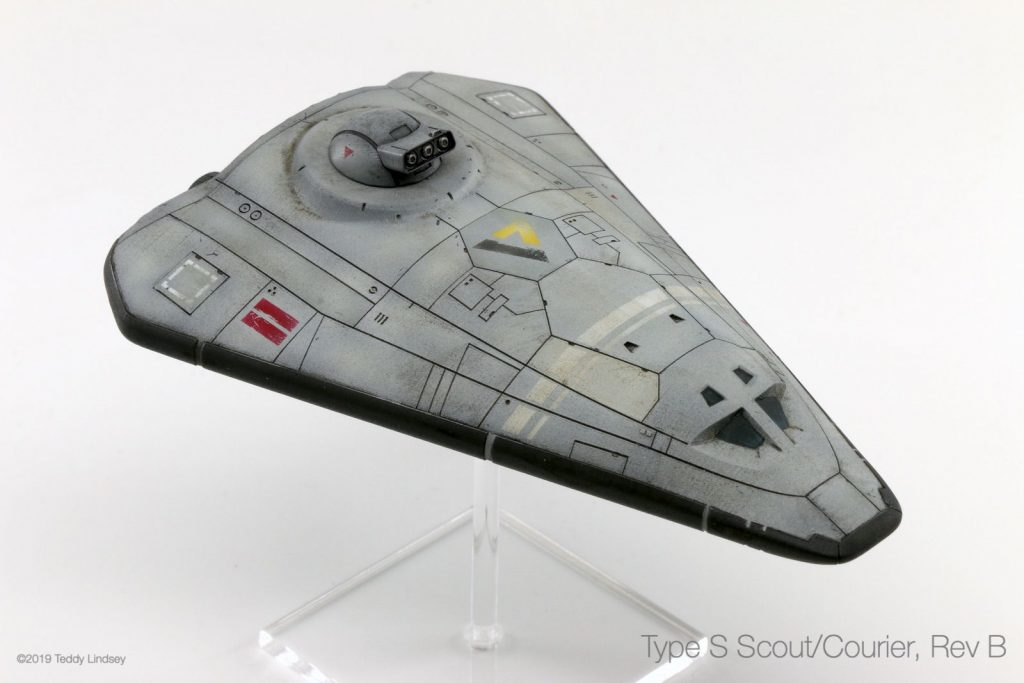
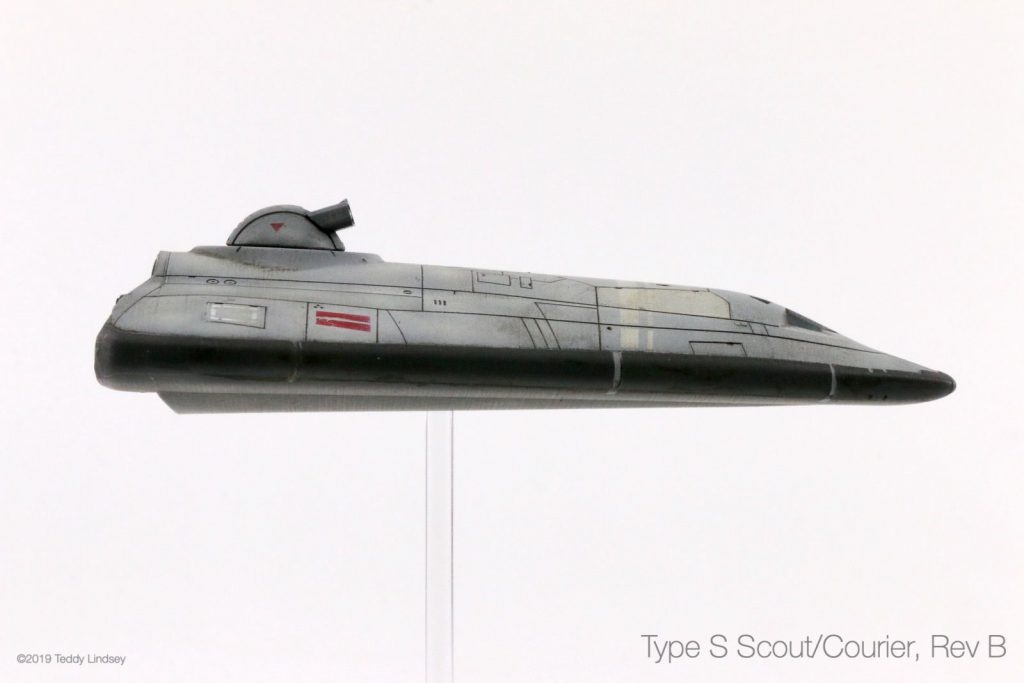
Finished Model Photos
Below are some turn around shots of the completed Revision B model.

Hi there Ted!
This is Caleb, the guy you met at the hobby store! Love your work!
Mind chatting with me about your work and stuff? Caleb.cleveland@gmail.com
Thanks sir!
Great to meet you as well, Caleb! Not often that I run into another Traveller fan “in the wild”. 😉 I sent you an email and look forward to speaking with you again.
Any chance of you’ve considered selling your designs on Shapeways, particularly in 1:1000?
I recently had the Scout printed in 1/350 scale via Shapeways using their Fine Detail Plastic and was very disappointed with the result. I’m not sure what printing process they use, but the layer lines were very evident and the details were not as crisp as my Form 2. Even after a layer of primer, the layer lines were still visible whereas the prints from my Form 2 are smooth with barely discernible layer lines.
Unfortunately, the details on the model (panel lines and greebles) would have to be completely reworked to be visible at 1/1000 scale. I would expect that it would simply look like a smoothly contoured wedge with almost no surface details at that scale.
That’s one of the reasons I’ve been focused on larger scale models (1/350 and larger) to really show some of the details that I’ve never seen present in small scale ships.
Fair enough and completely understandable. I’ve managed to get three different of the more classic wedge scouts via Shapeways and the level of detail was satisfactory for table-top gaming. They do admittedly require picking and choosing which details to bring out and an artificial deepening/widening of any detail lines.
Very nice model, I was just wondering if you’d be willing to share the model file? If not I understand, as a fairly adept computer modeller myself I understand the amount of time that goes into such a detailed model. If you are willing to share it, it would save me a great amount of time recreating one like it.
Well, I started recreation of the model and immediately noticed how the technical drawings I have look good but are not aligned correctly to each other. I would assume you made some technical corrections to make the model turn out as well as it did. If you have any suggestions to help me recreate this I would appreciate them.
Nearly fainted when i saw this model! It is just what I wanted for.my display case! How to arrange a.print / the model file? (Just setting up my 1st 3D printer! Forgive my terminology and general ignorance) have played with Blender but obviously this is a profesional model!) Let me know my options my display case is crying for this! Rphill1698@yahoo.com.
Whatever else happens that is a superb model I aspire to?
Do you sell the miniature ships?
Man, this brings back so many memories of those good ol’ Traveller days. What a great game. I love the modeling you are doing. Great stuff! Star Wars and those old pen and paper games are what are responsible for my career. I started as an Industrial Designer at Long Beach State (same place as Joe Johnston) and now (32 years later) I am working in graphic design for video games. Still love all this stuff and love to see people like you are keeping it alive!
Thanks for sharing your thoughts, Brett! Star Wars, Traveller and sci-fi novels, movies and games in general had an enormous impact on me as well. While I never pursued a career in the arts, it’s always been a passion and a hobby for me. I’m glad that I was able to contribute some of my art to the Traveller game universe over the years. 12 year old me would never have believed that my work would some day appear in the type of games and books that I was browsing through in the local game store!
I know this is years late but was this ever available for download? I’d love to throw it on my resin printer, it’s curves appeal to me
Coincidentally, this topic came up on my Facebook group (https://facebook.com/groups/martianmodels) for Martian Models today. I need to get back in touch with Marc Miller and restart my discussions about getting permission to distribute and sell my Traveller ship designs as 3D models.
Well, if you ever do, drop a reply here, I’d love to see it