This is the first in a series about my process of fabricating a sci-fi starship from original concept art through printing and painting a physical model.
Concept Art
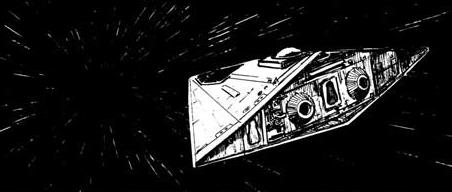
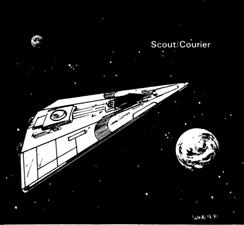
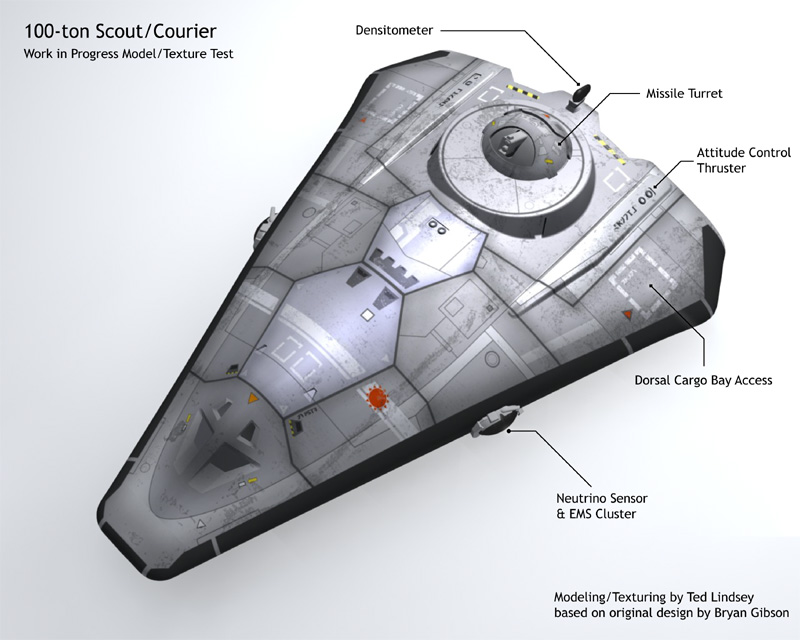
First, a little background: the model I am creating is a “Type S Scout/Courier” from the Traveller Role Playing Game universe. It’s a design that’s been around since the 1970s, with a number of iterations over the years.
While I had originally believed that the Scout design was derived from a Star Wars Imperial Star Destroyer, Winchell Chung informed me that the original Type S Scout designs created by William Keith were actually influenced by earlier designs such as the Convair Atlas space station glider. Check out Winchell’s site, Project Rho, if you have a chance. It’s a treasure trove of gaming and sci-fi goodness!
History of the Scout Redesign
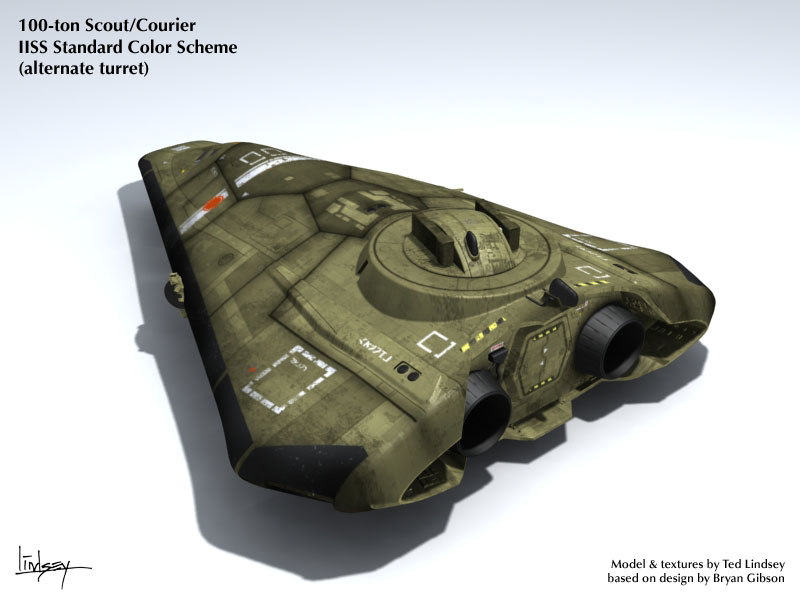
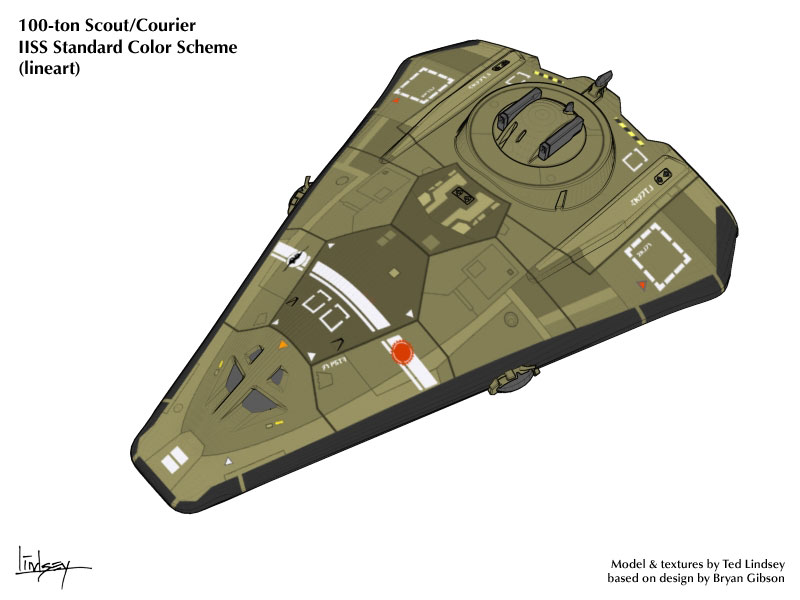
In 2002, I had the privilege of collaborating with Bryan Gibson, an artist whose work for various games I had admired since my teen years. A new version of the Traveller game, called Traveller T20, was in development and some of Bryan’s artwork had been posted showing some really interesting redesigns of iconic ships. Since I had done numerous pieces of artwork for the Traveller and 2300AD game systems over the years, I had some familiarity with the artists, writers and art directors in the field. I was able to get in touch with Bryan and we decided to collaborate on creating a 3D version of his new design. We ended up collaborating on a number of ship designs over the years and became long distance friends.
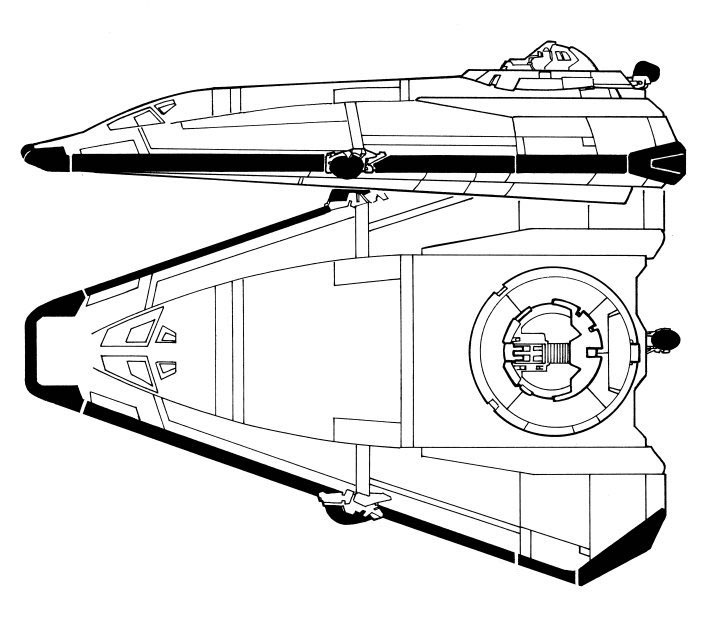
The original 3D model is pretty old and was not designed for fabrication, thus, I’ve had to redesign certain aspects to be better suited for 3D printing. I’m also omitting a couple of elements such as the side-mounted sensor clusters and the densitometer module.
I will be using a Form 2 printer from FormLabs, a leader in desktop stereolithography (SLA) fabrication. Unlike FDM (fused deposition modeling) 3D printers which extrudes molten plastic filament out like a tiny tube of toothpaste, SLA uses an ultraviolet laser to “draw” a design into a vat of photopolymer resin which solidifies layer by layer. SLA results in much higher resolution prints than FDM, but requires some additional post-printing preparation, e.g., immersion in isopropyl alcohol and curing under UV lights.
While I’ve done some minor experimentation with the Form 2 to gain an understanding of how various 3D modeled details print, this will be my first project with a specific goal of creating a 1/350 scale model of the Type S Scout that I can paint for display. I chose 1/350 since it’s the same scale as Bandai’s “box scale” Millennium Falcon included in the Last Jedi Resistance Vehicle Set.
The length of the classic wedge-shaped Type S Scout is 37.5m from tip to tail. For comparison, the Millennium Falcon is specified as being 34.5m long in Star Wars canon.
Since this design is slightly shorter due to it’s blunt nose, I estimated it would be about 34m long. Thus, at 1/350 scale, the printed model will be about 97mm in length.
3D Modeling
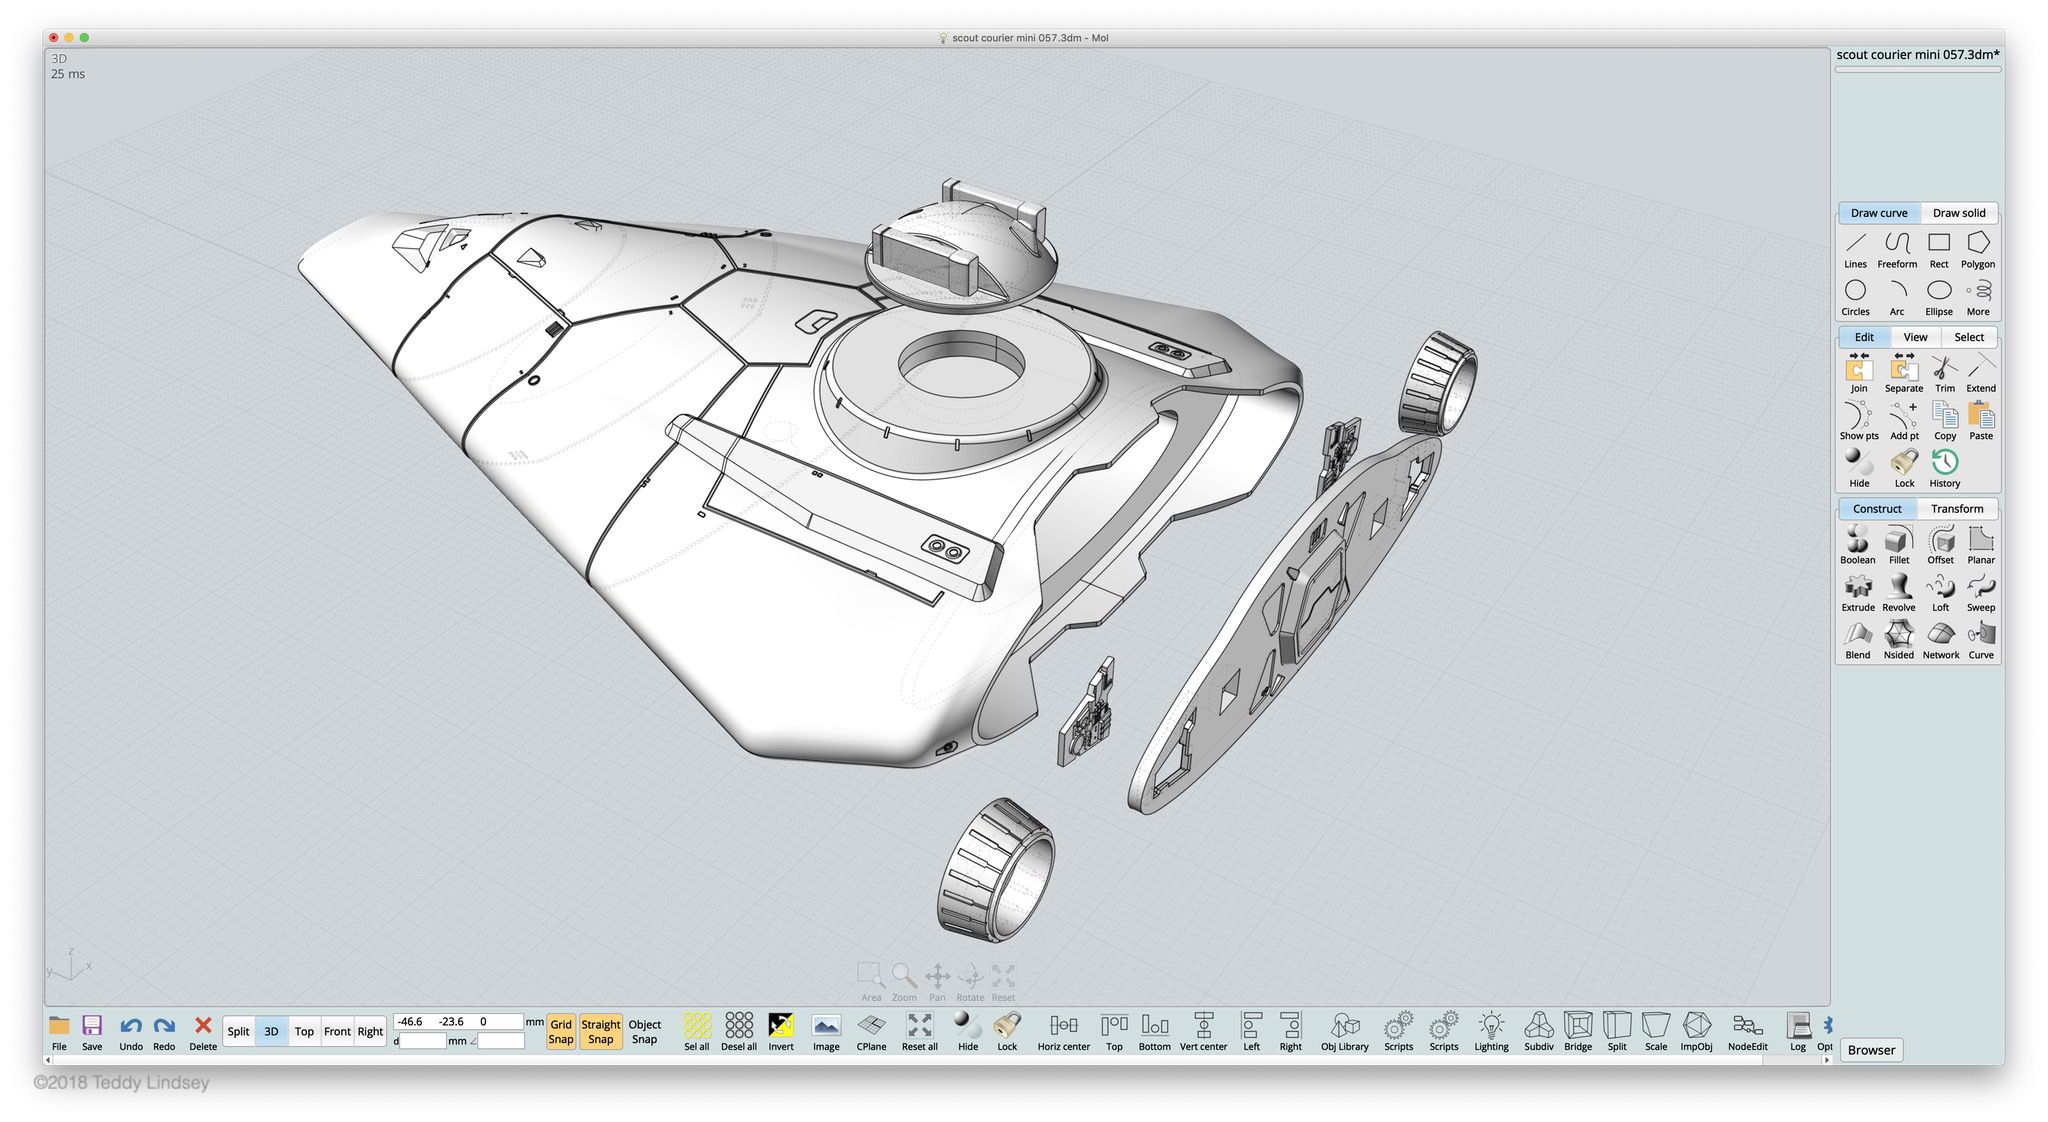
The first step is 3D modeling. I’m not going to delve into excruciating detail about this step since it can get pretty convoluted. I use a modeling application called Moment of Inspiration 3D (MOI3D), which has been my favorite modeling application since 2010.
Prior to MOI3D, I used Rhino 3D, which uses the same NURBS file format as MOI3D, but is more complicated and costly, although it has a much deeper feature set. The original model was created in Rhino, but much of the small details and greebles were added more recently in MOI3D.
As a side note, MOI3D is an incredibly elegant modeling application with a feature set that initially appears sparse, but has surprising depth. It also has a small, but passionate community that has contributed some fantastic scripts and additions that really unlock its potential. Amazingly, MOI3D was created by a single developer who continues to steadily improve the product each year and I recommend it to anyone interested in 3D modeling.
After determining that I would be using 1/350 as the scale of the ship, I started adding in little details such as panel lines, “rivet holes”, vents, ports and other small greebles that I want a wash to settle in and around when I paint the physical model. For this model, I’m estimating that the greeble details need to be inset or protrude by around 0.1-0.2mm in most cases.
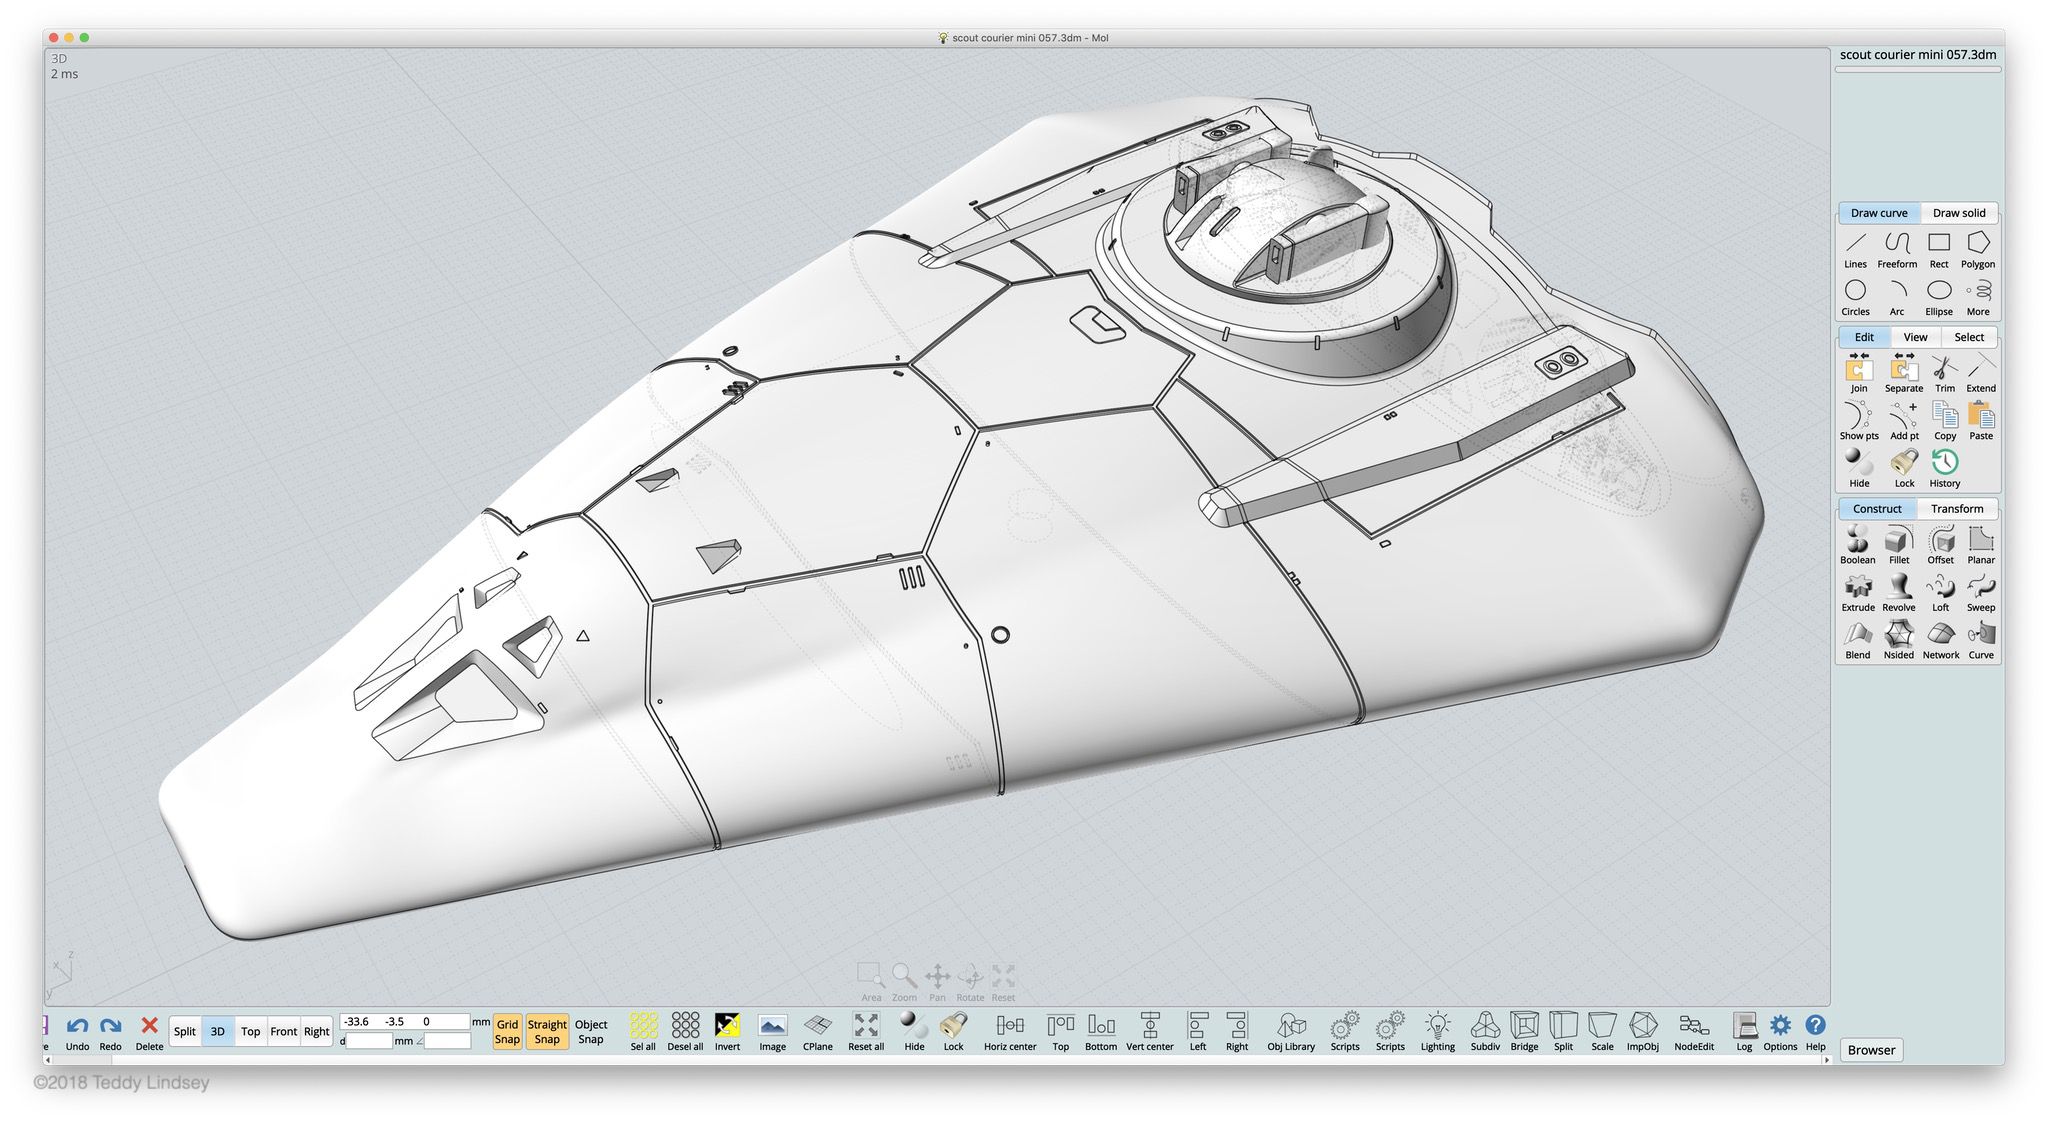
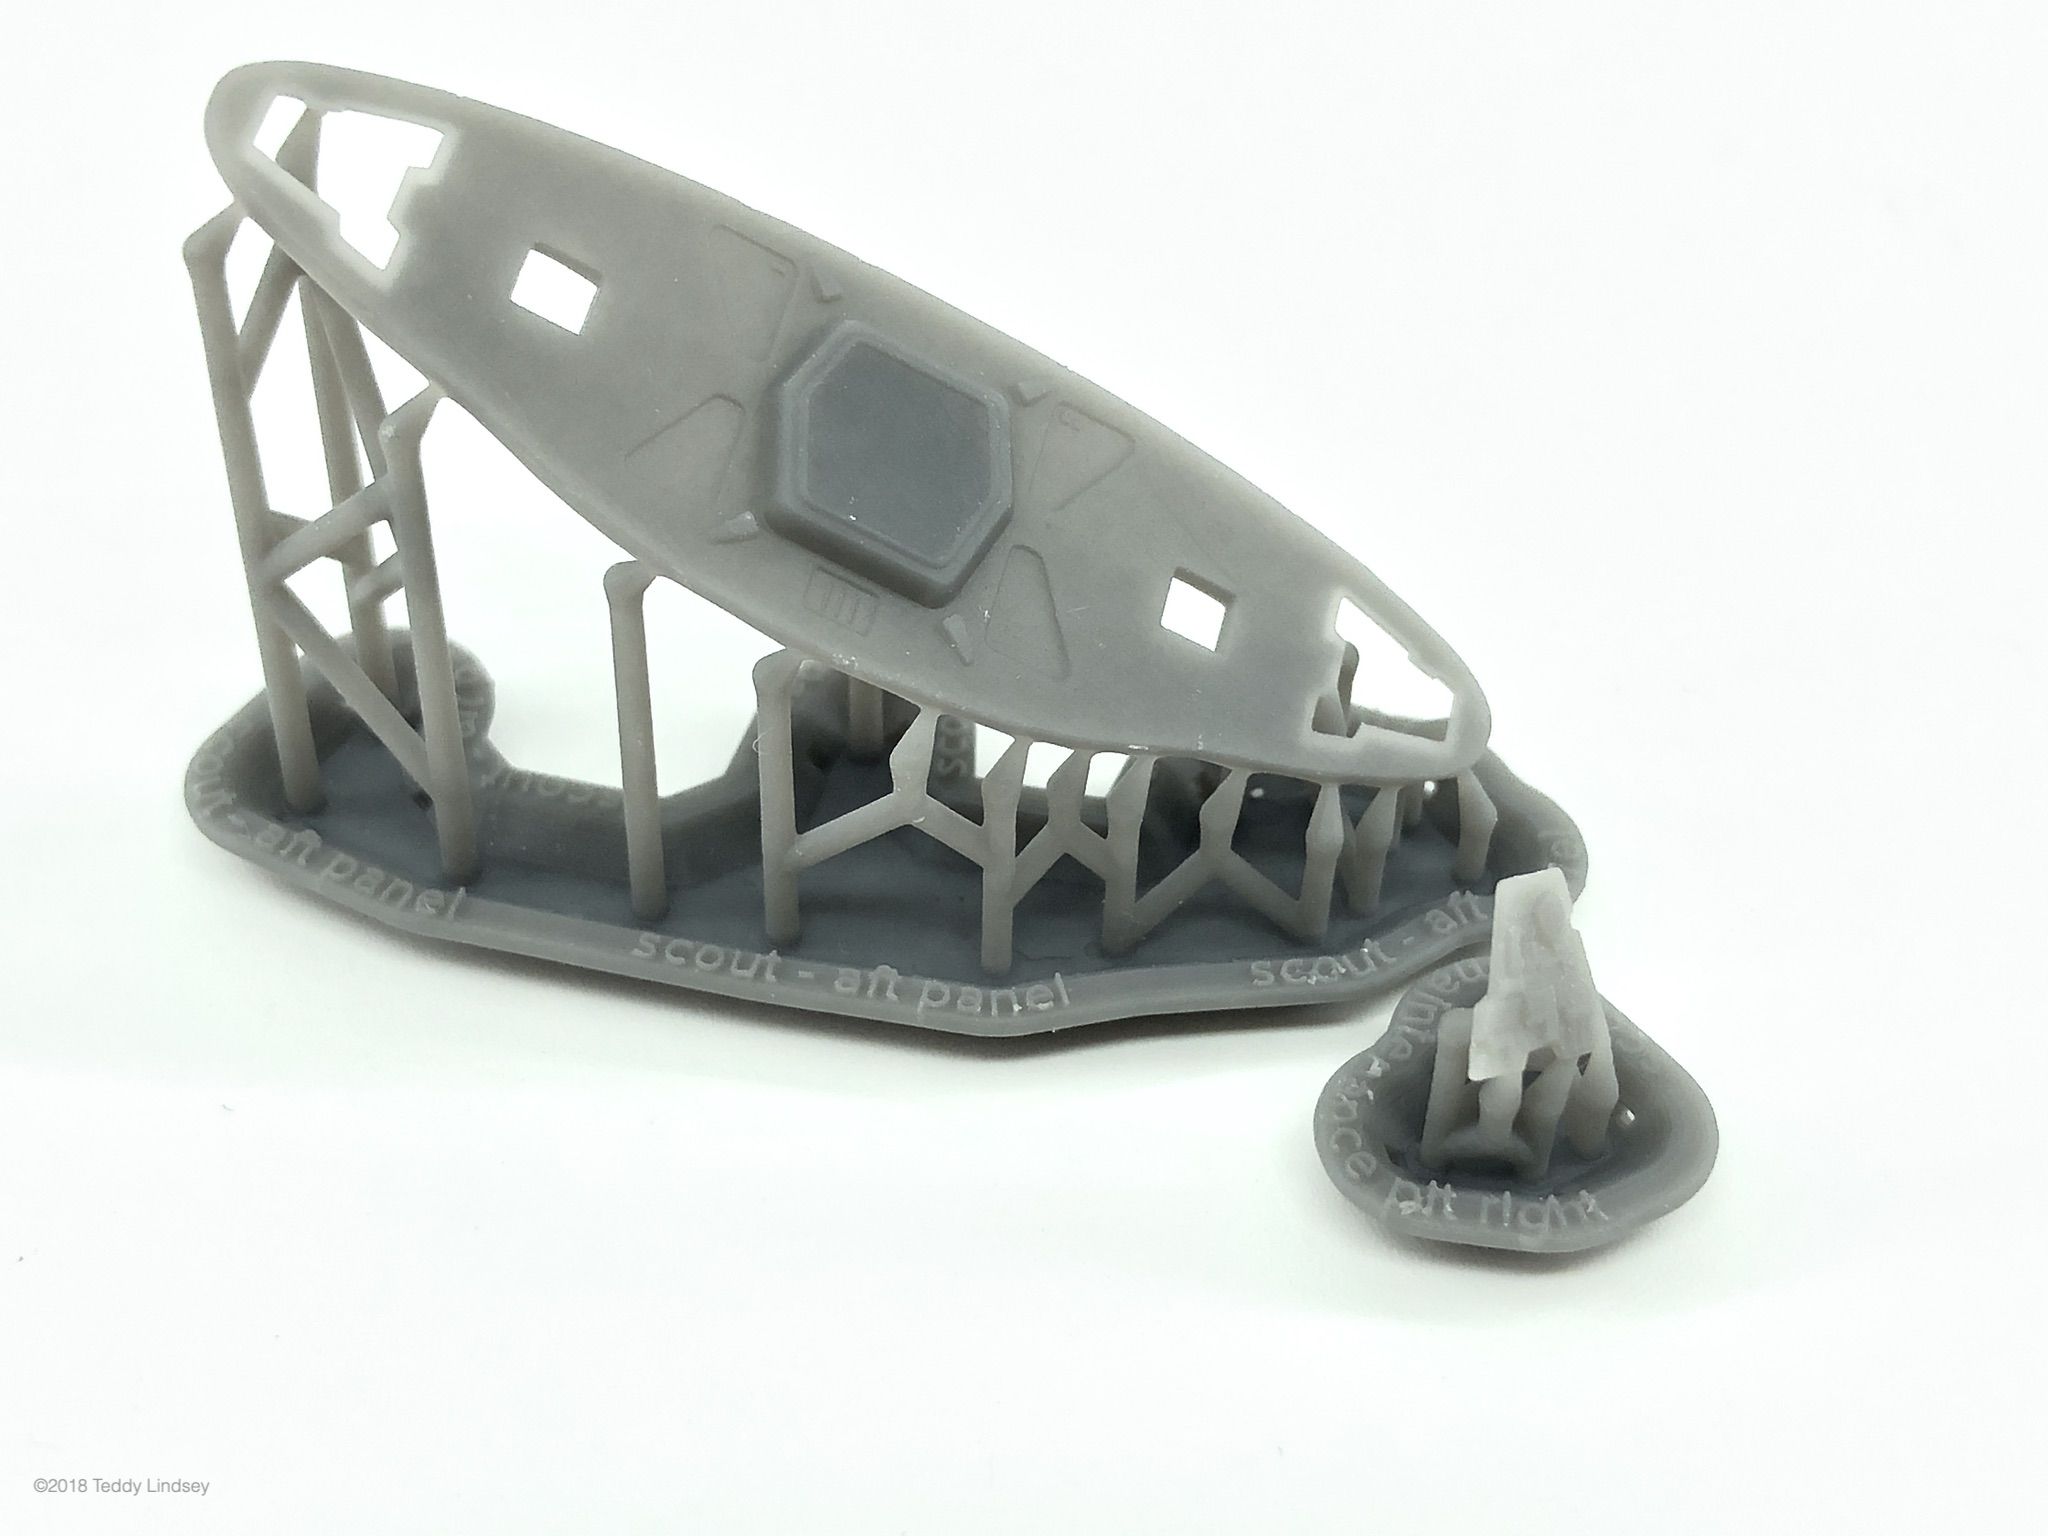
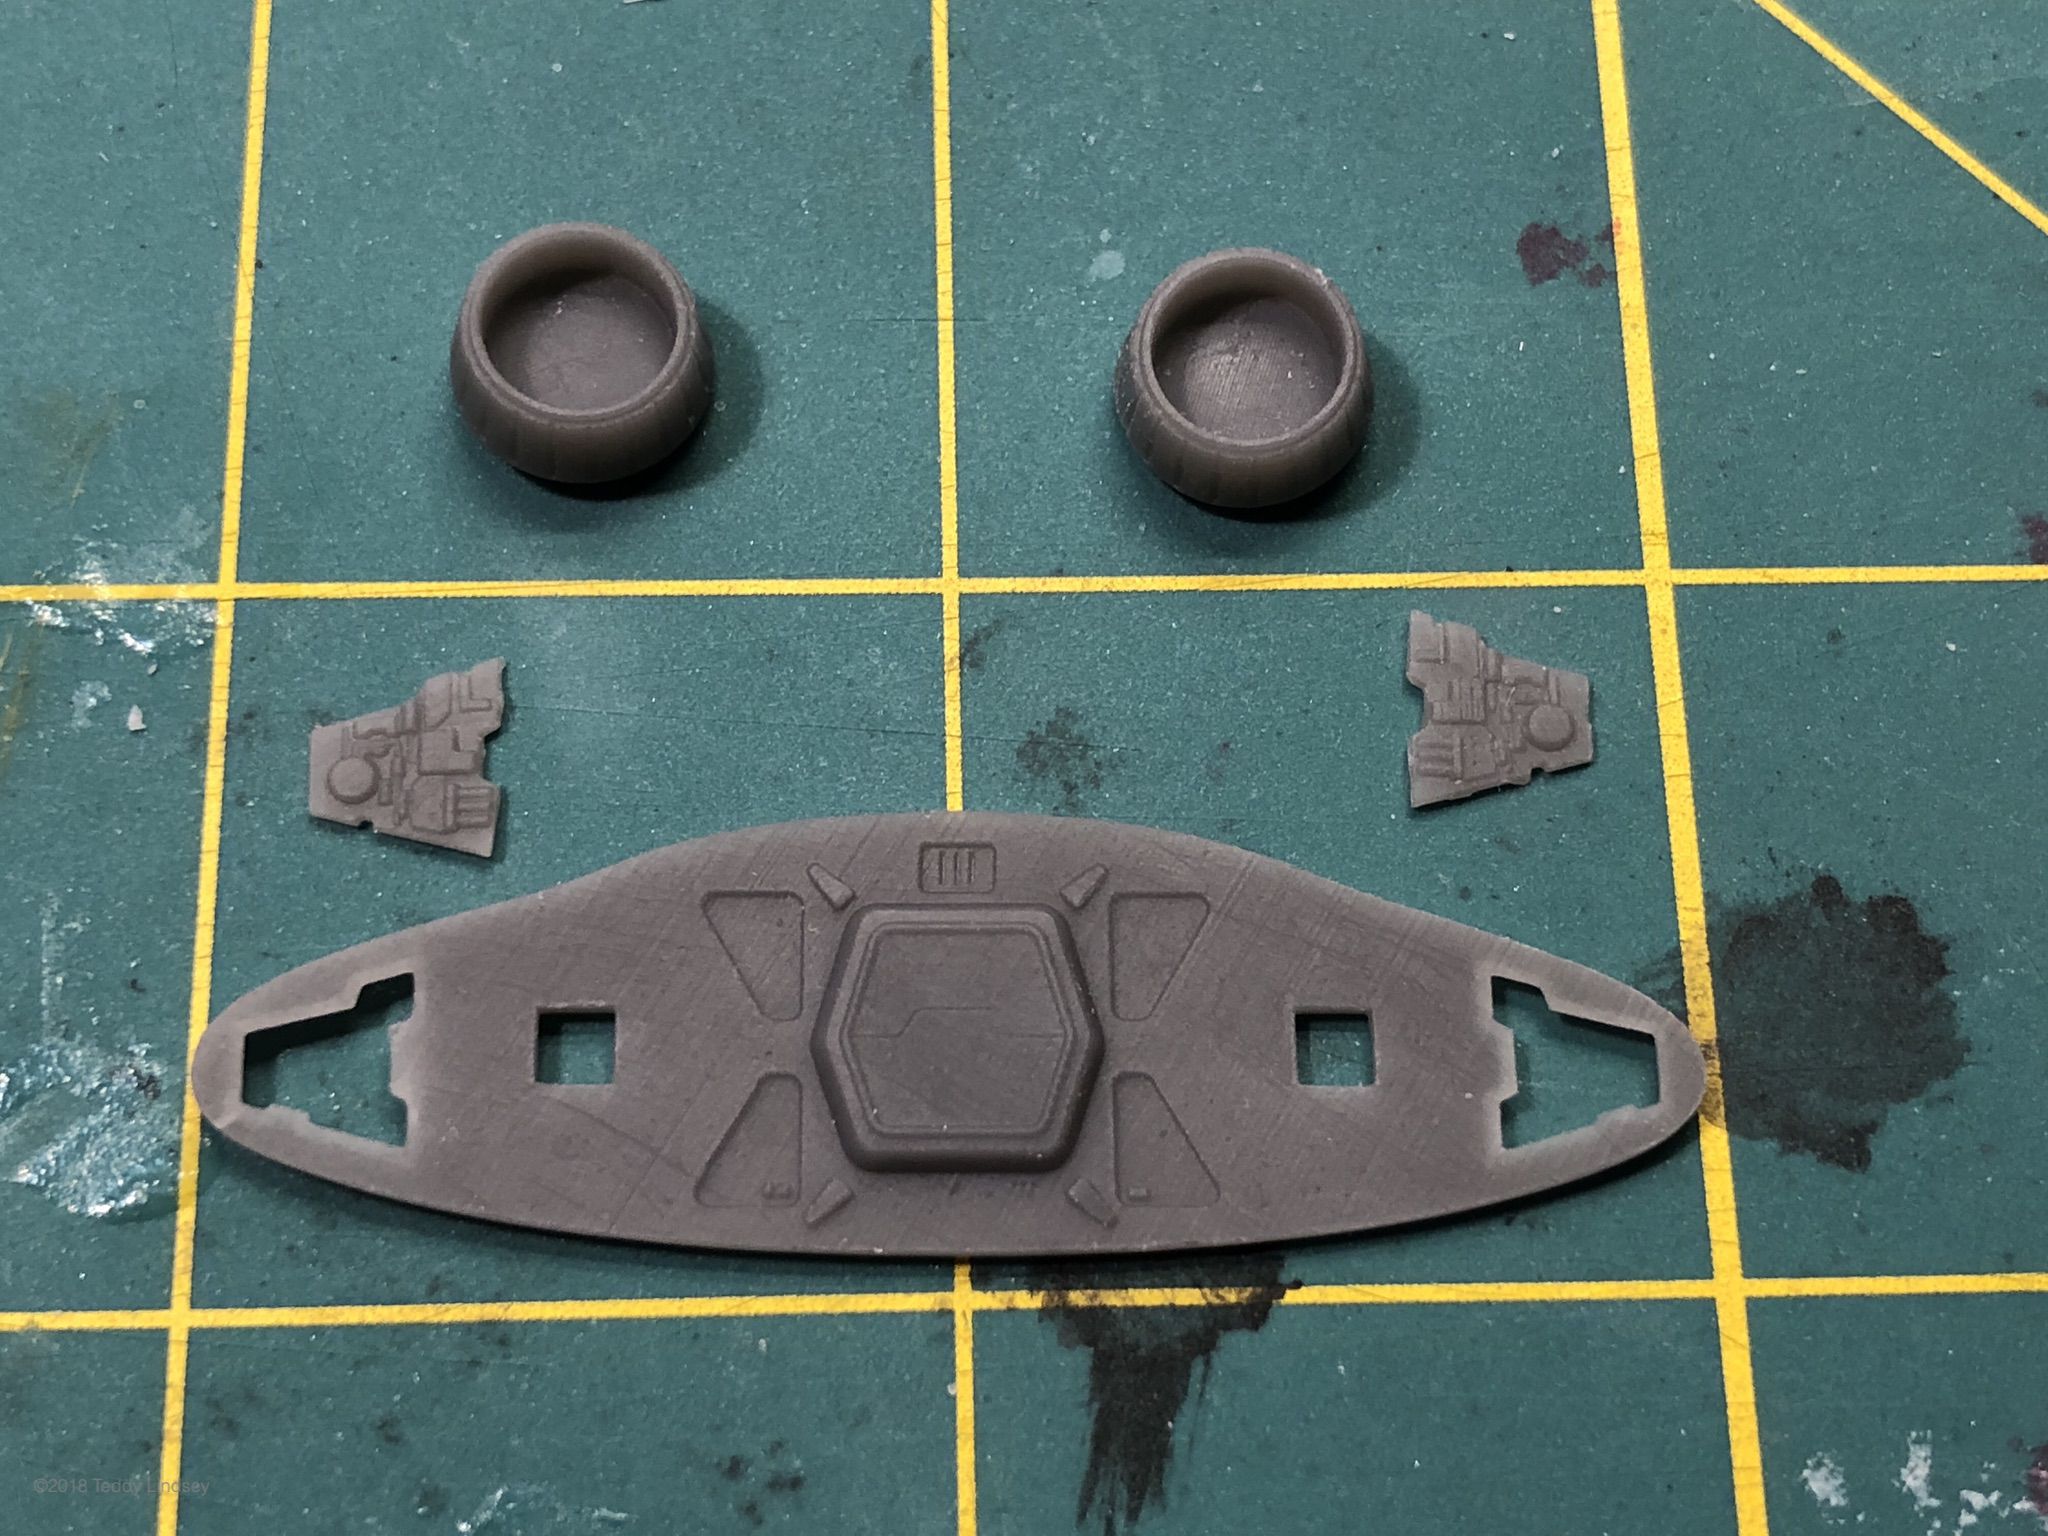
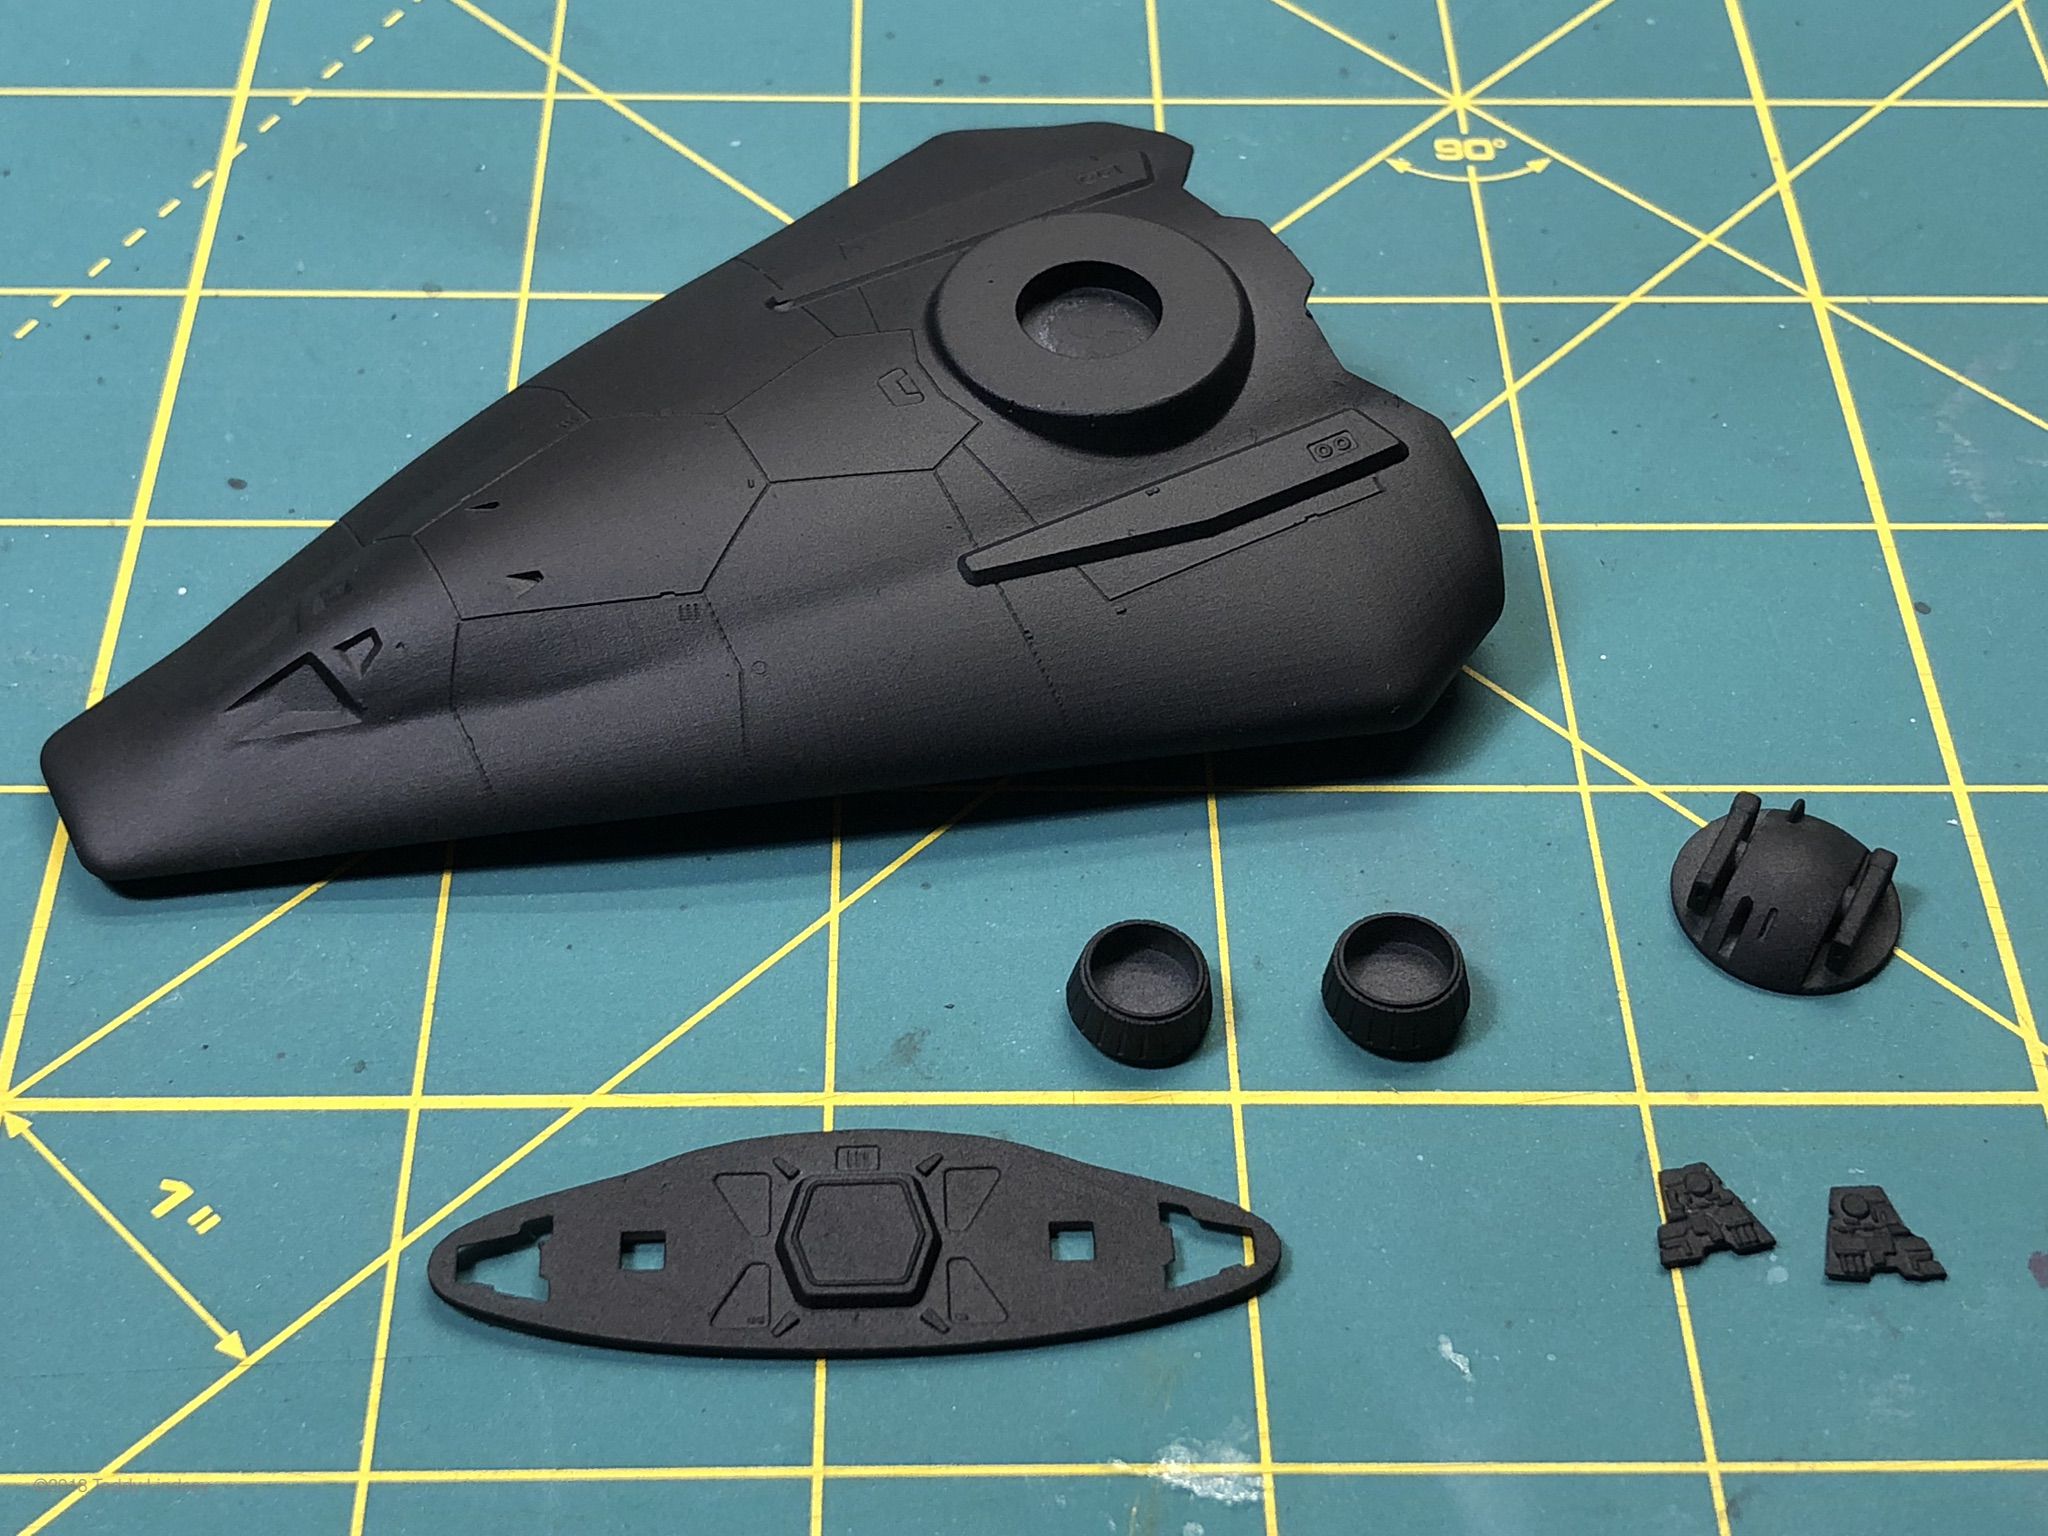
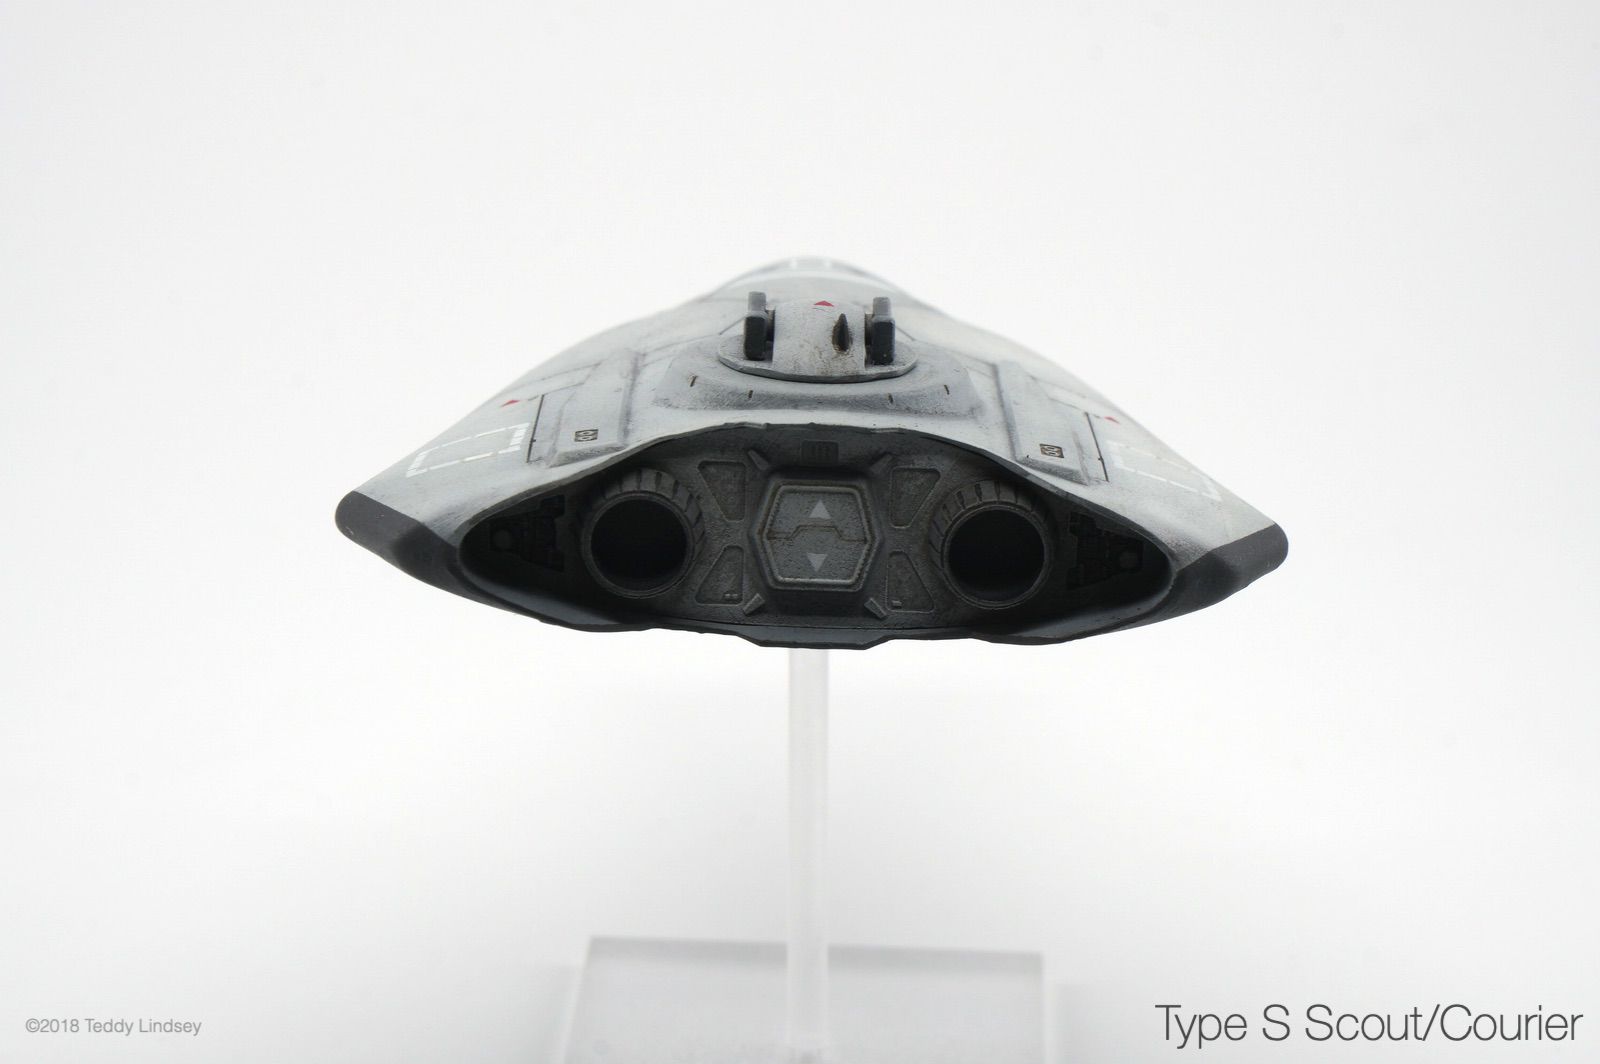
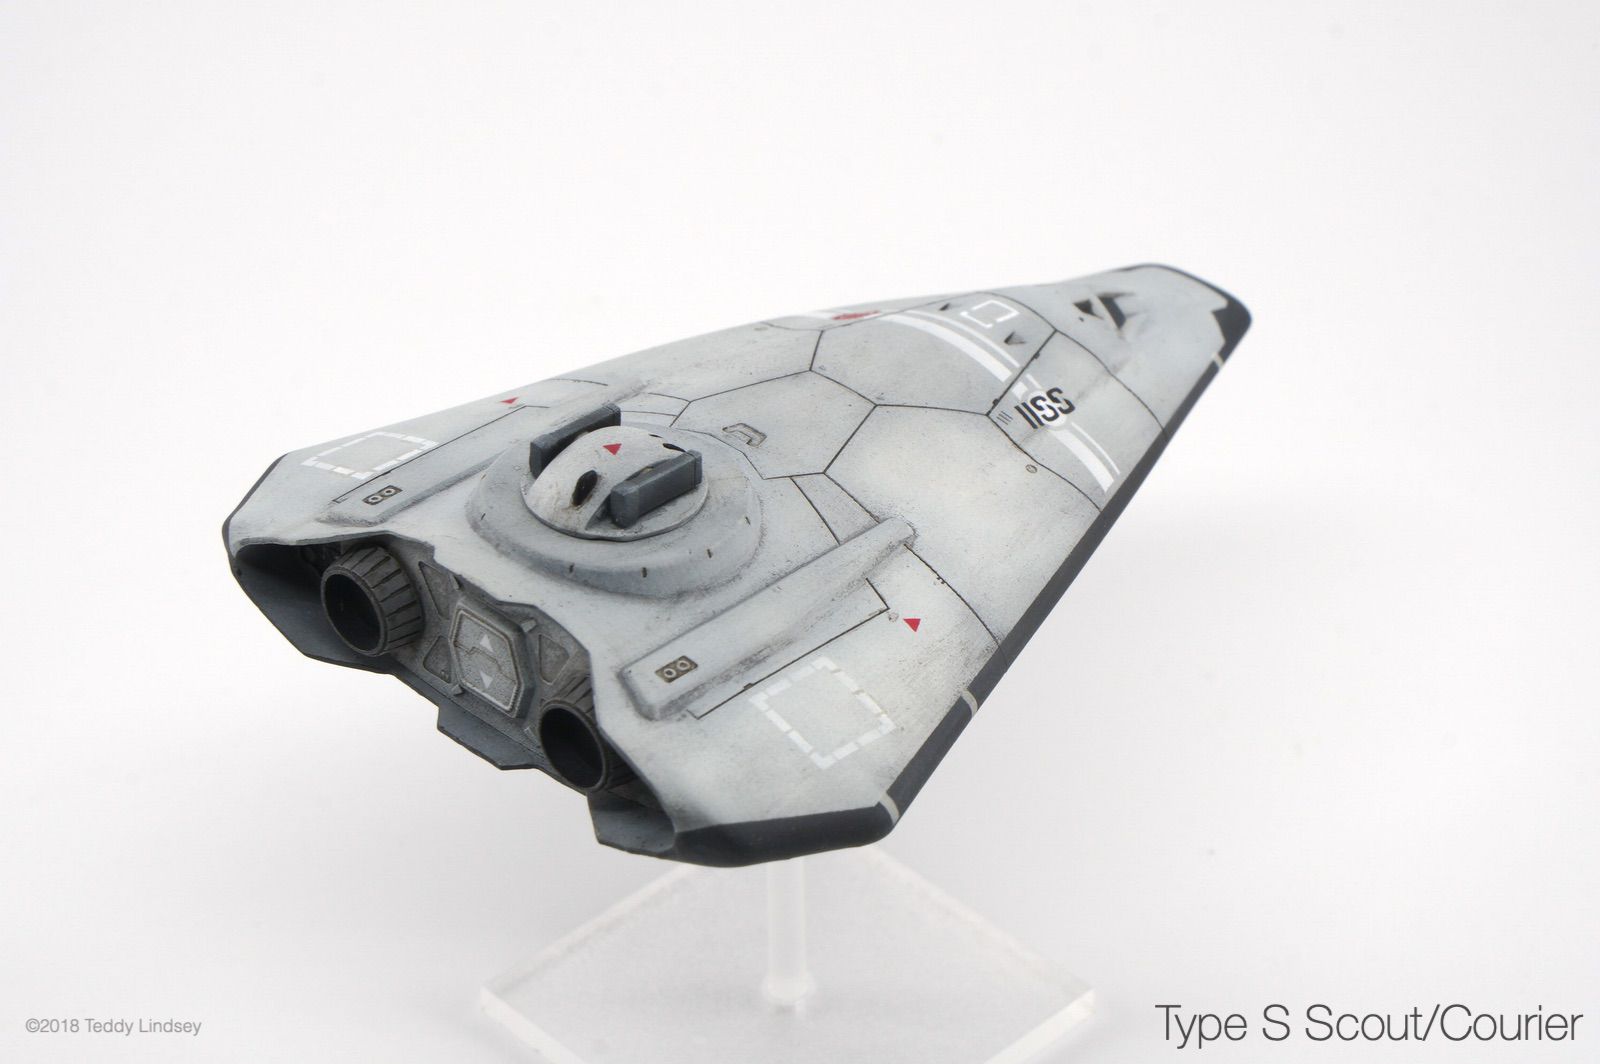
I broke the model up into separate parts to make painting easier. As you can see below, I hollowed out the main hull to reduce the amount of resin that would be required for the print. I also created the aft panel as a separate part that would have two open sections showing exposed mechanical details much like the “maintenance pits” of the Millennium Falcon. Because of the tiny details of the maintenance panels, I modeled them separately to make painting easier. I also want the thrusters to be painted a different color than the main hull, so I added two square posts to each thruster and a matching square hole for each in the aft panel.
3D Printing
After many hours of modeling and tweaking, the model is output as an STL file which is accepted by the Form 2 software, PreForm. You’ll notice the little sprue-like bases under each model component. These are supports which provide structural rigidity for various parts of the model as it’s being built layer by layer in the vat of resin.
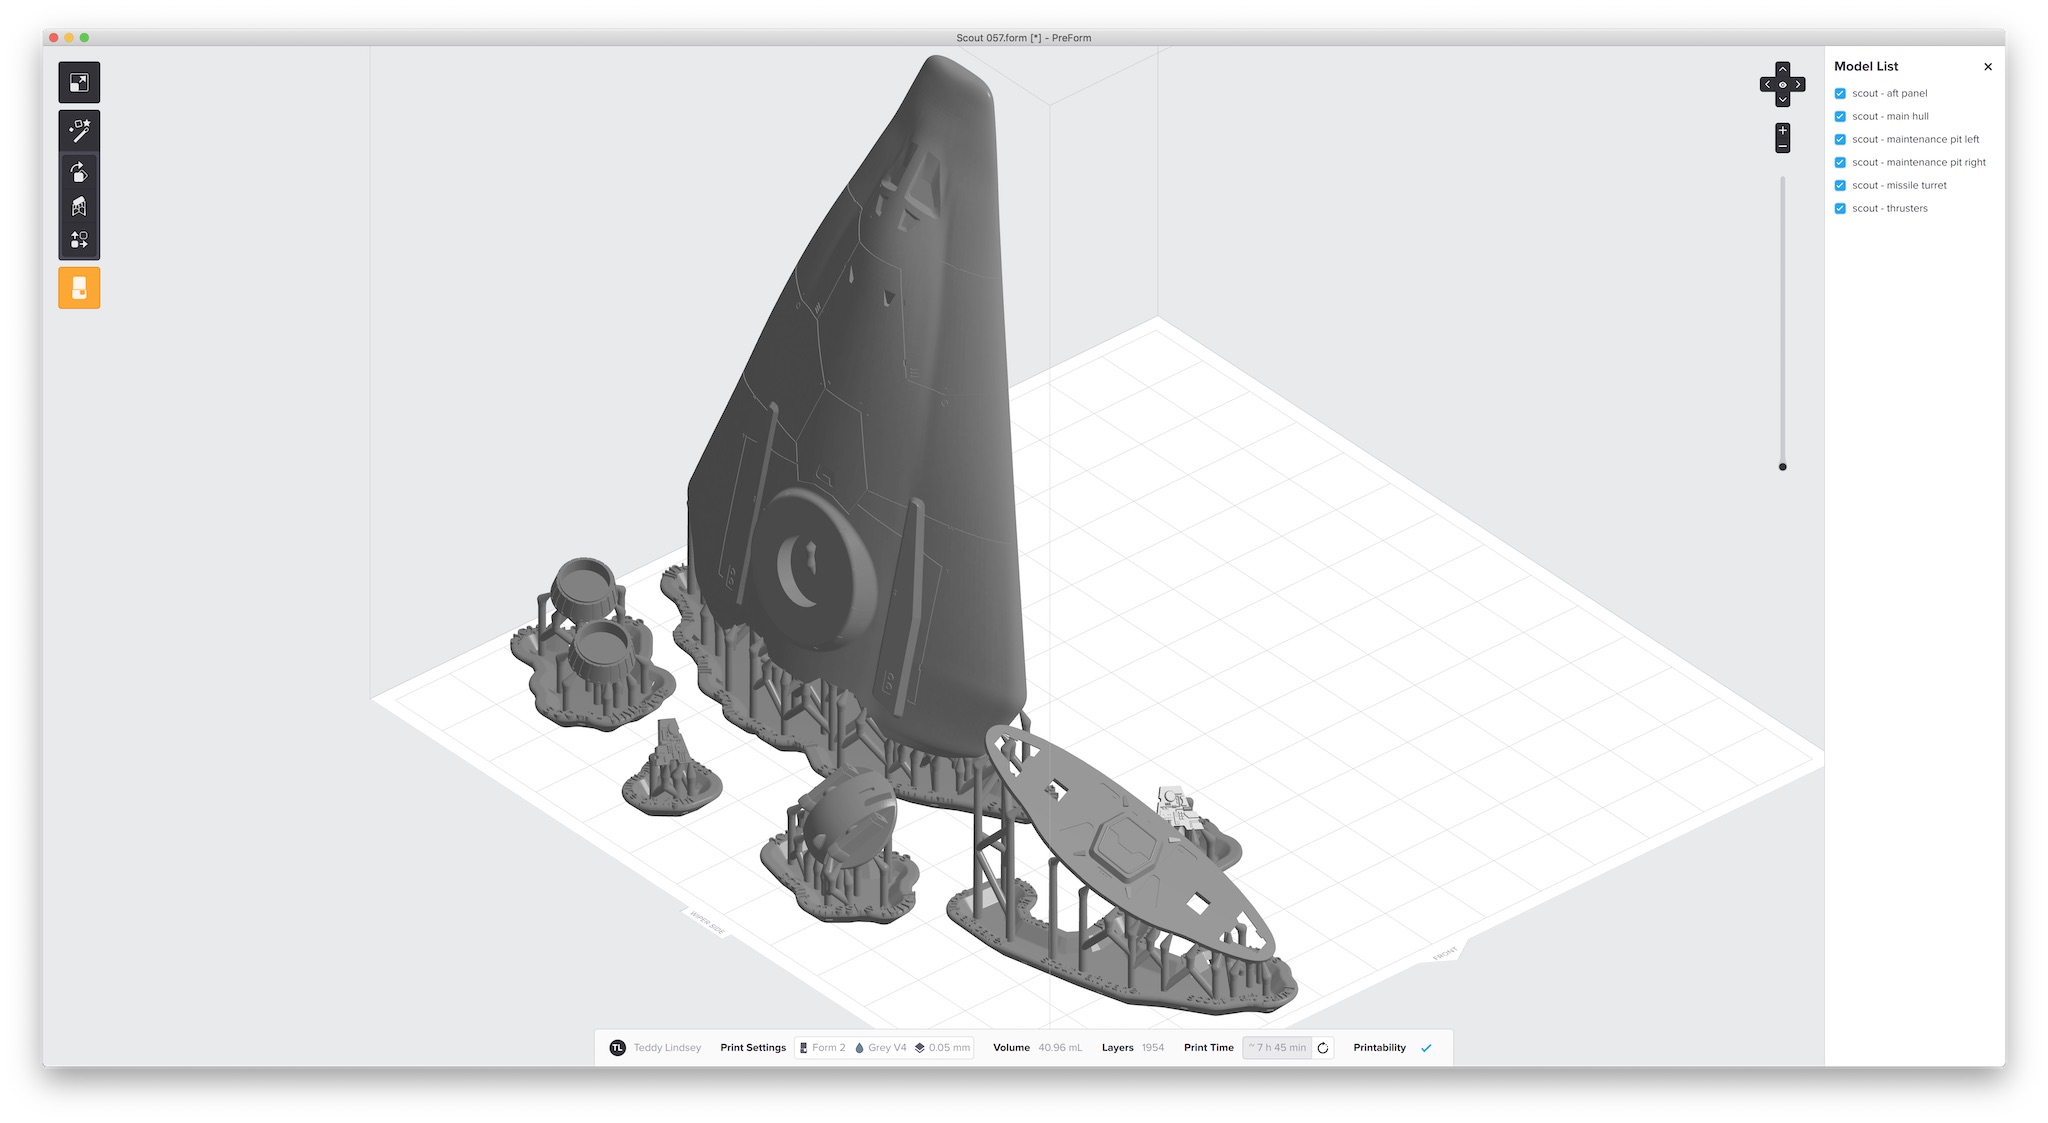
The Form 2 is capable of printing at the smallest details at 25 microns, but I’ve found that 50 microns looks almost as good. To give you an idea of the scale, an average human hair is between 30-100 microns in diameter.
The animation below shows how the Form 2 prints by using a laser to repeatedly cure microscopic layers of resin until a solid object is formed.
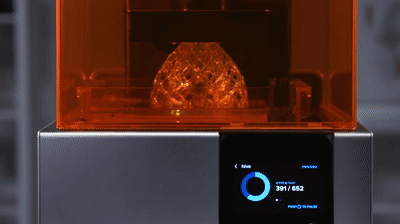
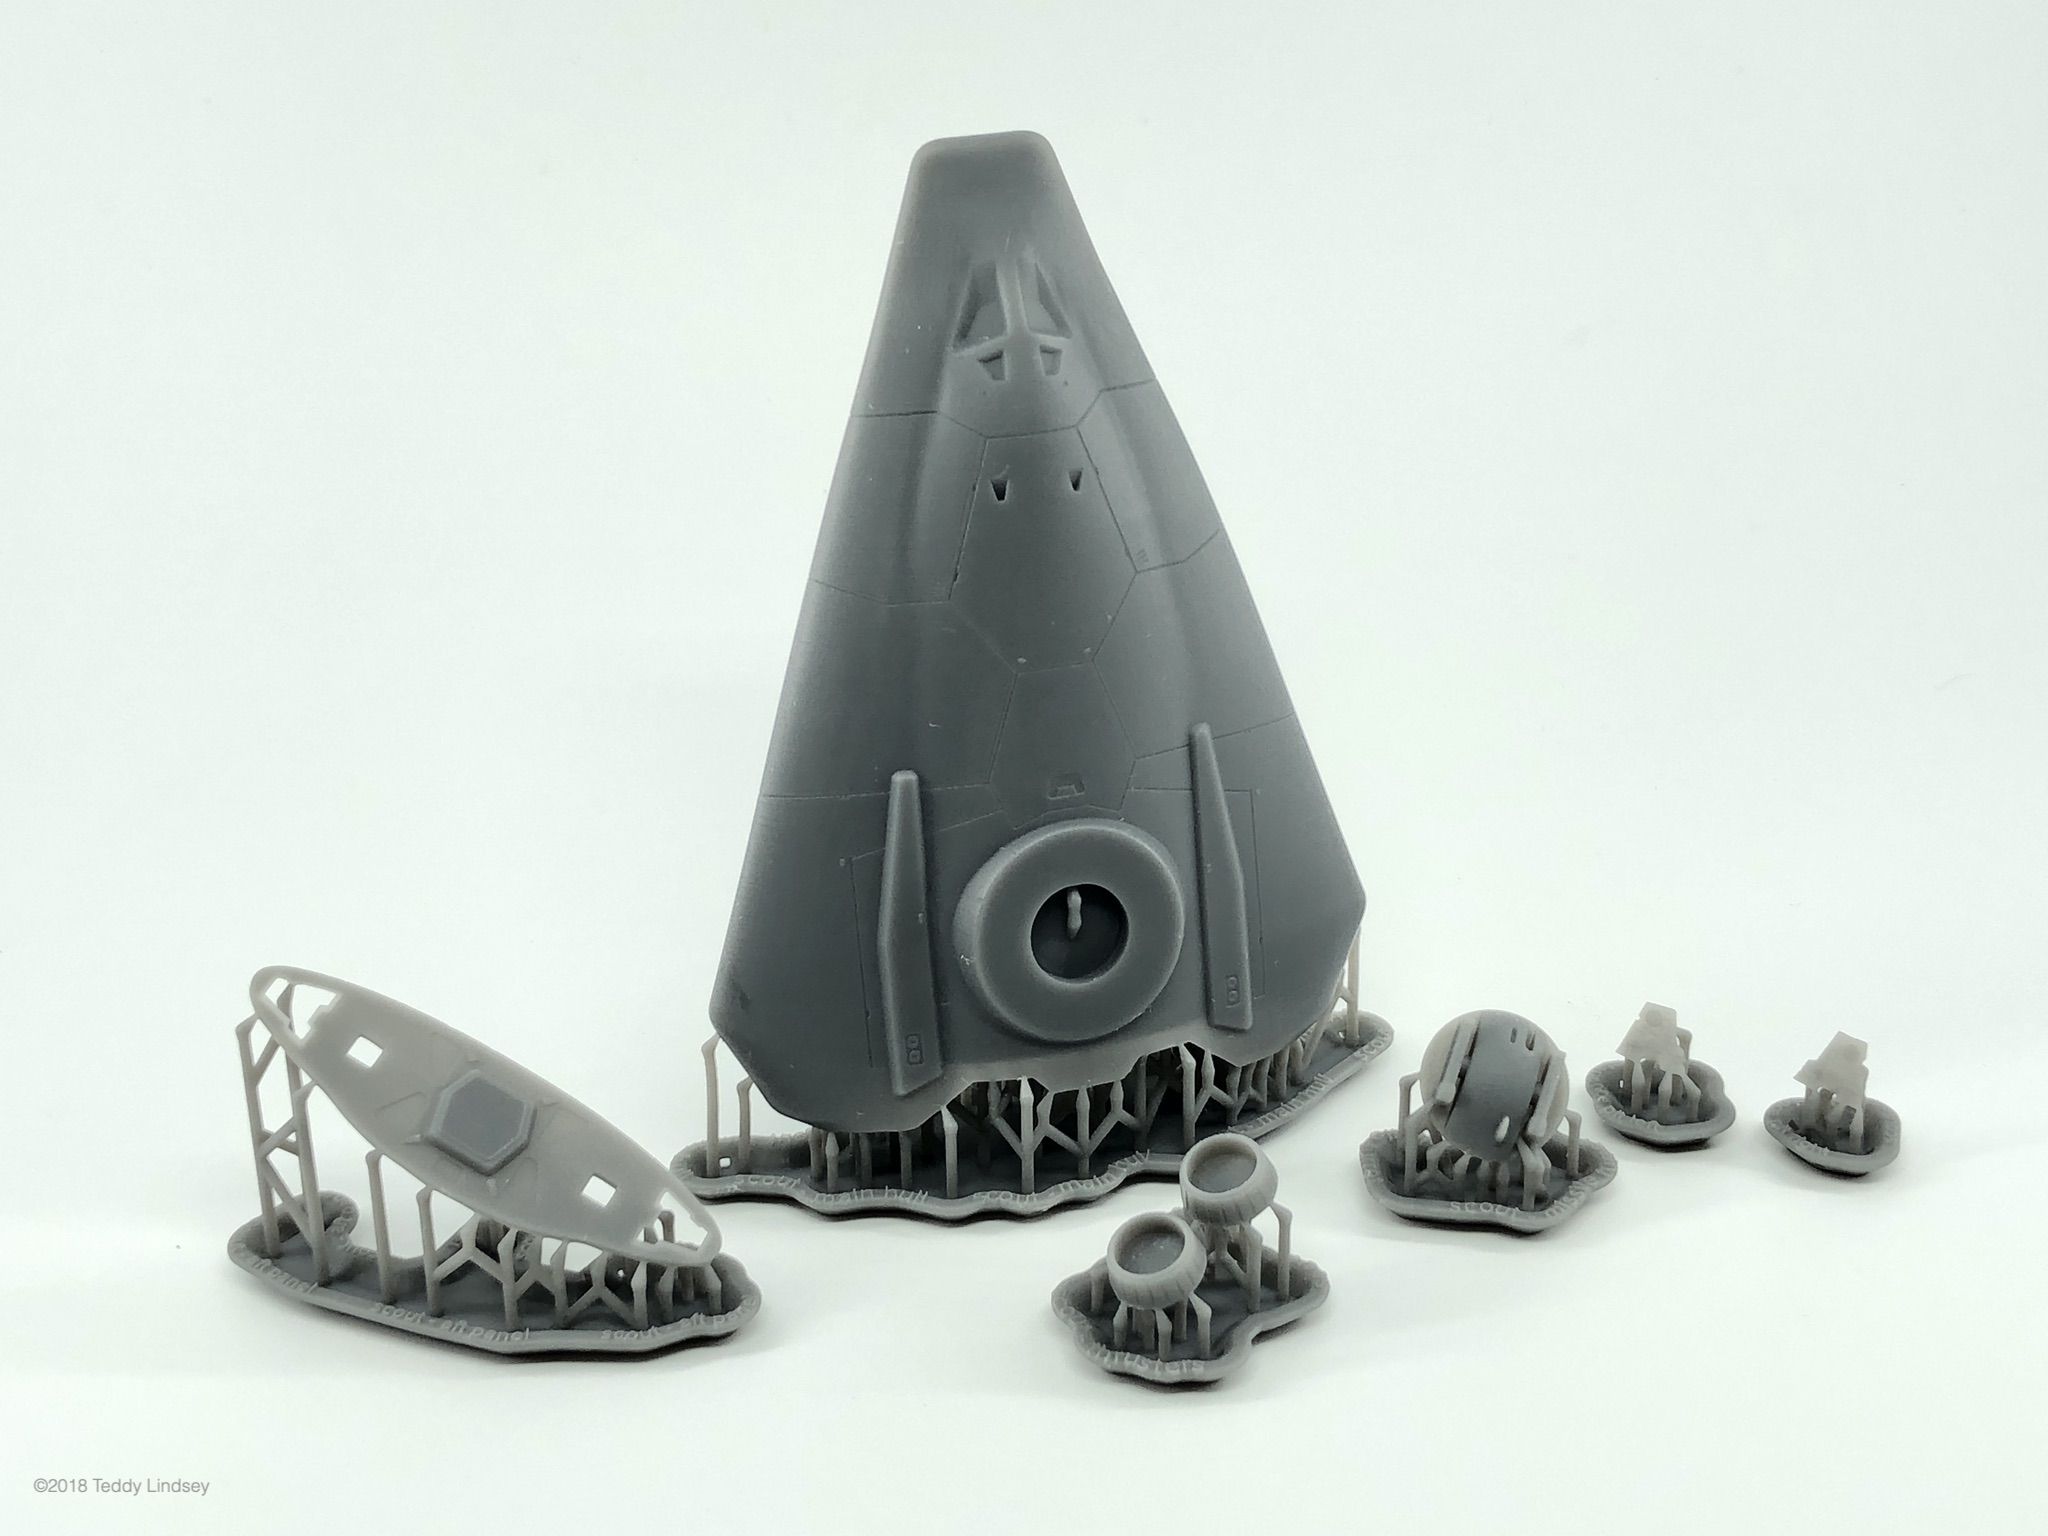
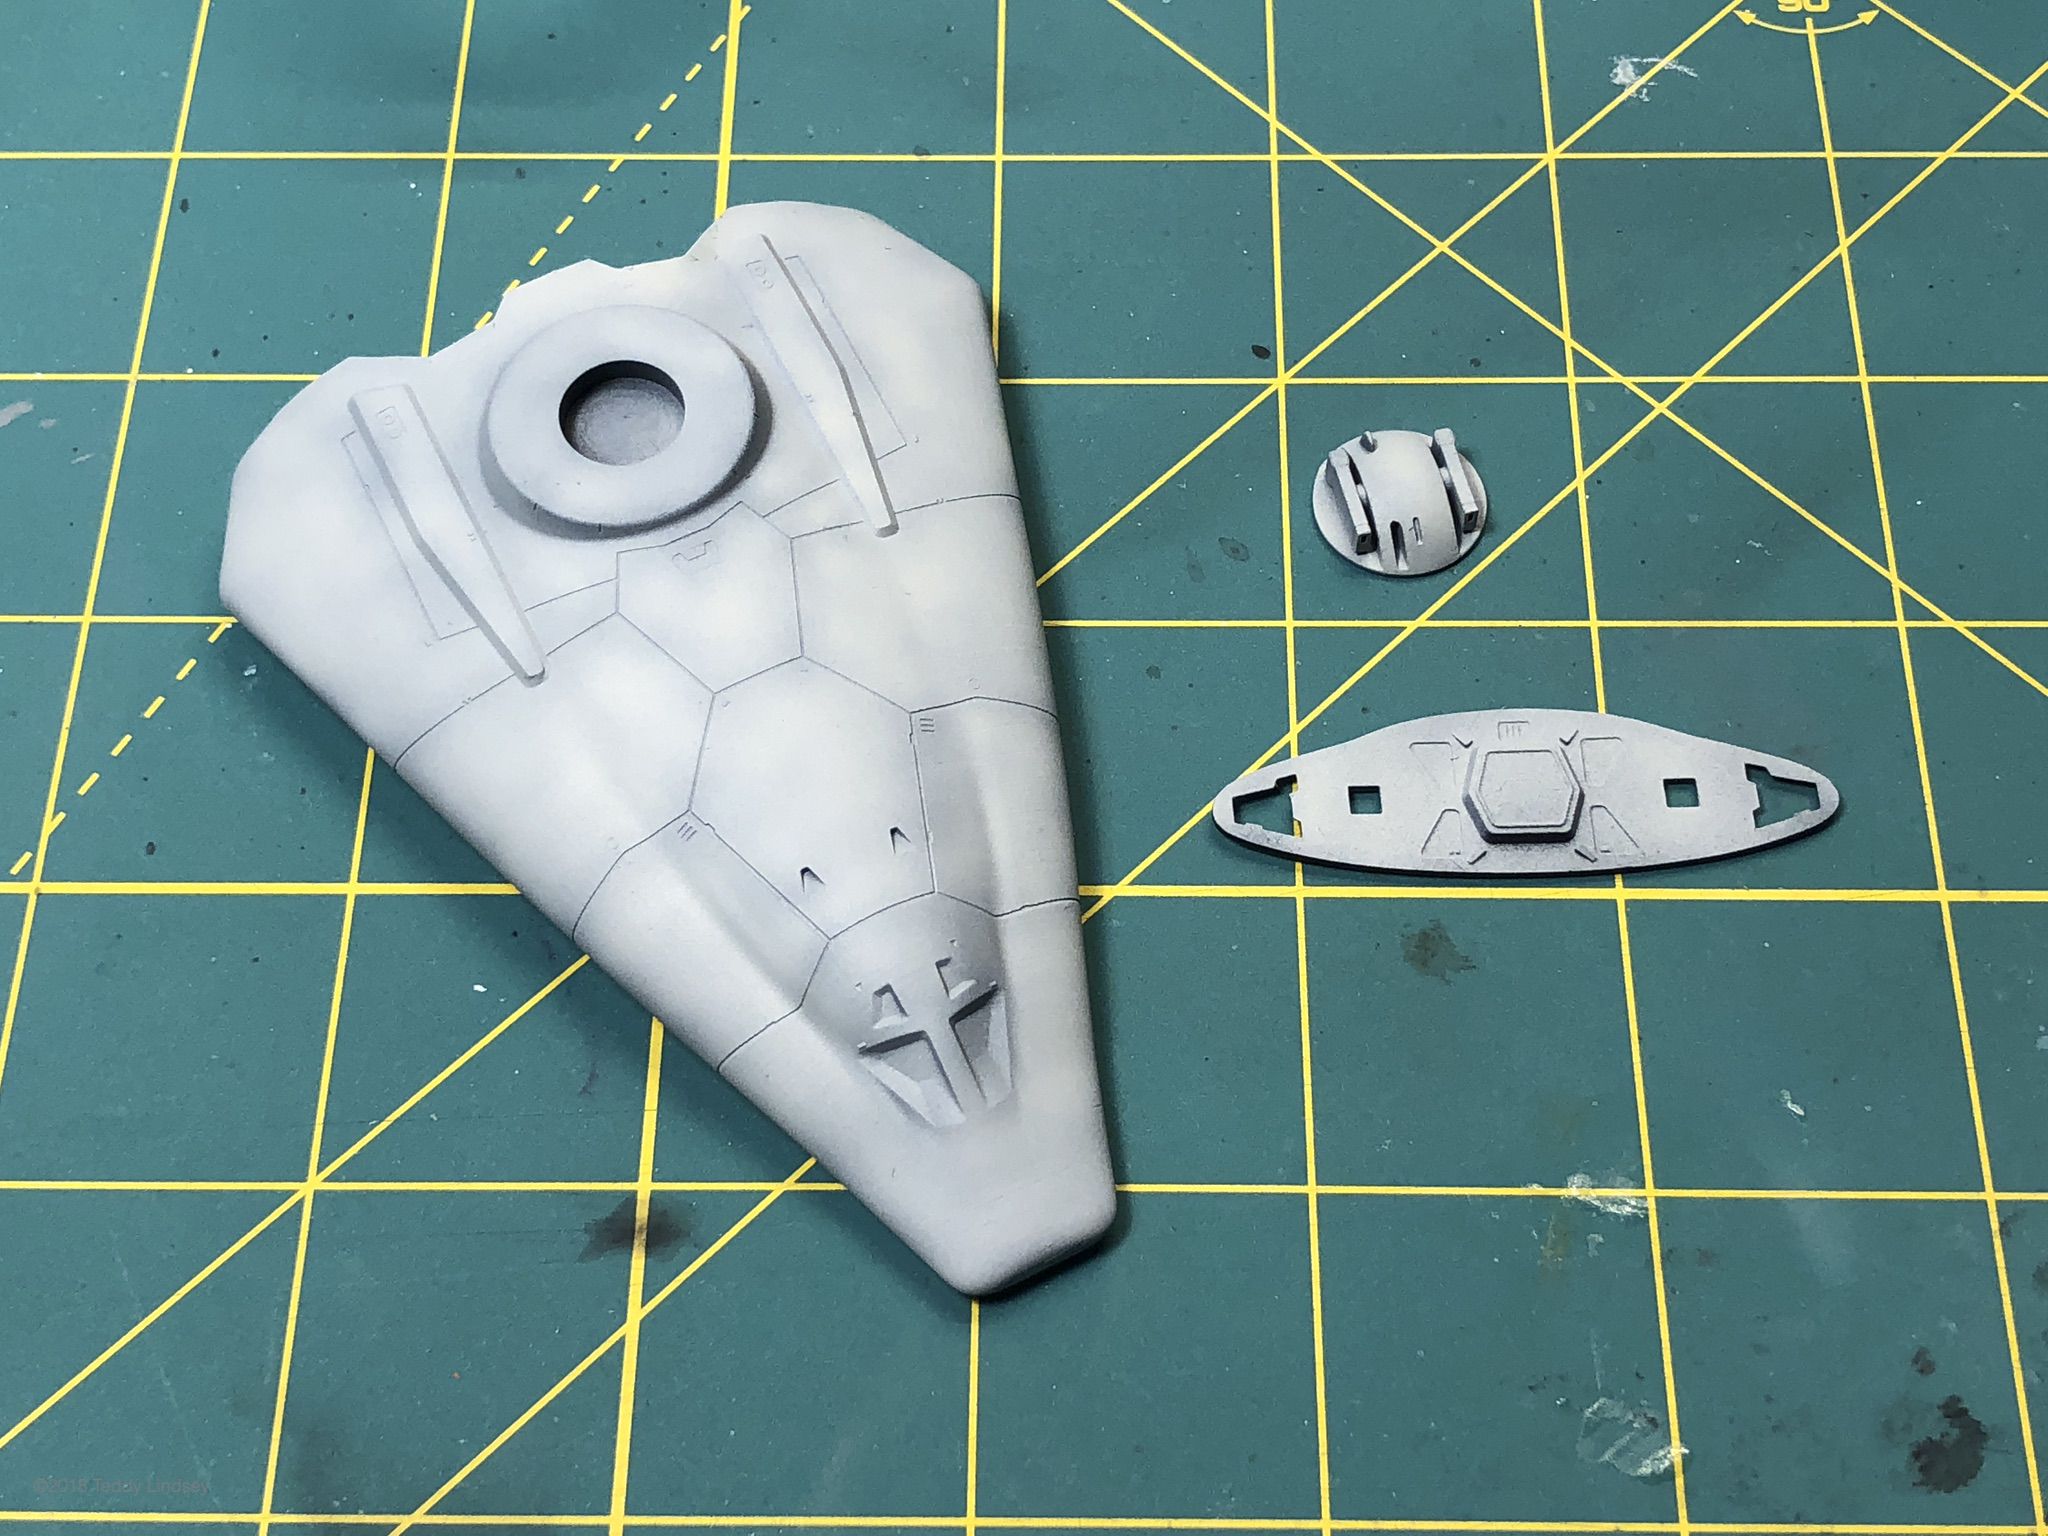
This print took 10 hours and 16 minutes to complete at 50 microns, after which I removed the parts from the printer, rinsed them in vats of isopropyl alcohol for 20 minutes to remove excess uncured resin. Next, I placed the parts in a UV light box for a couple of hours to assist with the curing process. The UV light helps the photopolymer resin in finalizing the formation of long-chain molecules to strengthen the material. Below you can see the parts after coming out of the UV light box.
Cleaning Up the Model
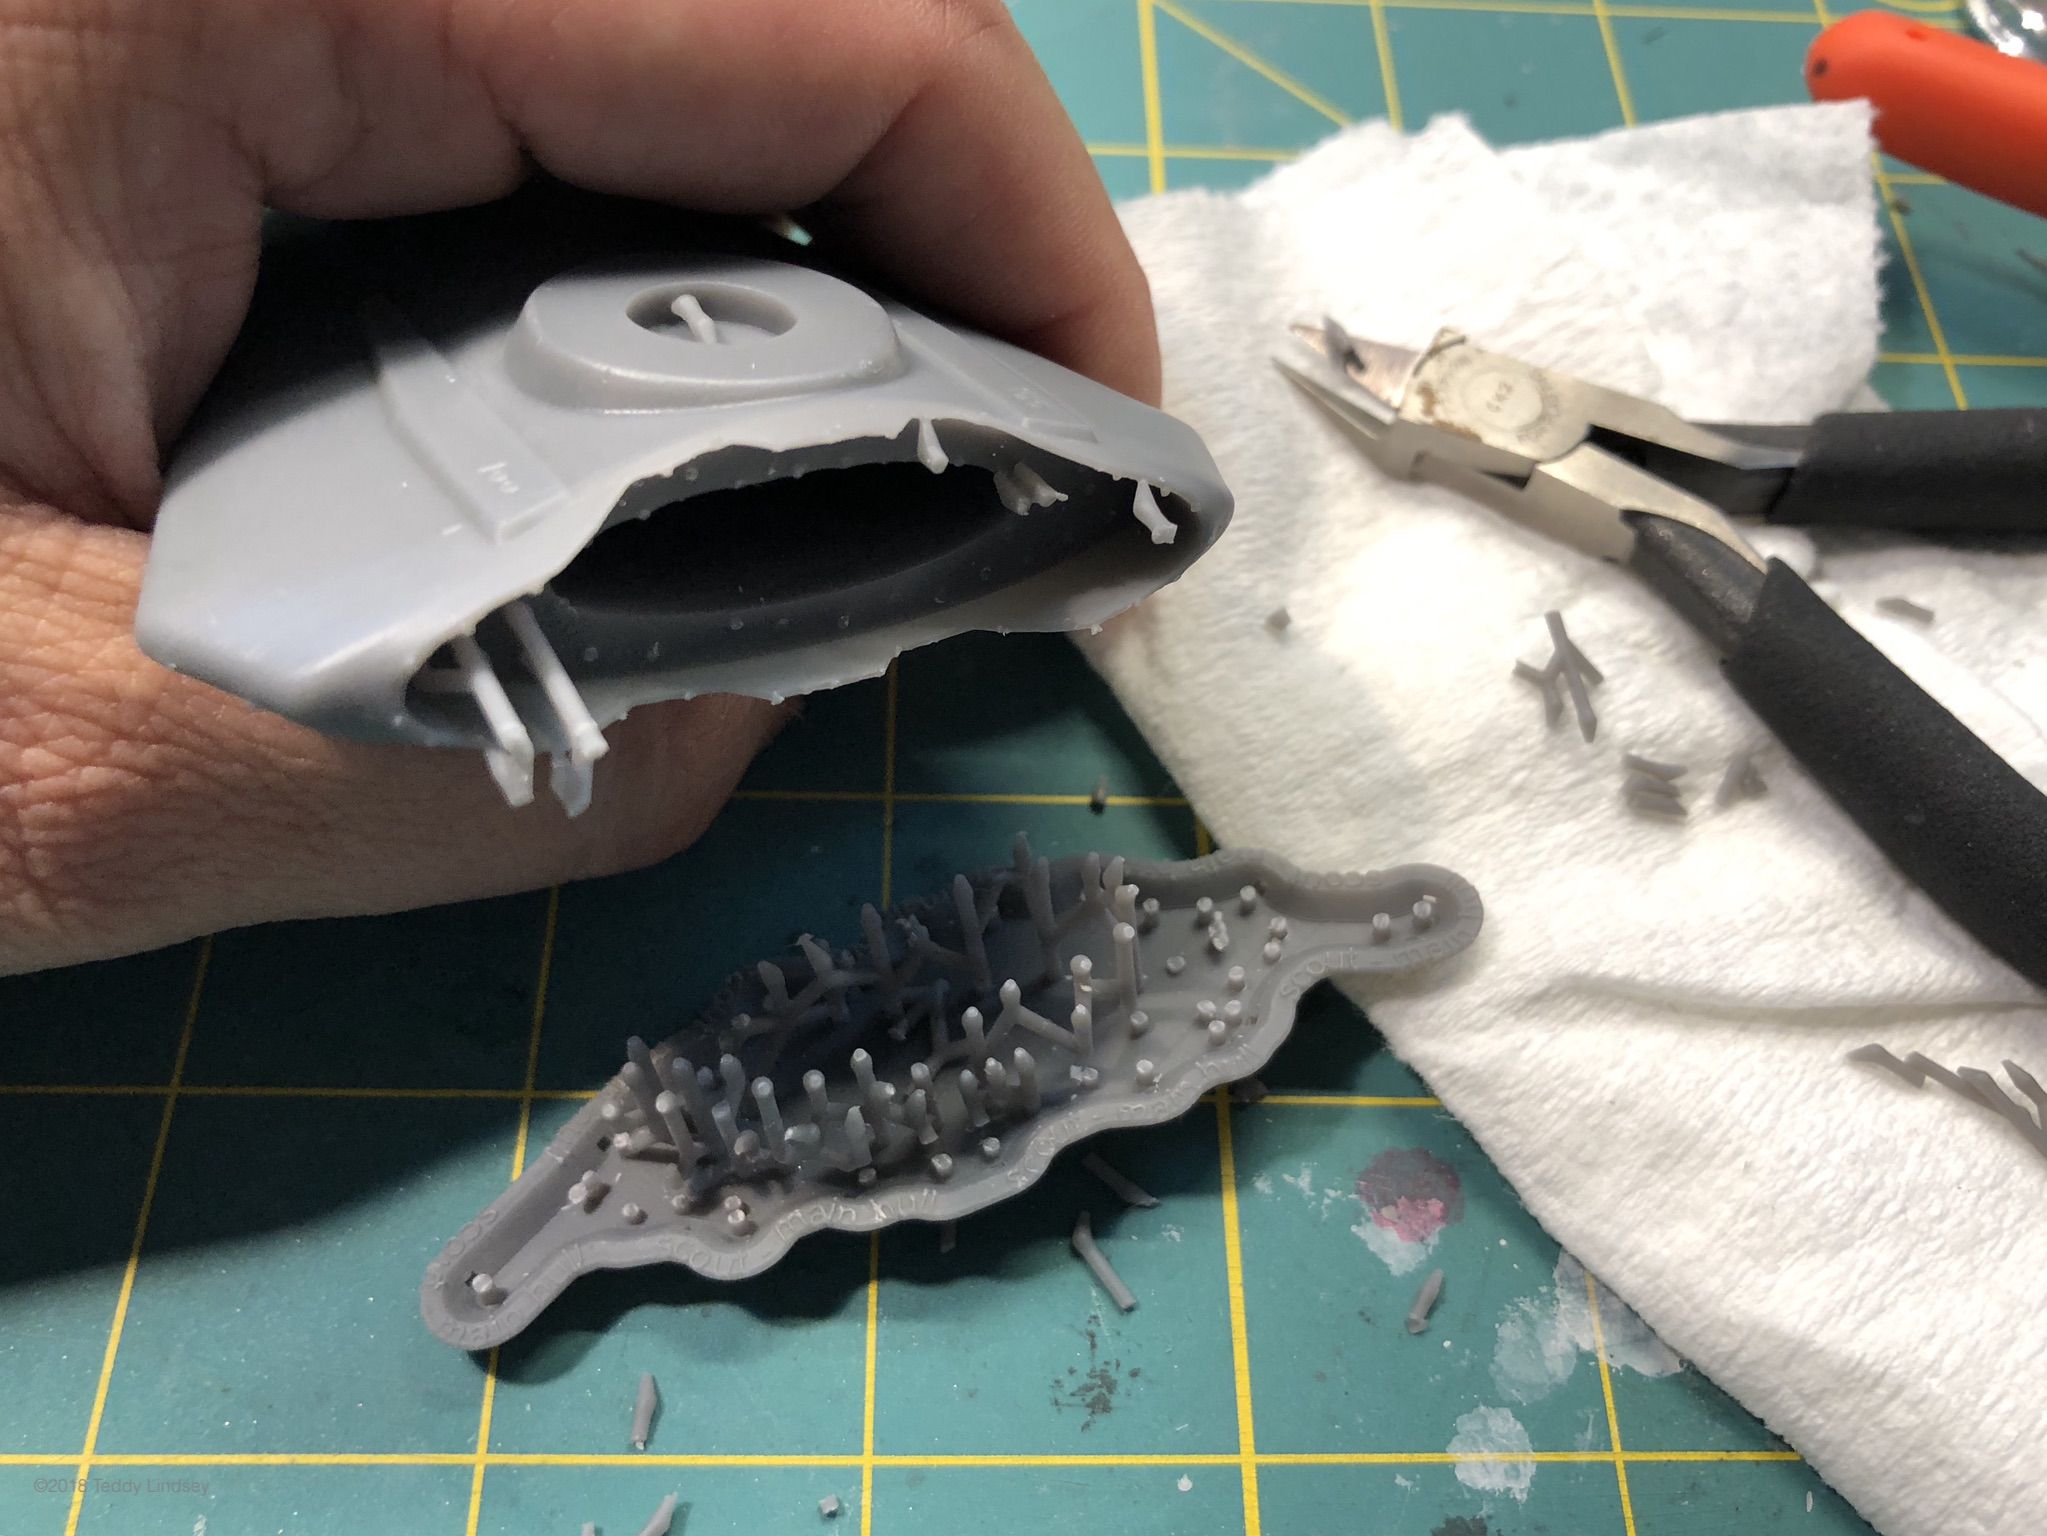
Removing the parts from the supports is not too different than removing a conventional injection molded model part from the sprue, although there can be many more supports than you’d typically find on a model kit. It can actually be pretty tedious and requires a good amount of clean up with a scalpel and sanding sticks.
I understand that more experienced folks will often override the automatic positioning of the support sprues to minimize the amount of clean up that might be required, especially around edges. This does carry the risk that the print will fail due to inadequate support but it’s something I’d like to experiment with more in the future.
I oriented the parts to minimize the number of supports that would be in contact with visible details of the model. It’s also the reason why I separated out the aft panel since I could have the supports that linked to the aft of the ship covered up.
Below you can see me in the midst of removing the supports, many of which left messy little nubs behind that required trimming and sanding.
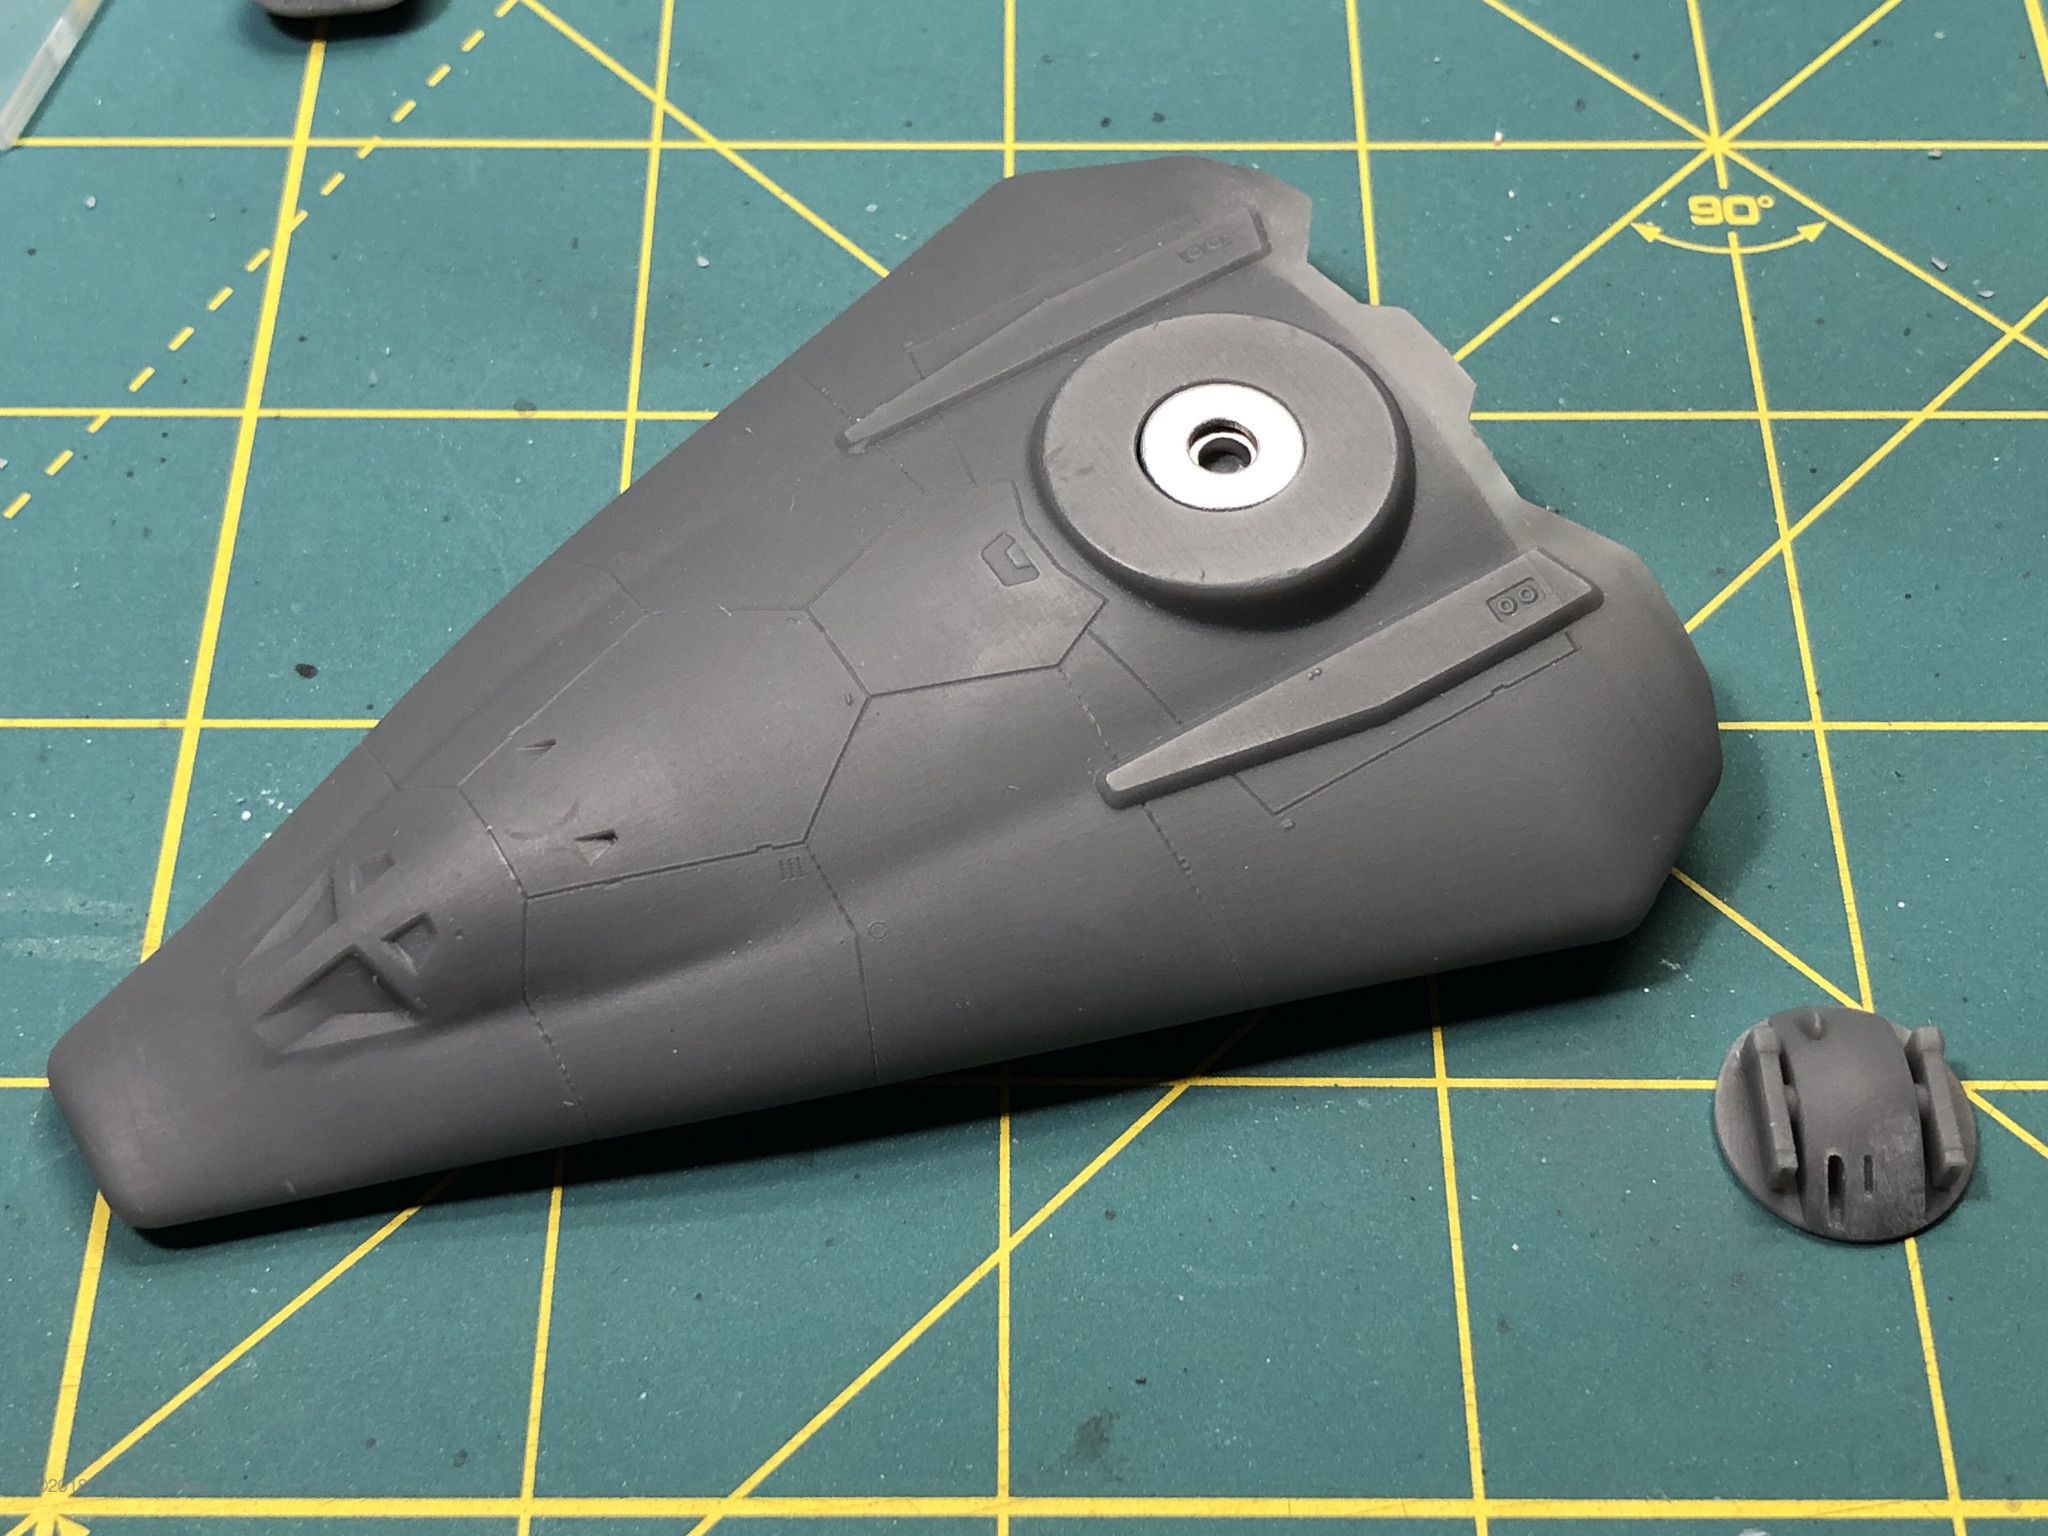
The parallel lines across each print are formed by the laser as it cures each 25 micron layer. While the surface appears to be rough, it’s actually pretty smooth and the lines are more of a visual artifact that will be mostly be covered up by primer. The separating line in the middle of the airlock is only 0.13mm across. I couldn’t even see this detail with my eye, but the camera picked it up.
I modeled a recess in the turret hard point that would accept a 10mm neodymium magnet with a 10mm steel washer that will be attached to the underside of the missile turret, allowing 360° rotation.
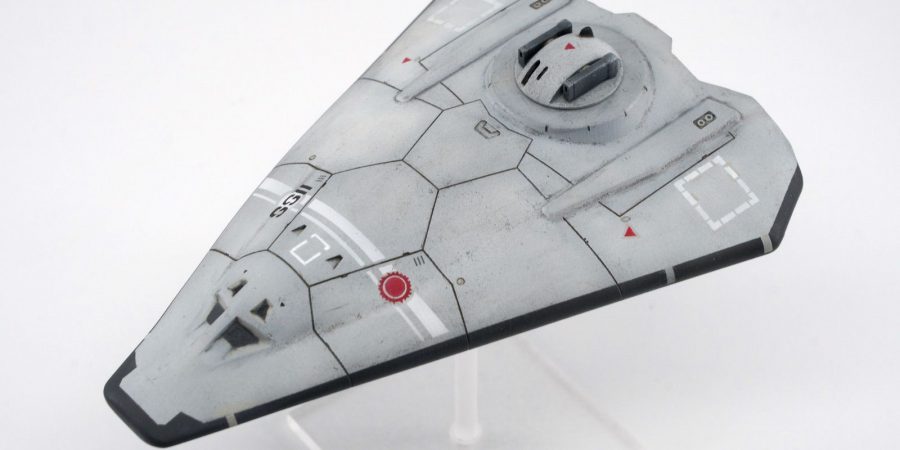
Painting the Model
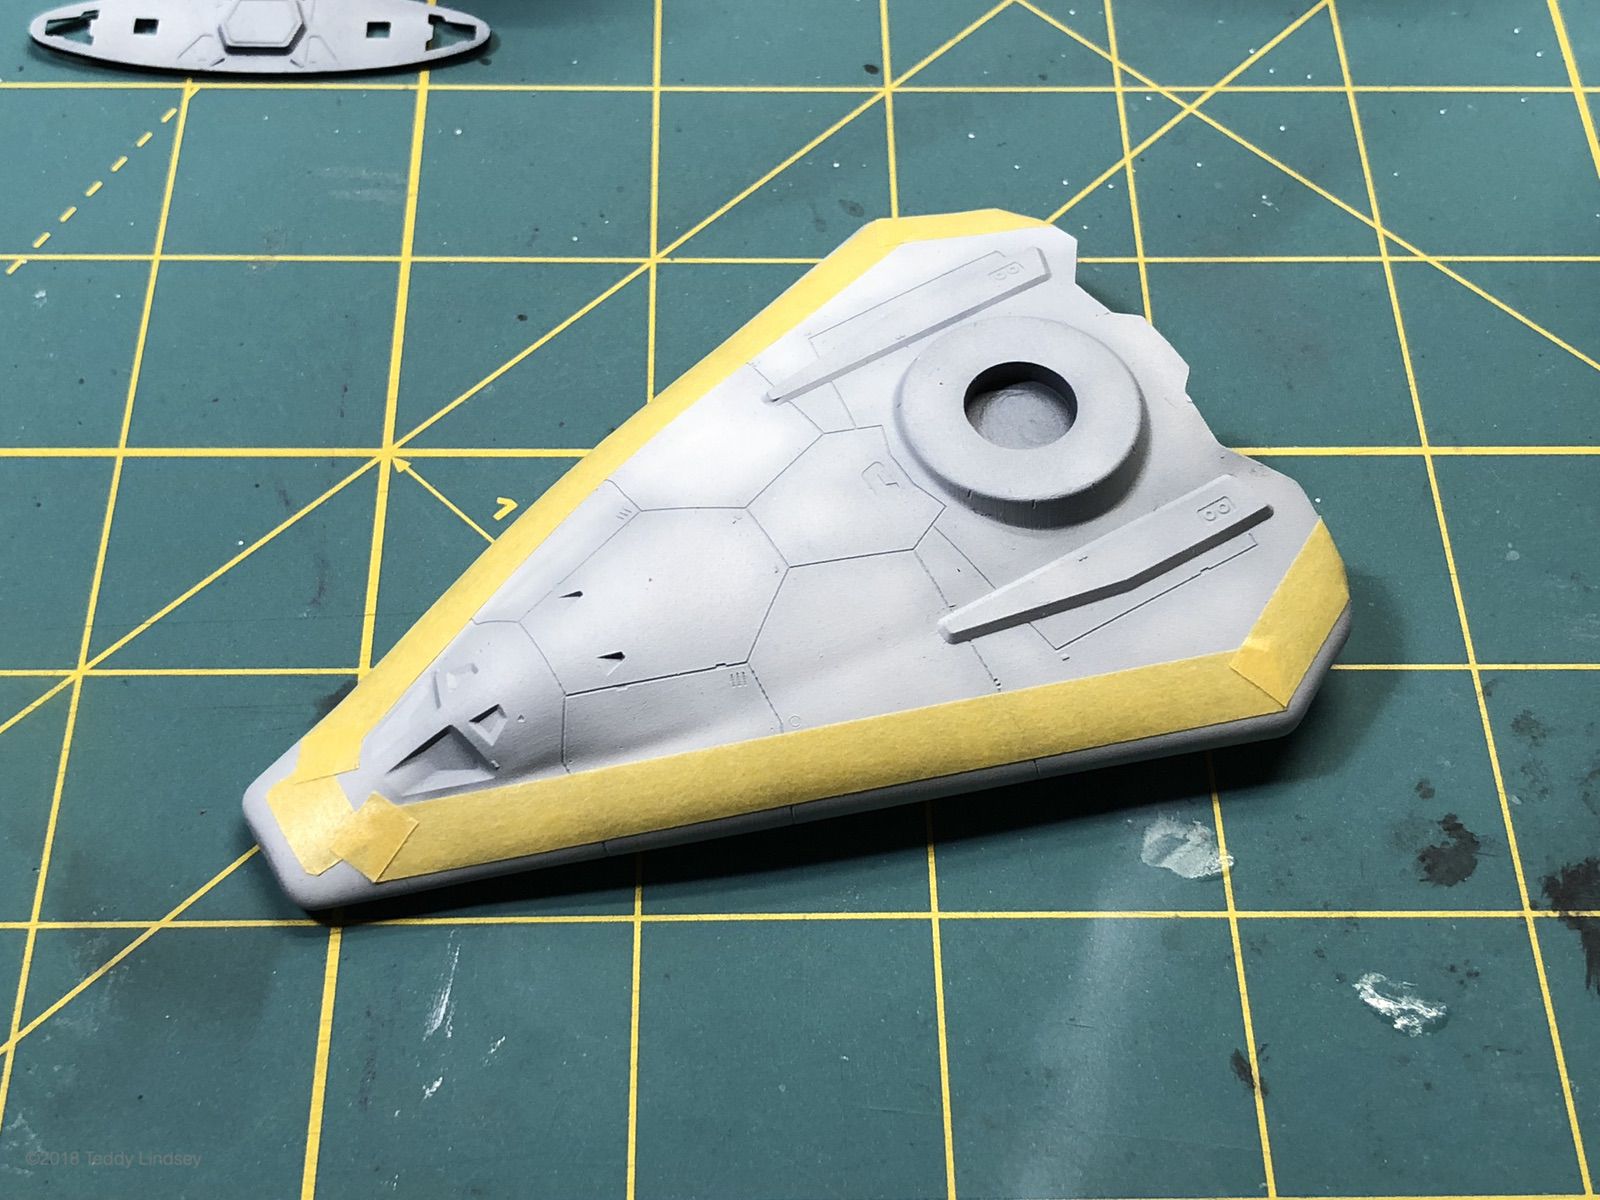
I primed the parts using a rattle can of GW Chaos Black. I generally prefer to airbrush on a base coat of Stynylrez Black Primer, but I noticed on an earlier print that it would not adhere well to the resin. I’m not sure if I possibly didn’t let the resin cure enough or if it’s just a property of the resin. More experimentation is required.
Next, I airbrushed on a coat of Vallejo Model Air 71.121 Light Gull Gray over most of the ship and have left it to dry overnight.
I applied an additional coat of VMA Grey White atop the Light Gull Gray to bring some additional mottling and contrast to the hull panels.
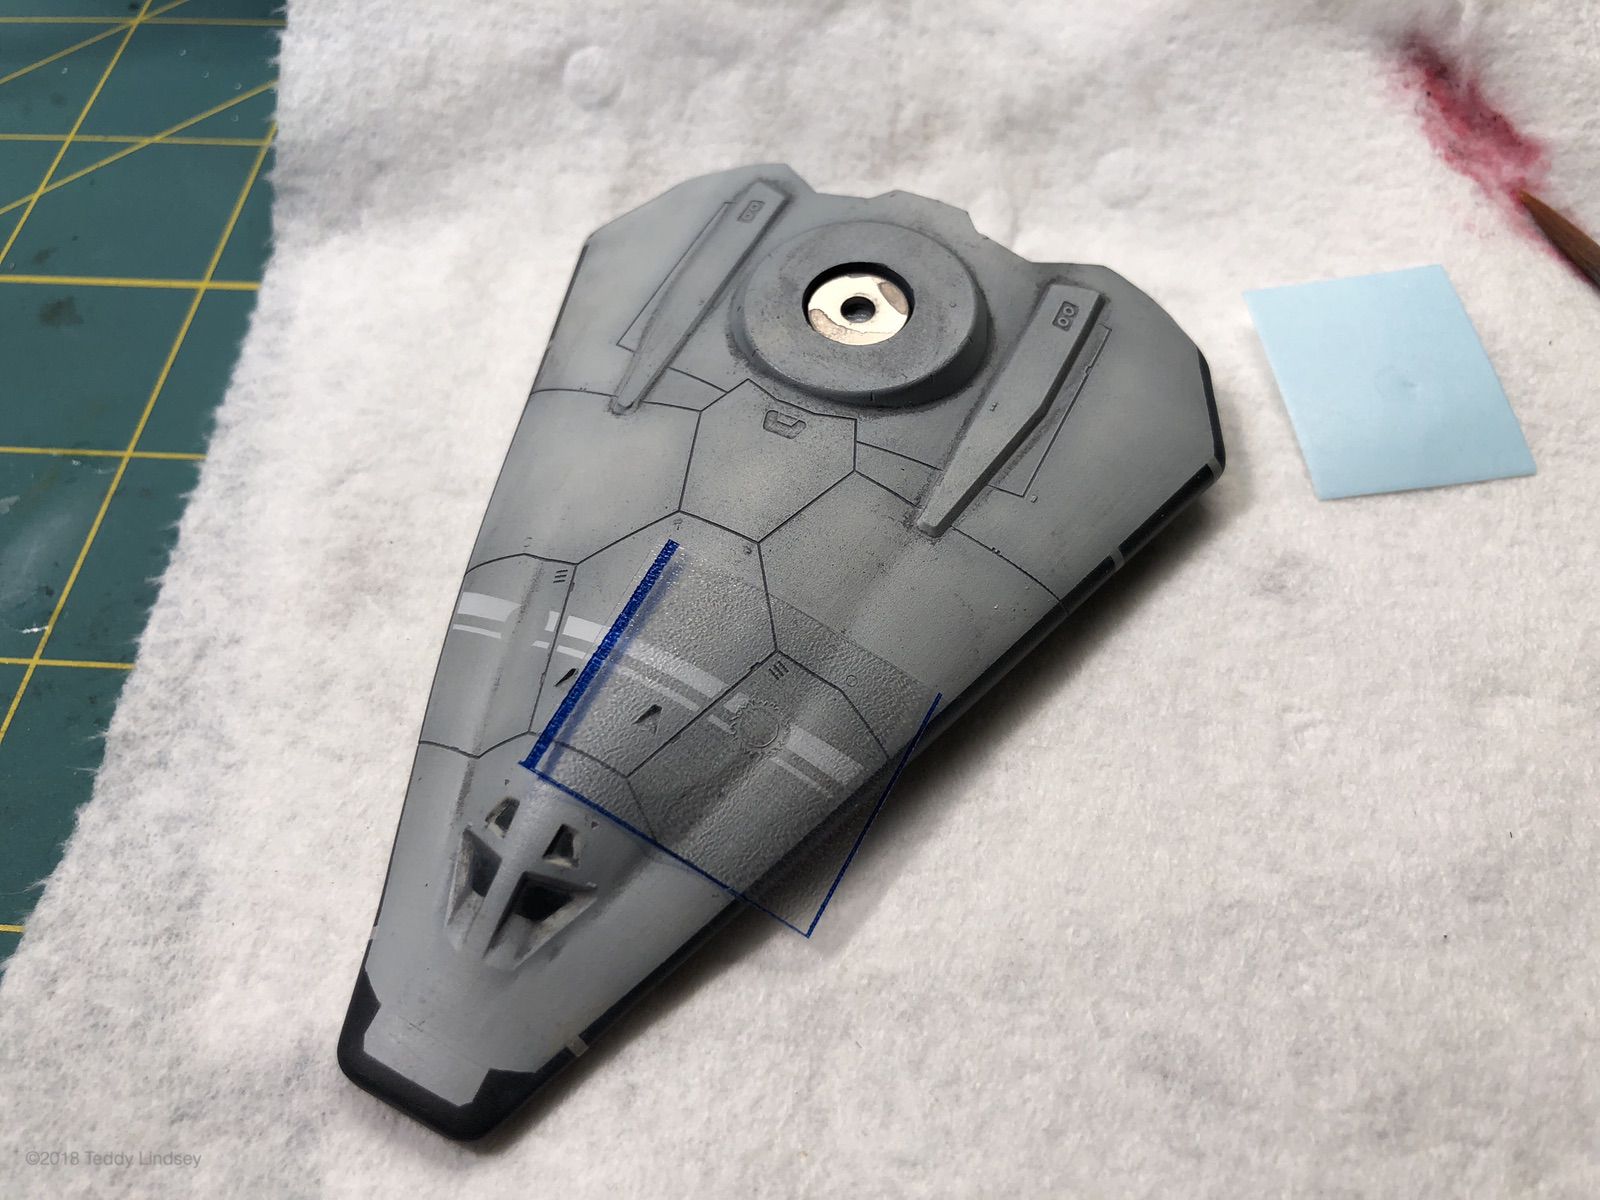
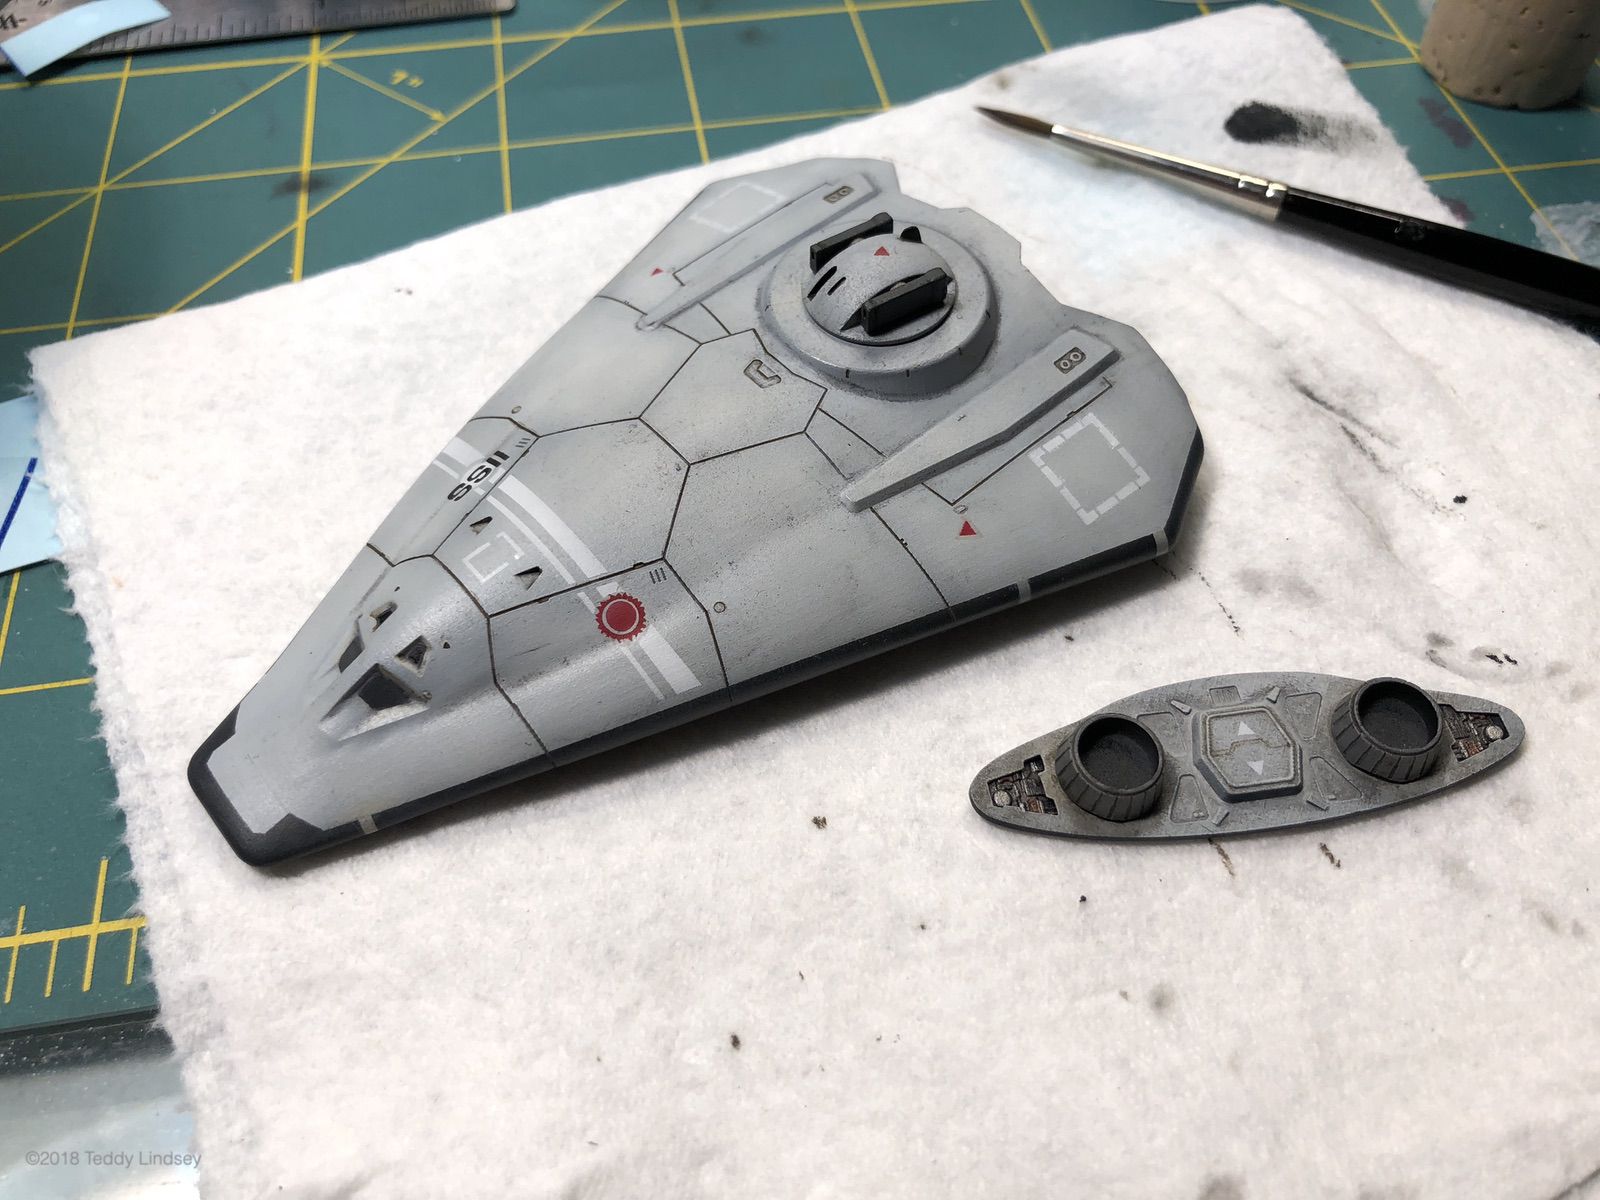
Next, I masked out the lower portion of the hull that looks like heat shielding and applied a coat of Vallejo Model Air Anthracite Gray. After the large blocks of color were in place I sealed it with Tamiya Clear Semi-Gloss and started brushing on some Flory Wash Gray to bring out some of the details.
Then I began focusing on the hull markings. I wanted to get close to my original rendering, so I was able to take the vector shapes I had created in Adobe Illustrator and create masks from low-tack transfer tape that were cut with my Cameo 3 cutter. Below you can see the mask for the Imperial Sunburst symbol which has a fringe of “sun flares” surrounding a red disc.
Below, you can see most of the markings in place. I’m very happy with how the Imperial Sunburst turned out. I’ve been impressed with how small the Cameo 3 is capable of cutting with accuracy. However, I did have some problems with the transfer tape allowing the paint to bleed underneath and I’ll have to clean these up. I’m going to try cutting a sheet of Tamiya masking tape next time.
I need to touch up the IISS (Imperial Interstellar Scout Service) lettering on the starboard side. The fine detail of the curves in the “S” didn’t come out uniformly in the mask I cut. So I’m learning the limits of what the Cameo 3 cutter is capable of.
I rubbed away most of the gray Flory Wash and added some Flory Wash Dark Dirt into the panel lines and around key details. I decided to not go crazy with weathering like I usually do for my Star Wars models since the original renderings were pretty clean. So I added some edge highlights and cleaned up some of the markings that had bled under the masks with a brush.
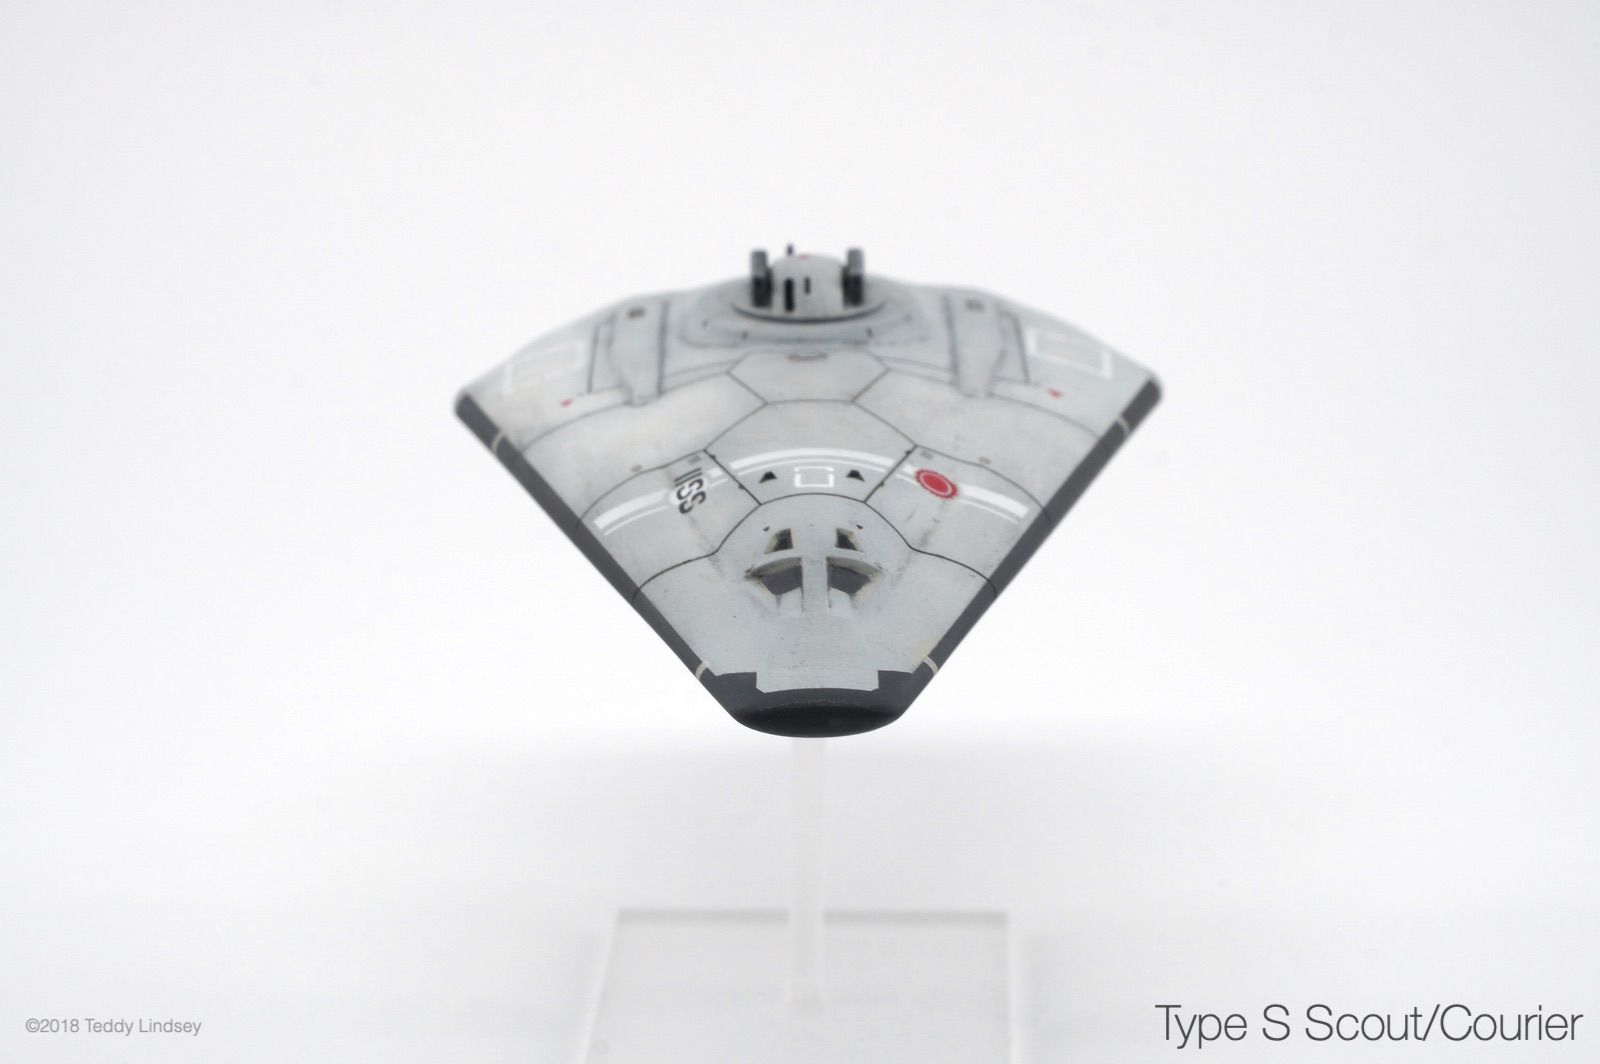
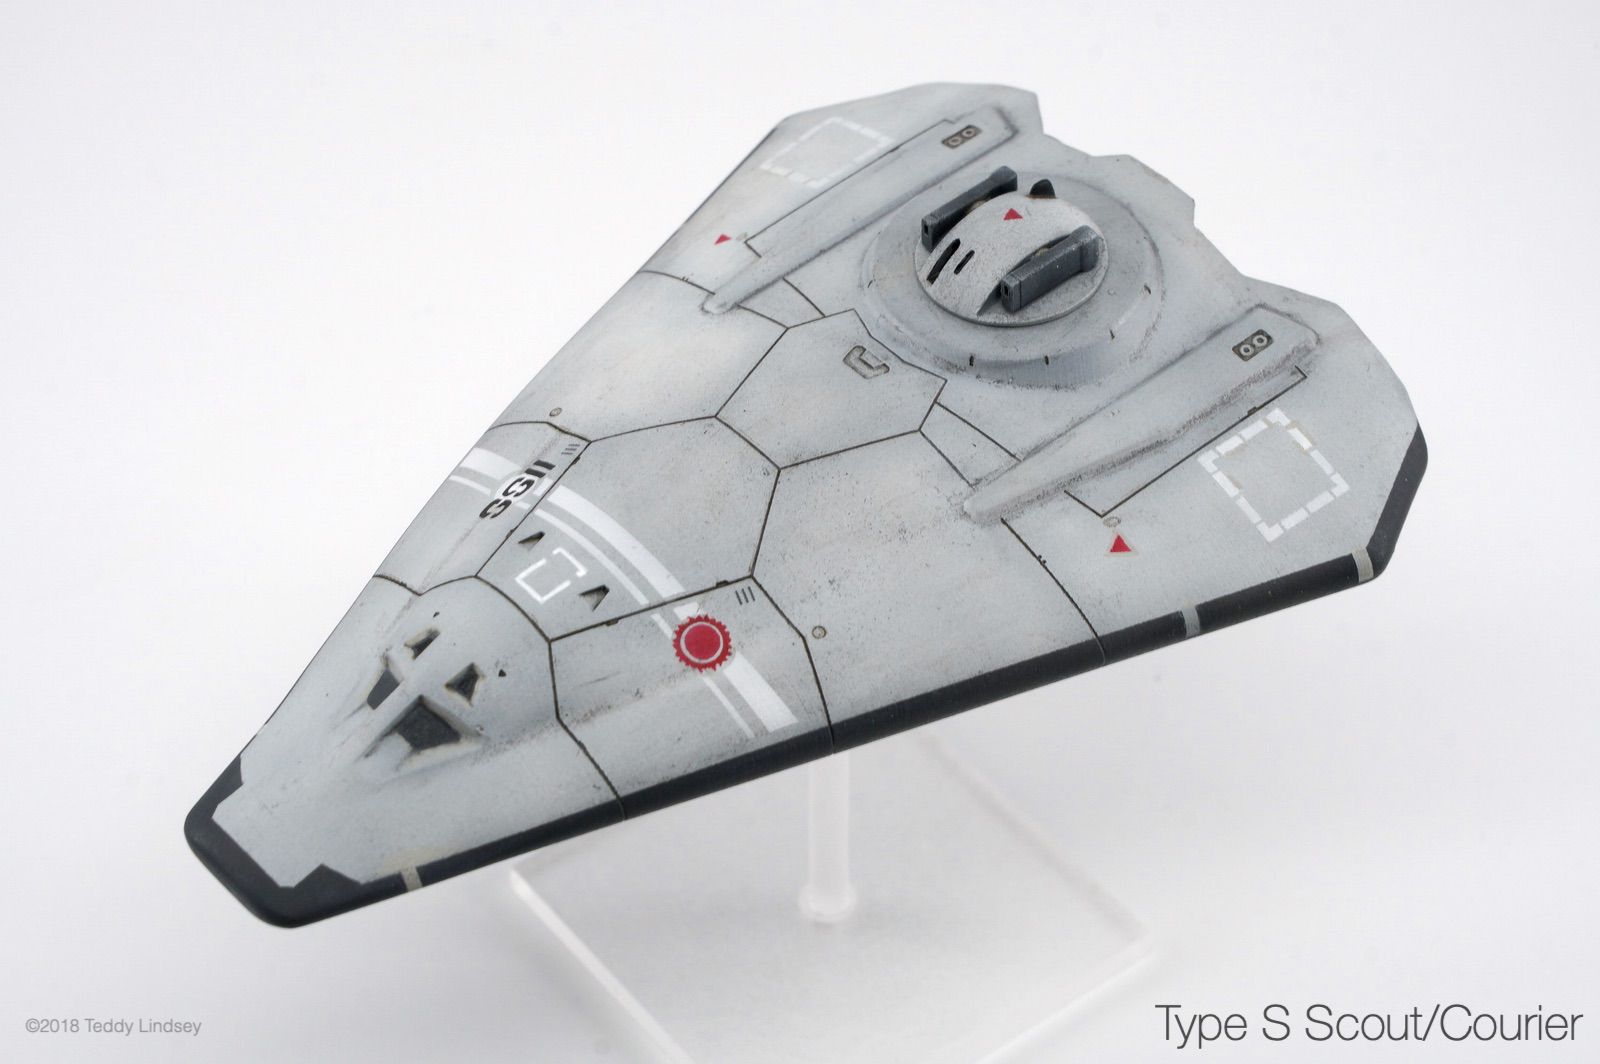
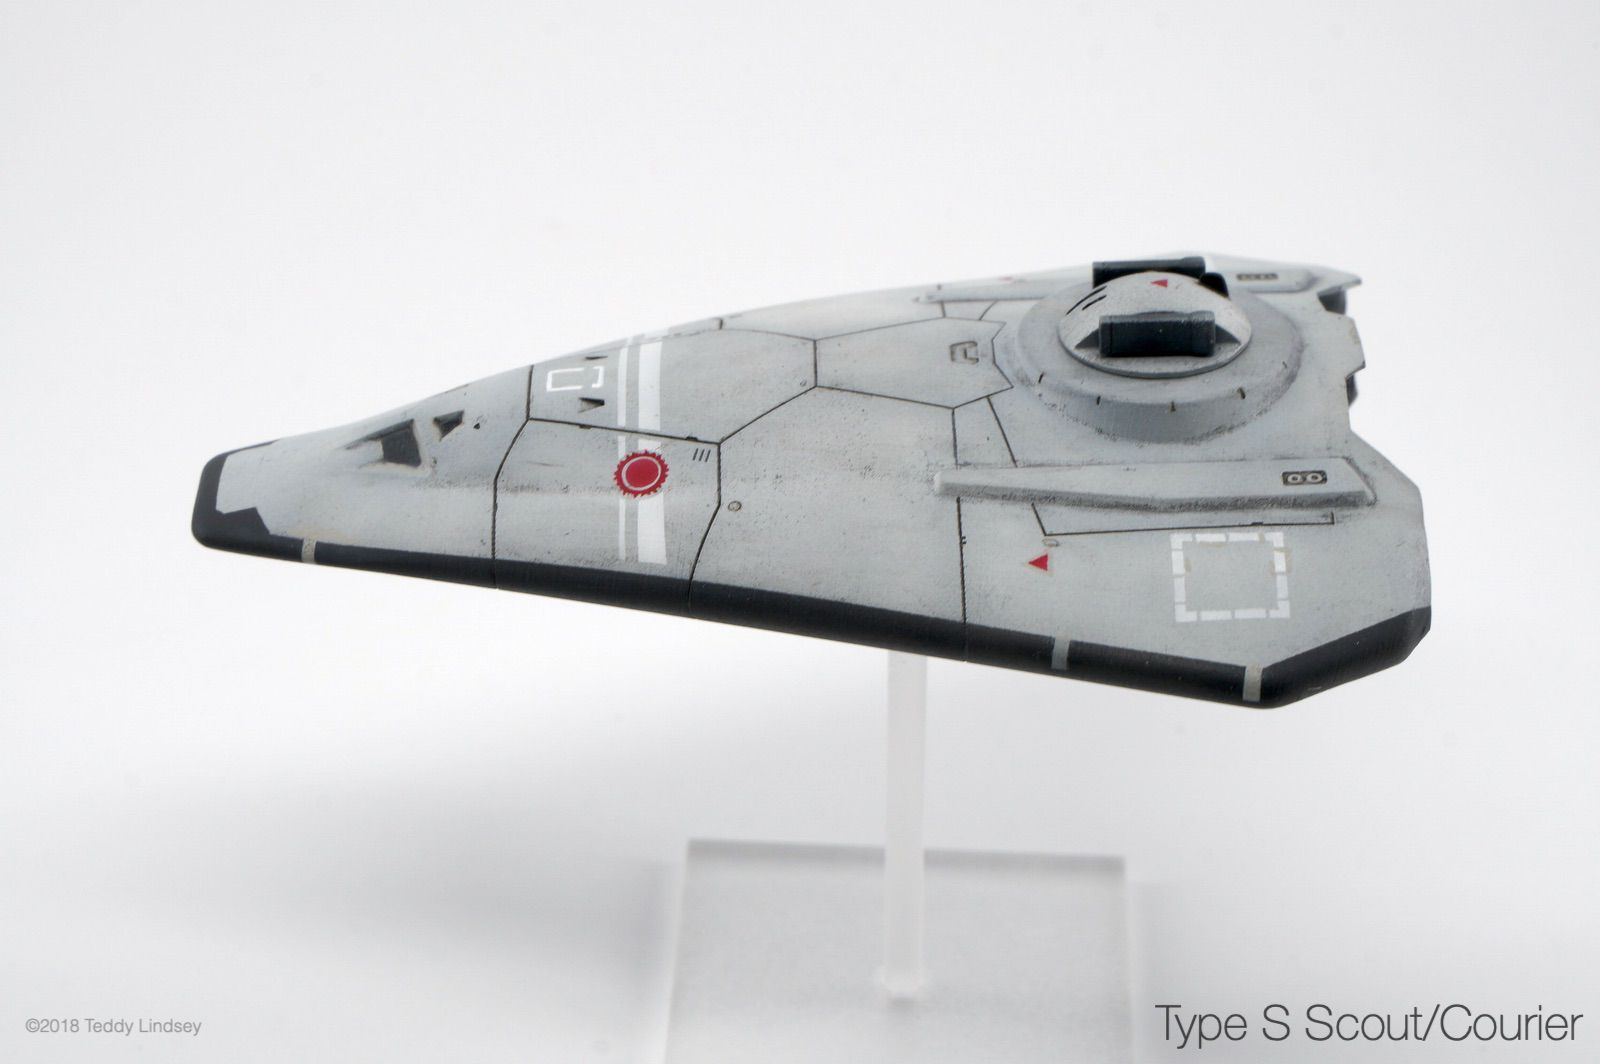
Completed Model
This has been a great experiment for me and I’ve learned quite a bit in the process of bringing this model from digital to physical form. I’ll be following up with another post that covers some of the lessons I learned along the way.
Below are some turn around shots of the completed model.

Thank you for this. I recently printed a model of the sea view submarine and about to do some clean up, sanding and painting. It is my first printed model. I very much appreciate any advices on type of sand papers and paints that you use. Stores to buy them. Thanks in advance.
I don’t have much experience myself since this is my first 3D print that’s not a trivial experiment, but I’ll try to share what little knowledge I have. Once I have more experience, I’ll make a post detailing my lessons learned, but in the mean time, here’s a list of some of the materials I used:
– Tamiya Sharp Pointed Side Cutters to remove the supports from the model.
– Squadron Sanding & Polishing Sticks for cleaning up the model.
– Games Workshop Chaos Black rattle can for priming.
– Minitaire Airbrush paints.
– Vallejo Model Air paints.
– UMP Apex Airbrush.
– Cameo 3 Cutting Machine for creating spray masks for details (stripes and hull markings).
Good luck with your Seaview! Voyage to the Bottom of the Sea was one of my favorites shows as a kid!
Thanks for tips. Your workshop is impressive
Regards
Hung
Great work. Any interest in selling a copy, for those of us without printers?
I’ve had several inquiries about selling prints of this model and I’ve done a little research on what print-on-demand services charge for a similarly sized model. Typically, a model of this size, 100mm in length, costs between $35-45 although I’d have to charge more since I’m not producing them in bulk to take advantage of economies of scale.
I’m also in the process of rebuilding this model to take advantage of what I’ve learned. The revision will have improved detail, and new options such as a beam turret and landing gear.
If you’re interested, please contact me directly via the Contact page.
I would love to know how you did the panel line work in MOI. It’s something I’m struggling with on a similar project. In fact, if you made a video tutorial of the whole project I’d buy it – This is EXACTLY what I am trying to accomplish myself.
It definitely took me a lot of time and experimentation to arrive at a somewhat straightforward process. I’ll have to make a tutorial at some point that I can post here and on the MOI3D forums when I have some time. The technique involves a lot of splitting of surfaces and use of the Shell command.
Excellent article. I have an FDM CR-10 which I have printed 1:1000 scale Type S scouts on. The detail isnt amazing but they are not bad. I have been looking into a small entry level sparkmaker printer for detail work. I look forward to any other articles you put out on this subject since I think that SLA will be a whole new learning curve.
Excellent work. Are you selling the 3d model for this?
Hi Nicholas, didn’t know you were a Traveller fan. 🙂
That’s top-notch work!
I remember seeing your original art when you collaborated with the legendary Bryan Gibson (I still miss him) about a decade ago. I had hoped that some day you’d make it into a 3D printed model.
Your attention to detail is precise, and your paint job is professional grade. And I’m sure the process of making a 3D model that was suitable for printing was … educational.
I am sure you are aware that when William Keith made the basic scout shape he was inspired by the plastic model of the Convair space station. But as you state the rear is obviously inspired by the Star Wars imperial star destroyer
http://www.projectrho.com/public_html/rocket/spacestations.php#travelscout
Hi Winchell! I’ve been a big fan of your work since I purchased my first pocket box copies of G.E.V. and OGRE back in the early 80s. Your Pan-European light tank has always been a favorite design for me!
Thanks for the praise on the Type S Scout! I’ve had to put my modeling work on hold since the summer due to work constraints and travel, but I hope to pick things up again in the new year. I’ve been working on another Type S Scout design variant which is closer to some of Bryan’s later illustrations. It features more detailed surface paneling as well as a range of options: various turrets, landing gear, sensors, etc. I wish Bryan could have seen a physical model of his art take shape. He was a good dude and I miss him as well.
And thanks for the bit of history on the influence of the Convair space station on William Keith’s Scout design! I never knew that and had always assumed it had solely been influenced by the Imperial Star Destroyer shape. I’ll need to amend my description to include this fact and link to your site if that’s all right.
I’d love to see that baby in 6mm/1:268 scale.
http://theminiaturespage.com/ref/scales.html
Cheers,